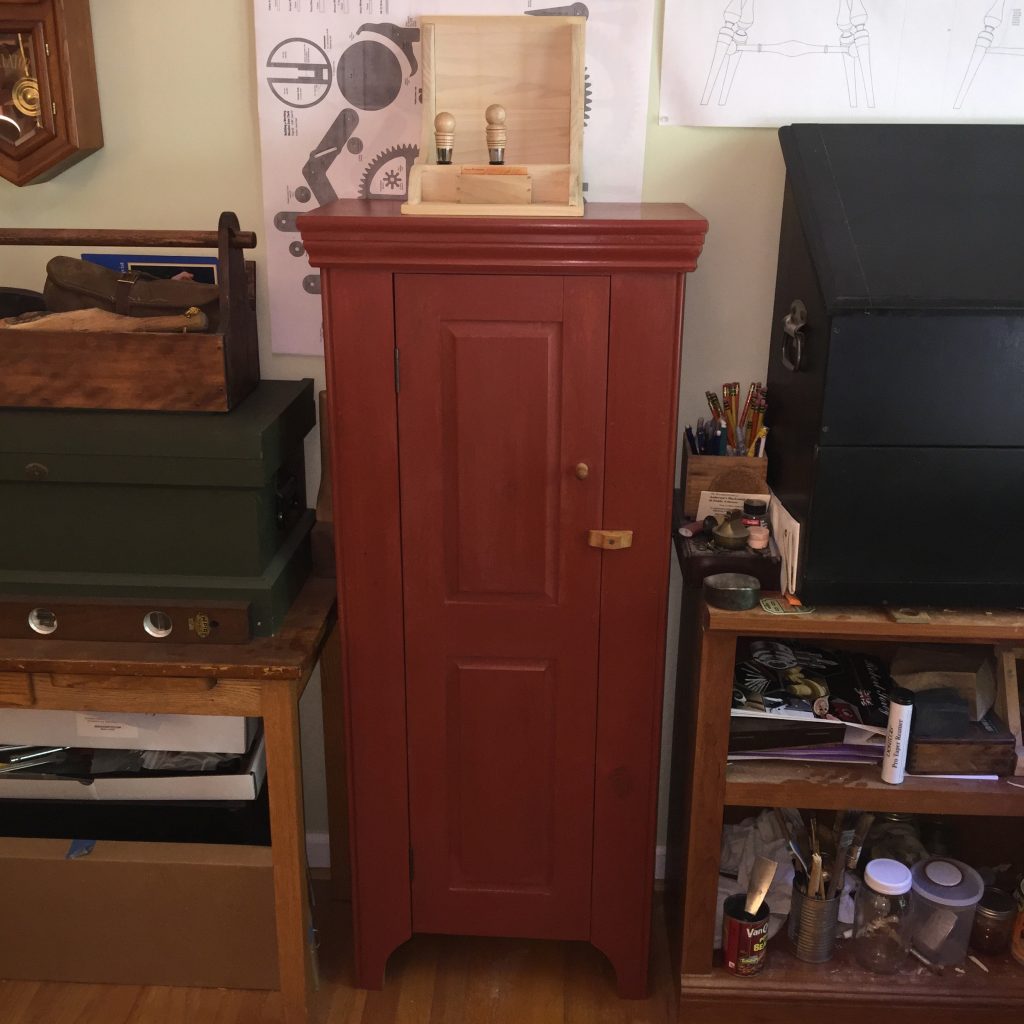
As promised, here is the finished cabinet. This was a fun and quick project to do and it was so needed in my shop. It was quick because milk paint dries crazy fast and the top coat is only paste wax.
“Happy Shavings”
-Aaron

 A few weeks ago, I posted some pictures of my spring pole lathe and the great progress I was making. Well, as always, life happens, and manages to alter the best laid plans of men. The lathe was to a point where it was looking really good. After chopping out the mortises, I noticed a bit of stiffness in my arm. I stopped working for the day and rested for the night. My arm was very swollen and I could not fully flex it. Where does the “Spring Pole Bookshelf” come in you may ask? Please bear with me and I will explain.
I rested my arm for a week, and took anti-inflammatories, and it was feeling better, although still a little swollen. Then, I made the mistake of using it again to install a storm door that was a Mother’s Day gift for my very patient wife. It re-injured my elbow so badly that I had to do the unthinkable; I had to cancel my Moravian Workbench class at Roy’s Woodwright’s School. I cannot tell you how disappointed I was when I realized I would not be able to physically stand up to a solid week of punishing mortise chopping, but I contacted Roy and let him know I was not going to be able to make the class.
Fast forward a couple of weeks to this past weekend, and after going to the Doctor and getting some stronger medication and a new arm brace, my injury was doing better. I decided to take it slow and do some limited work. I did some plane refurbishing, which amounted to some sanding of the sole of the plane and blade sharpening. I took frequent rests and iced my elbow after each session. I was not feeling any pain afterwards, and I could tell it was healing.
After doing some deep thinking about my predicament, I surmised that the root cause of the problem was the height of my workbench. I have not discussed my workbench a lot as it is a commercial bench I bought from Grizzly before I knew any better. It’s funny, for what I paid for this bench, I could have purchased the material for a really nice bench. I have made do with this light-weight, thin-topped, crappy-vised bench-shaped object for almost 3 years now, and I have never adjusted the height. That all changed. I reduced the height of my bench by 4 inches. I must tell you, this really made a huge difference. Planing is easier and so is sawing.
Now we get to the “Spring Pole Bookshelf” part: As I was piddling around the shop this weekend, I was cleaning, and I placed s few books on my lathe. They fit nicely on the bed and it got me thinkin’….If I cut a board the same shape as the tail stock, I could use it for a sliding bookend. This was just the small project I felt I could tackle with my limited elbow capacity.
I sawed out the block of wood and drilled a hole for a 1/2″ dowel rod and inserted the rod after placing the bookend on the lathe bed. I put my woodworking books on the lathe bed and adjusted the new bookend. I cut a wedge to set the bookend in place and it worked great; who needs a lathe when you have such a nice bookshelf! I took a few pics and then went to rest my arm and elbow on some ice.
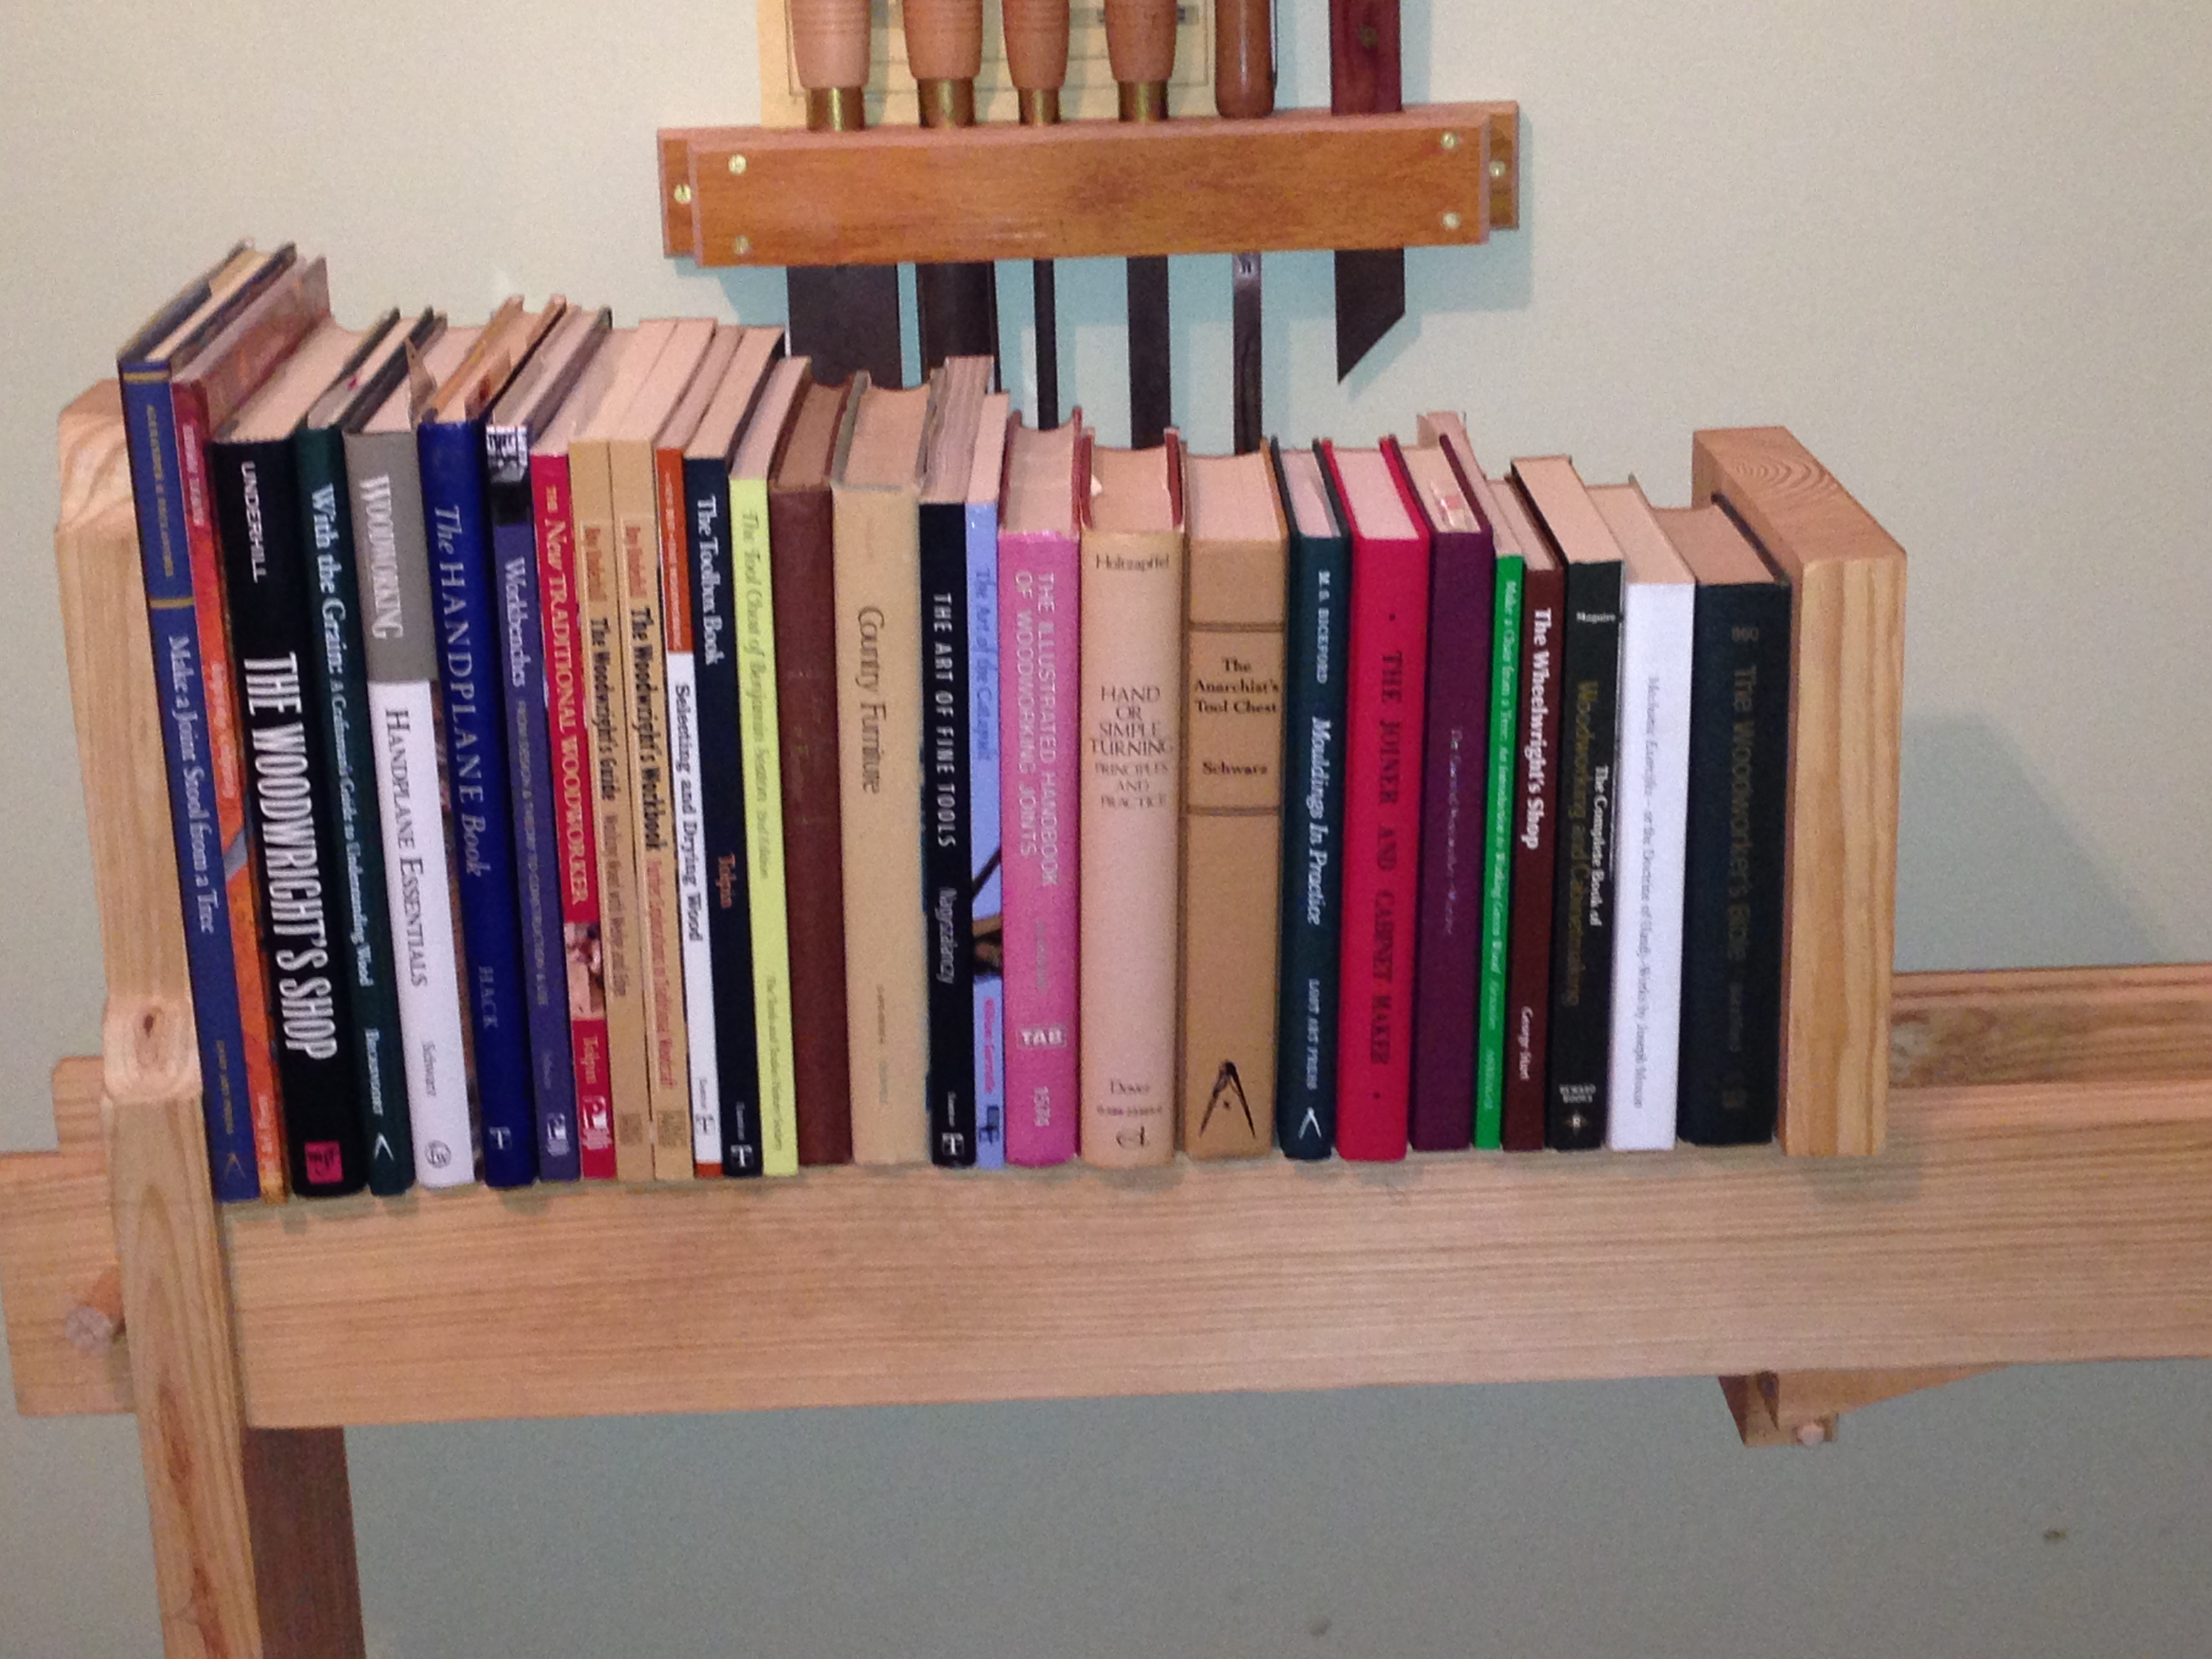
I like this design concept and I will probably make a bookshelf similar to this after I complete the spring pole lathe. Yes, I plan to finish the lathe. This bookshelf was only a side-diversion to entertain me until I am physically able to continue the lathe project.
I will publish a list of my books in a later post. This is a combination of deliberate purchases, books I’ve had for years and lucky finds in the annual library book sale. All of the LAP or Lost Art Press books I own are definitely deliberate purchases.
One side note, I was planning on doing a “The Onion“-esque post with a title like “Traditional Woodworker Injures Self in Freak Strain-Related Accident” but decided I’m not the professional humorist like those that populate “The Onion.”
-Aaron

Here is my new workshop. It is glorious! I now have tons of room, great light, and a comfortable environment to work in. The white oak floor is so much better on my back than the concrete in my garage. As this is in my house, my family visits more frequently and gets more involved. I would like to thank my wife for suggesting this; she knows this was the right choice every time she sees the joy on my face while I am working here.
As with any workshop, this is a work in progress, and there are some additional things to do. I was getting antsy and needed to do some woodworking, so I moved most all my tools in and started doing work. At some point I will be adding molding around the floor. I am still undecided whether to sand the floor. It is not entirely flush across the different rows, but it is already finished and this would save me the expense. It is quite slippery and this could present some issues going forward. I will have to use it for a while to decide what course I will take. Now to get a vintage working pedestal fan…
-Aaron

This weekend was very busy. I am about a week behind my original schedule, as I just finished installing the subfloor (actually I still have a few cement screws to put in). I would like to thank my brother, Berry, for helping me with this difficult job. We had a very lively discussion on the best orientation of the subfloor panels, but somehow we managed to get them installed.
My wife, Beth, and I painted the workshop last weekend, and I really like the color we chose, “Endive,” a Martha Stewart color from Home Depot in Behr single coat paint, which really lives up to its description; it only took one gallon to paint my whole workshop. The paint has light green and yellow tints, and changes color throughout the day. This will go well with the white oak flooring and my darker green tool chest, and keep the space a warm, welcoming and wonderful environment to hone my craft.
I also finished installing my new light fixture, but I will show this when I complete the space since there’s a good story to go with it…
I moved the flooring into the workshop to acclimate to the conditions in the house. I needed to get this done by Sunday because I had a medical procedure scheduled on Monday, so the wood will acclimate while I heal. The wood and I should be good to go at about the same time.
![]()
The above picture shows the transition from my existing floor to the workshop floor level. This will keep the overall 1 1/2″ height increase from occurring right at the threshold. I will be putting a floating panel into this space, which I will make from the flooring, and I will make the transition molding pieces from the excess flooring as well.
I have decided to leave the existing finish on the recycled flooring as it will save time and money. It already has character, not to mention it is also the color we wanted, aged oak. Now we wait for me to heal and the floor to acclimate. We both should be ready in about 2 weeks.
– Aaron Henderson

New "used" flooring
I just bought some recycled white oak flooring for my workshop. It is solid 3/4″ x 2 1/2″ from our local Habitat for Humanity store here in Raleigh. I paid $1.50 / square foot, this is very straight grain premium grade flooring on the cheap. Best of all, no additional trees were cut to give me a comfortable and beautiful floor. I plan on sanding the old finish off, putting a light stain and then applying a single coat of poly to raise the grain to make the floor a bit less slippery. This treatment is like the one Chris Schwarz mentions in his ATC book regarding his shop floor.
You’ll also notice the carriage lantern in the picture. This has great patina and will give my Olde Tool Workshop a more vintage feel. My only concern with this fixture is the amount of light that it will give off because it will limit its usefulness after I loose my natural light. As a remedy, I can always add supplemental lighting later if needed.
So far I am on track for getting this shop finished. I will be laying the sub-floor tomorrow and letting the oak flooring acclimate to the space all next week.
– Aaron Henderson

I finally emptied my old office this weekend. This is the space for my new “traditional” workshop. Now that it is cleared out, I am on schedule for painting the walls and installing the new flooring. If I can find a deal on some nice maple flooring, I will use that, otherwise oak is my second choice.
My next steps are:
I know this is not really a woodworking project per se, but it will allow me to be more productive and by being in the house, more inviting. I know my cat will like it. He loves to roll in wood shavings and then track them all through the house. My wife does not like this, but we tolerate it, as it is a small price to pay to have a happy cat.
My next project after getting my shop situated will be to make a “proper” workbench. This, of course, will be chronicled here for your amusement.
– Aaron Henderson

My wife is awesome! She is the reason I am making this blog entry today. She has given me the inspiration, the time and most of all the encouragement to pursue my passion for woodworking. She has agreed to let me move my workshop from my garage to our office inside the house. This new location has a lot of advantages over my current setup.
First, it has natural light provided by two large east-facing windows, not southern as the optimum, but a great improvement over my florescent light I use in my current garage workshop.
Second, it will be a more comfortable location because my garage is not heated or cooled. The lack of heating is not as big of an advantage as the cooling, the summers here in North Carolina are hot and humid and that is a very challenging environment for hand woodworking.
Third, it is a clean slate and I can design the new space specifically to meet my woodworking needs. My current space is pretty much a random grouping of items I have thrown together to make a workshop. I have learned a bit about how I work and where I like to position my tools and furnishings for optimal efficiency.
The last advantage is that I am planning to install a hardwood floor to help my back while spending joyful hours standing at my workbench.
Come on and join me in this new adventure and watch my new space take shape. Well, I better get started, there’s no time like the present 🙂
Aaron