Should You Upgrade to Stanley Bedrock Planes?

Notice the Cherry Tote and Knob on the 605, It had cracked and damaged ones so I made my own.

Bedrock Planes

If you’ve been using standard Stanley bench planes like the No. 3, 4, 5, 6, or 7 you might be wondering whether upgrading to a Stanley Bedrock (models 603–607 or others) is worth it. The short answer is: it depends on what you value in your tools. For many experienced woodworkers, the Bedrock series offers a noticeable upgrade in precision, performance, and long-term satisfaction. For others, it may feel like an unnecessary added expense.

Craftspeople from all over the world use the standard Stanley versions everyday and do great work with them. They are happy with these planes and do not see the need for Bedrock planes. If that is you, great, I just saved you some reading. But if you want something special and a little better or are just interested in learning about them, then read on.

In this article, we’ll look at several factors to help you decide whether upgrading is right for you or, if you’re new to woodworking, whether investing in Bedrock planes from the start makes sense.

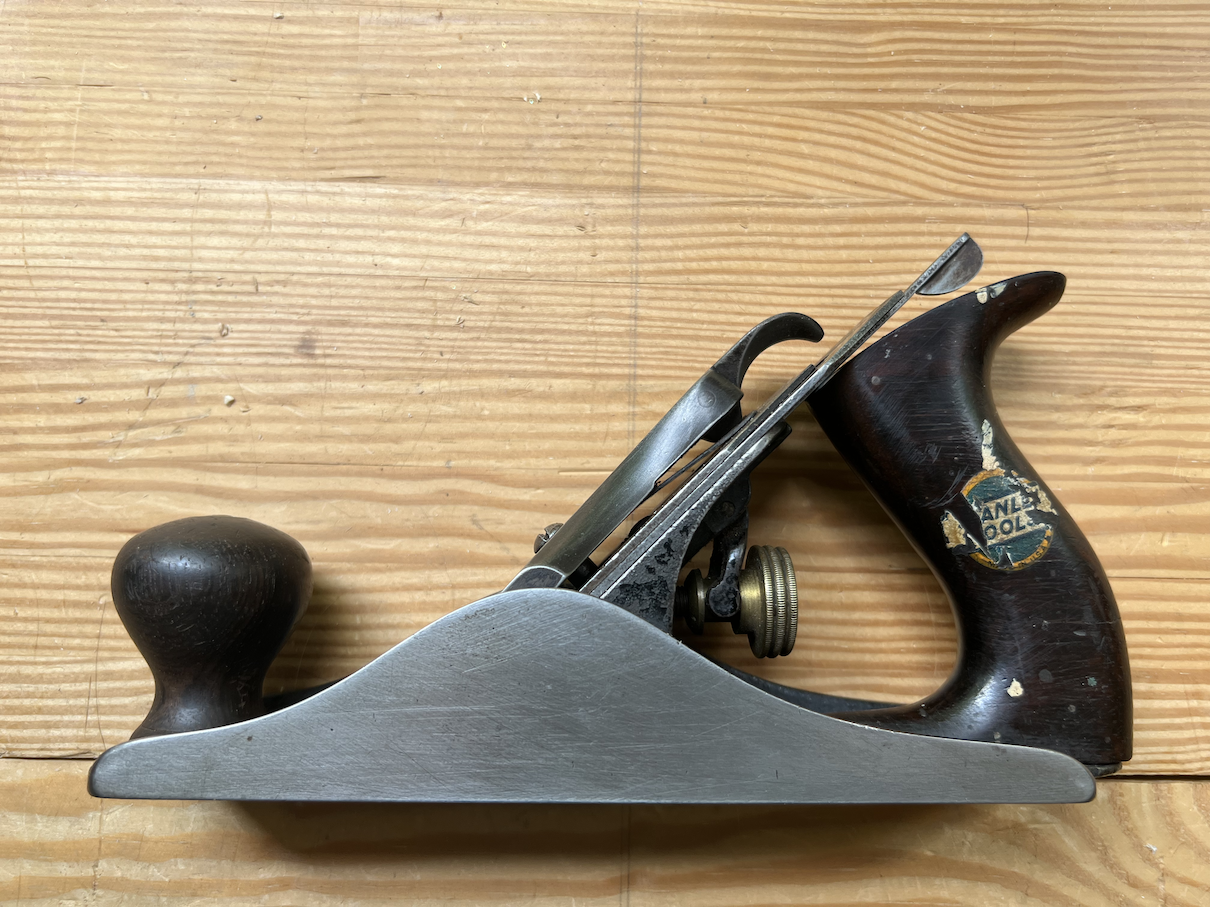
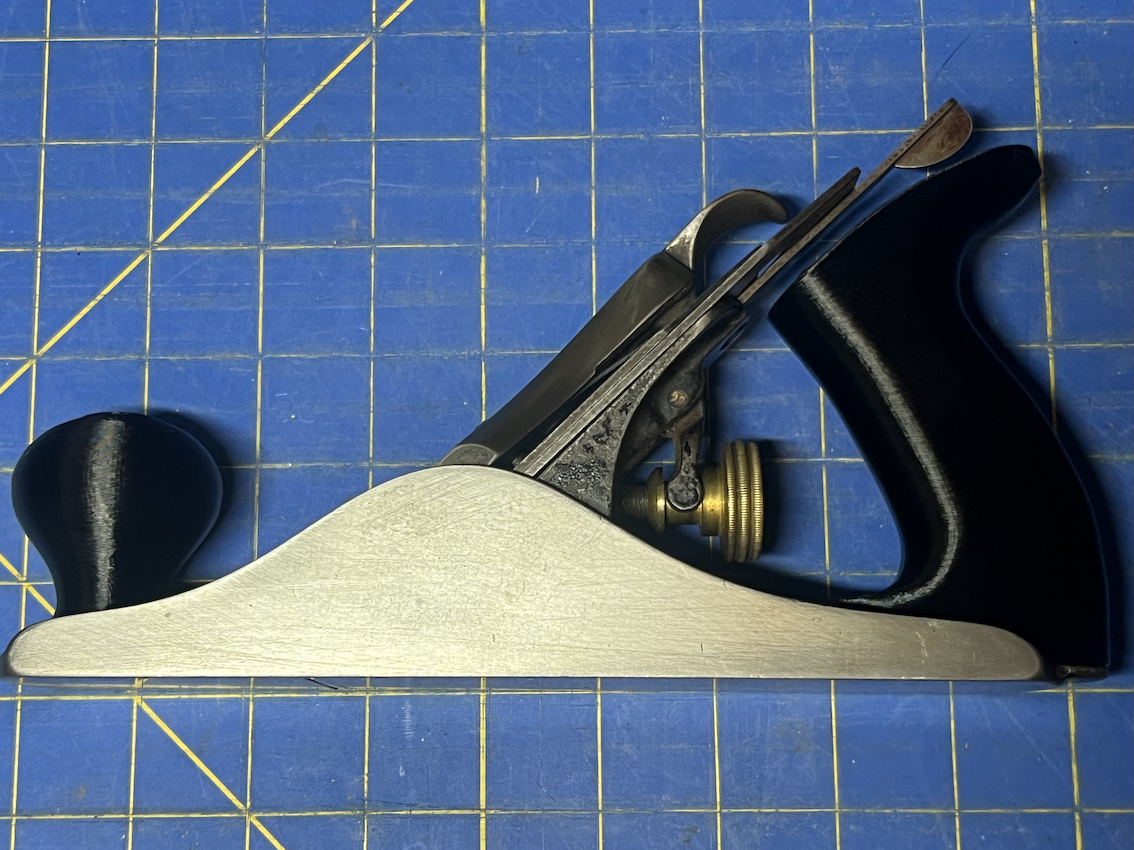
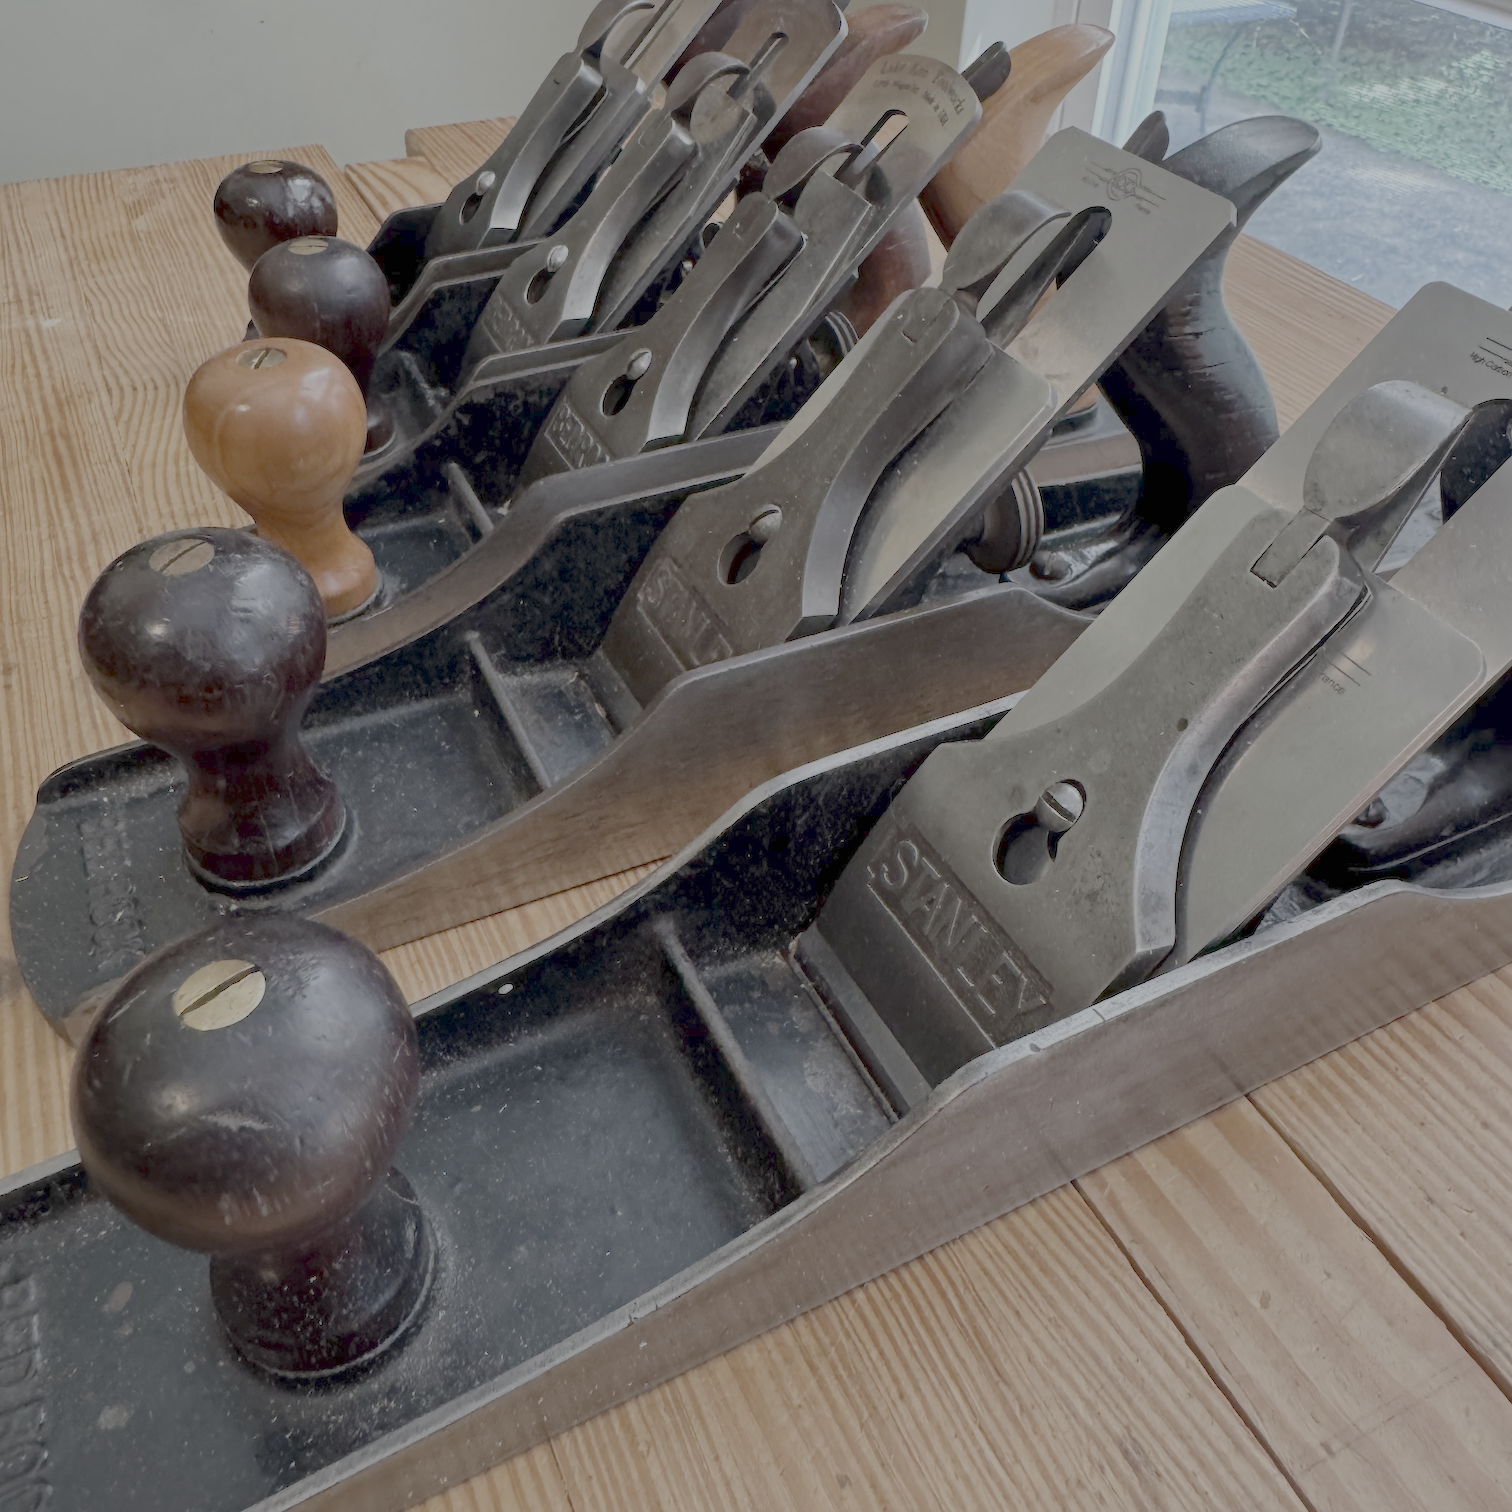
I chose to upgrade based on a few key factors. Most of these reasons are discussed below, but primarily, I appreciate the improved adjustability, added weight, build quality, and aesthetic appeal of the Bedrock planes. Tom Lie-Nielsen selected this design as the foundation for his premium line of planes (subsequently copied by many other makers) for a reason. I avoid the earlier types of Bedrock planes, but any of the flattop types should be fine. My preference is from 1920’s types to end of production in the 1930’s.

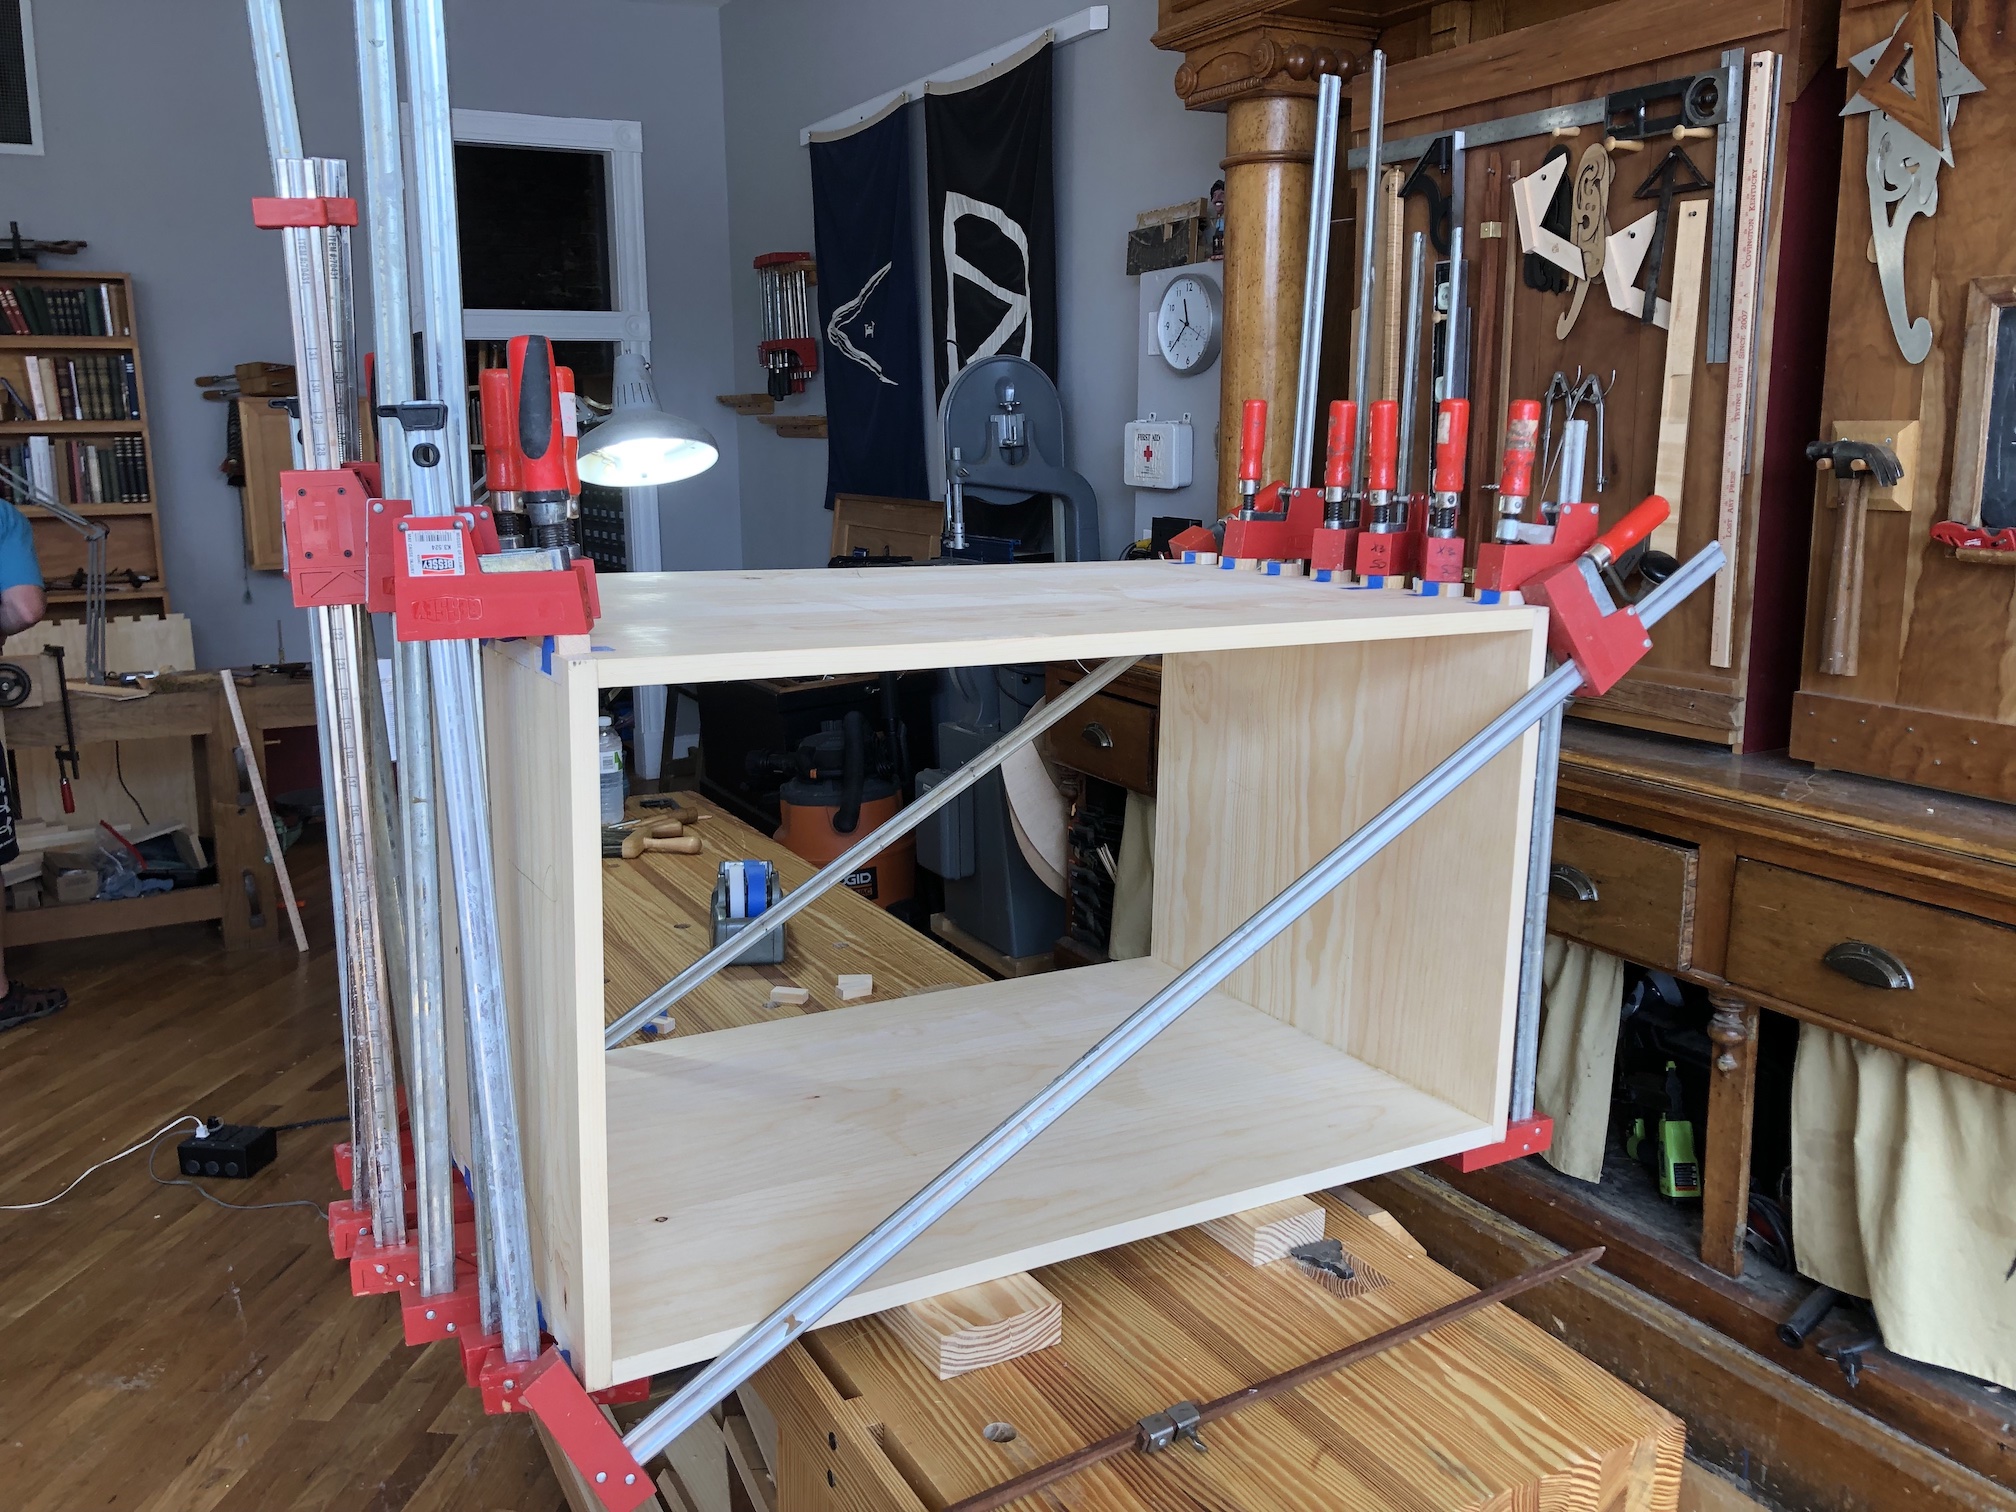
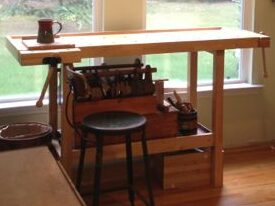
As you may see in the photo above, I have upgraded all the chip breakers and plane Irons with newer thicker ones. My two favorite are A2 Hock Blades from Lee Valley and CPM Magnacut from Lake Erie Toolworks.

You don’t need to upgrade your planes all at once, it’s perfectly fine to take your time. It took me about five years to acquire the ones shown in the photo. I’ve found some good deals and some fair ones, but I don’t think I ever overpaid, because I was selective about what I bought.

You probably don’t need the full range of planes from No. 603 to 607, but I personally use all of them—so upgrading all of my existing planes to Bedrocks was an easy decision.

If you’re just starting out, a 604 and a 605 make excellent entry points. From there, you can expand to a 607 or other sizes as your needs, budget, and availability allow.

1. Why Would I Want to Upgrade over regular Stanleys?

Page 68 of the Stanley CATALOGUE No 34

The Stanley Bedrock planes were designed as a premium line for serious woodworkers. Their improvements over standard Bailey style planes include:

  • More stable frog design – Bedrock frogs sit on a wide machined surface, reducing chatter and improving blade support.
  • Easier frog adjustment – You can adjust the frog (and mouth opening) without removing the blade, a big time-saver.
  • Heavier castings – Adds mass and stability, especially noticeable on smoothing and jointing tasks.
  • More precise machining – Leads to better registration and tuning.
  • Collectibility and aesthetics – For many, owning a Bedrock is about history, pride, performance and they way they look.

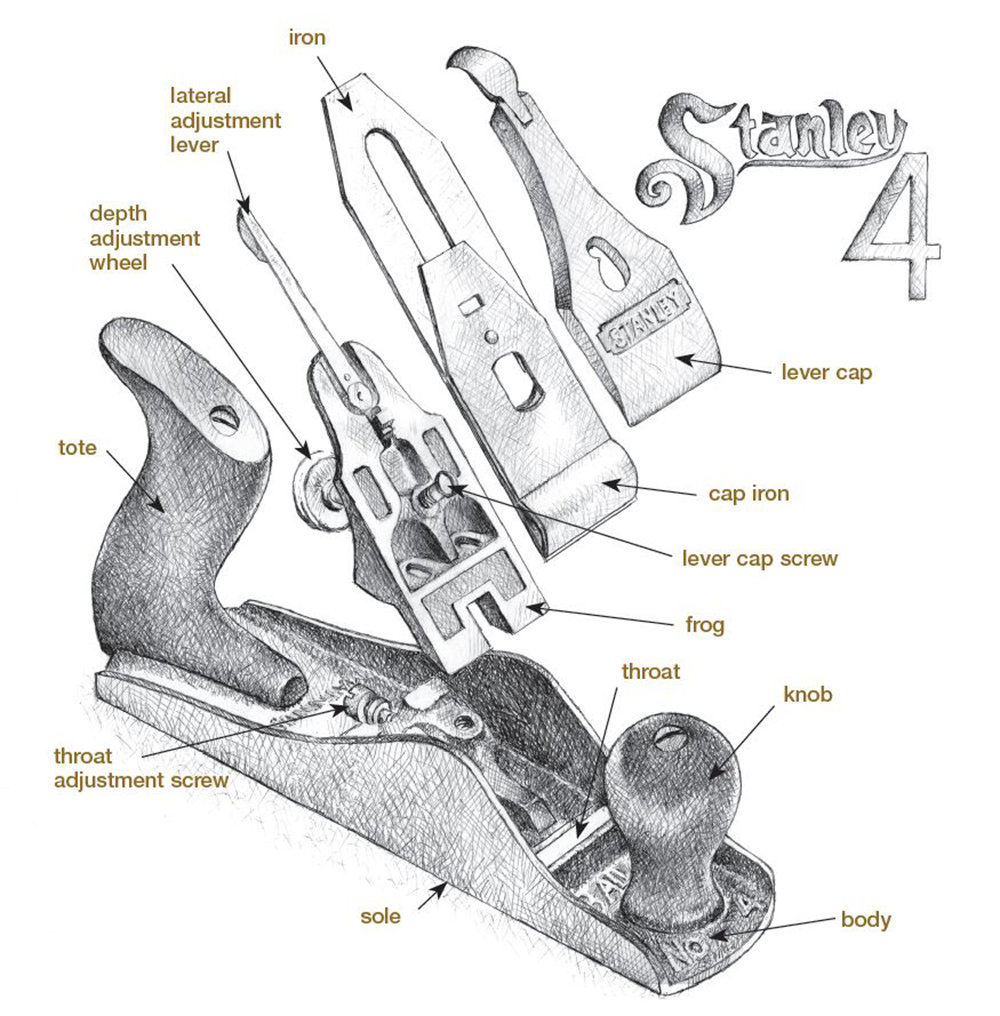
Why the Stanley Bedrock Plane Feels Like a Single Solid Tool

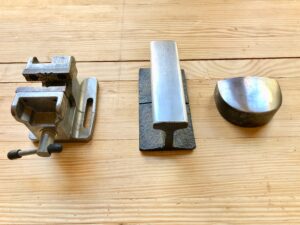
The Stanley Bedrock plane stands out for its rock-solid construction. The frog sits in full contact with a precisely machined bed in the plane body, making the entire tool, from iron to sole, feel like a single piece of metal. This design virtually eliminates vibration during use.

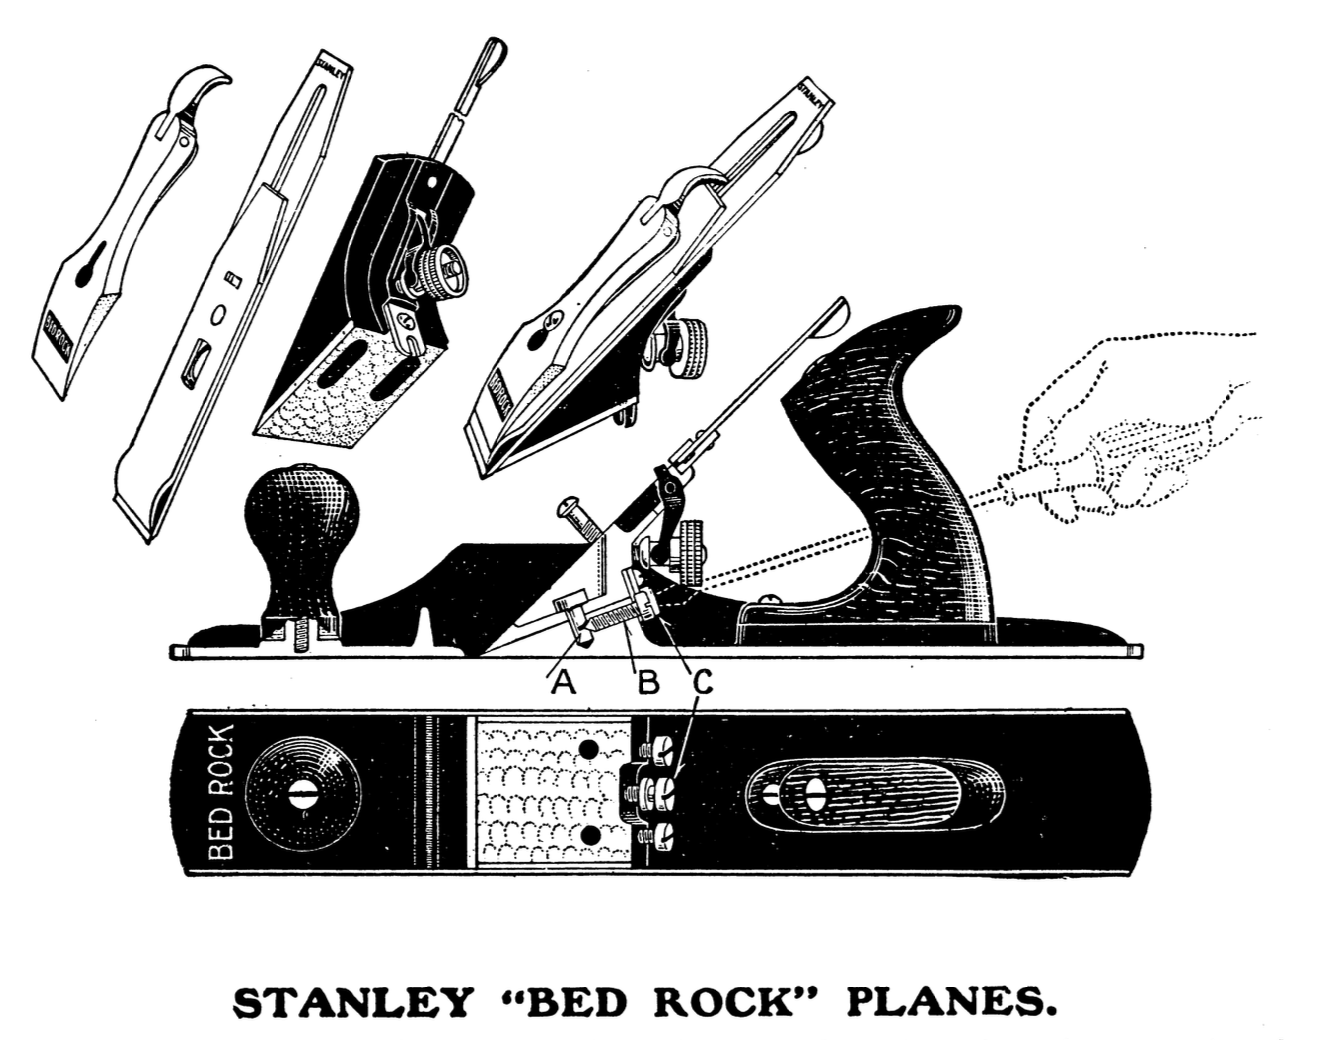
The frog features a tongue-and-groove interface with the body, ensuring it remains square to the mouth and aligned during adjustments, no shifting, no wobble.

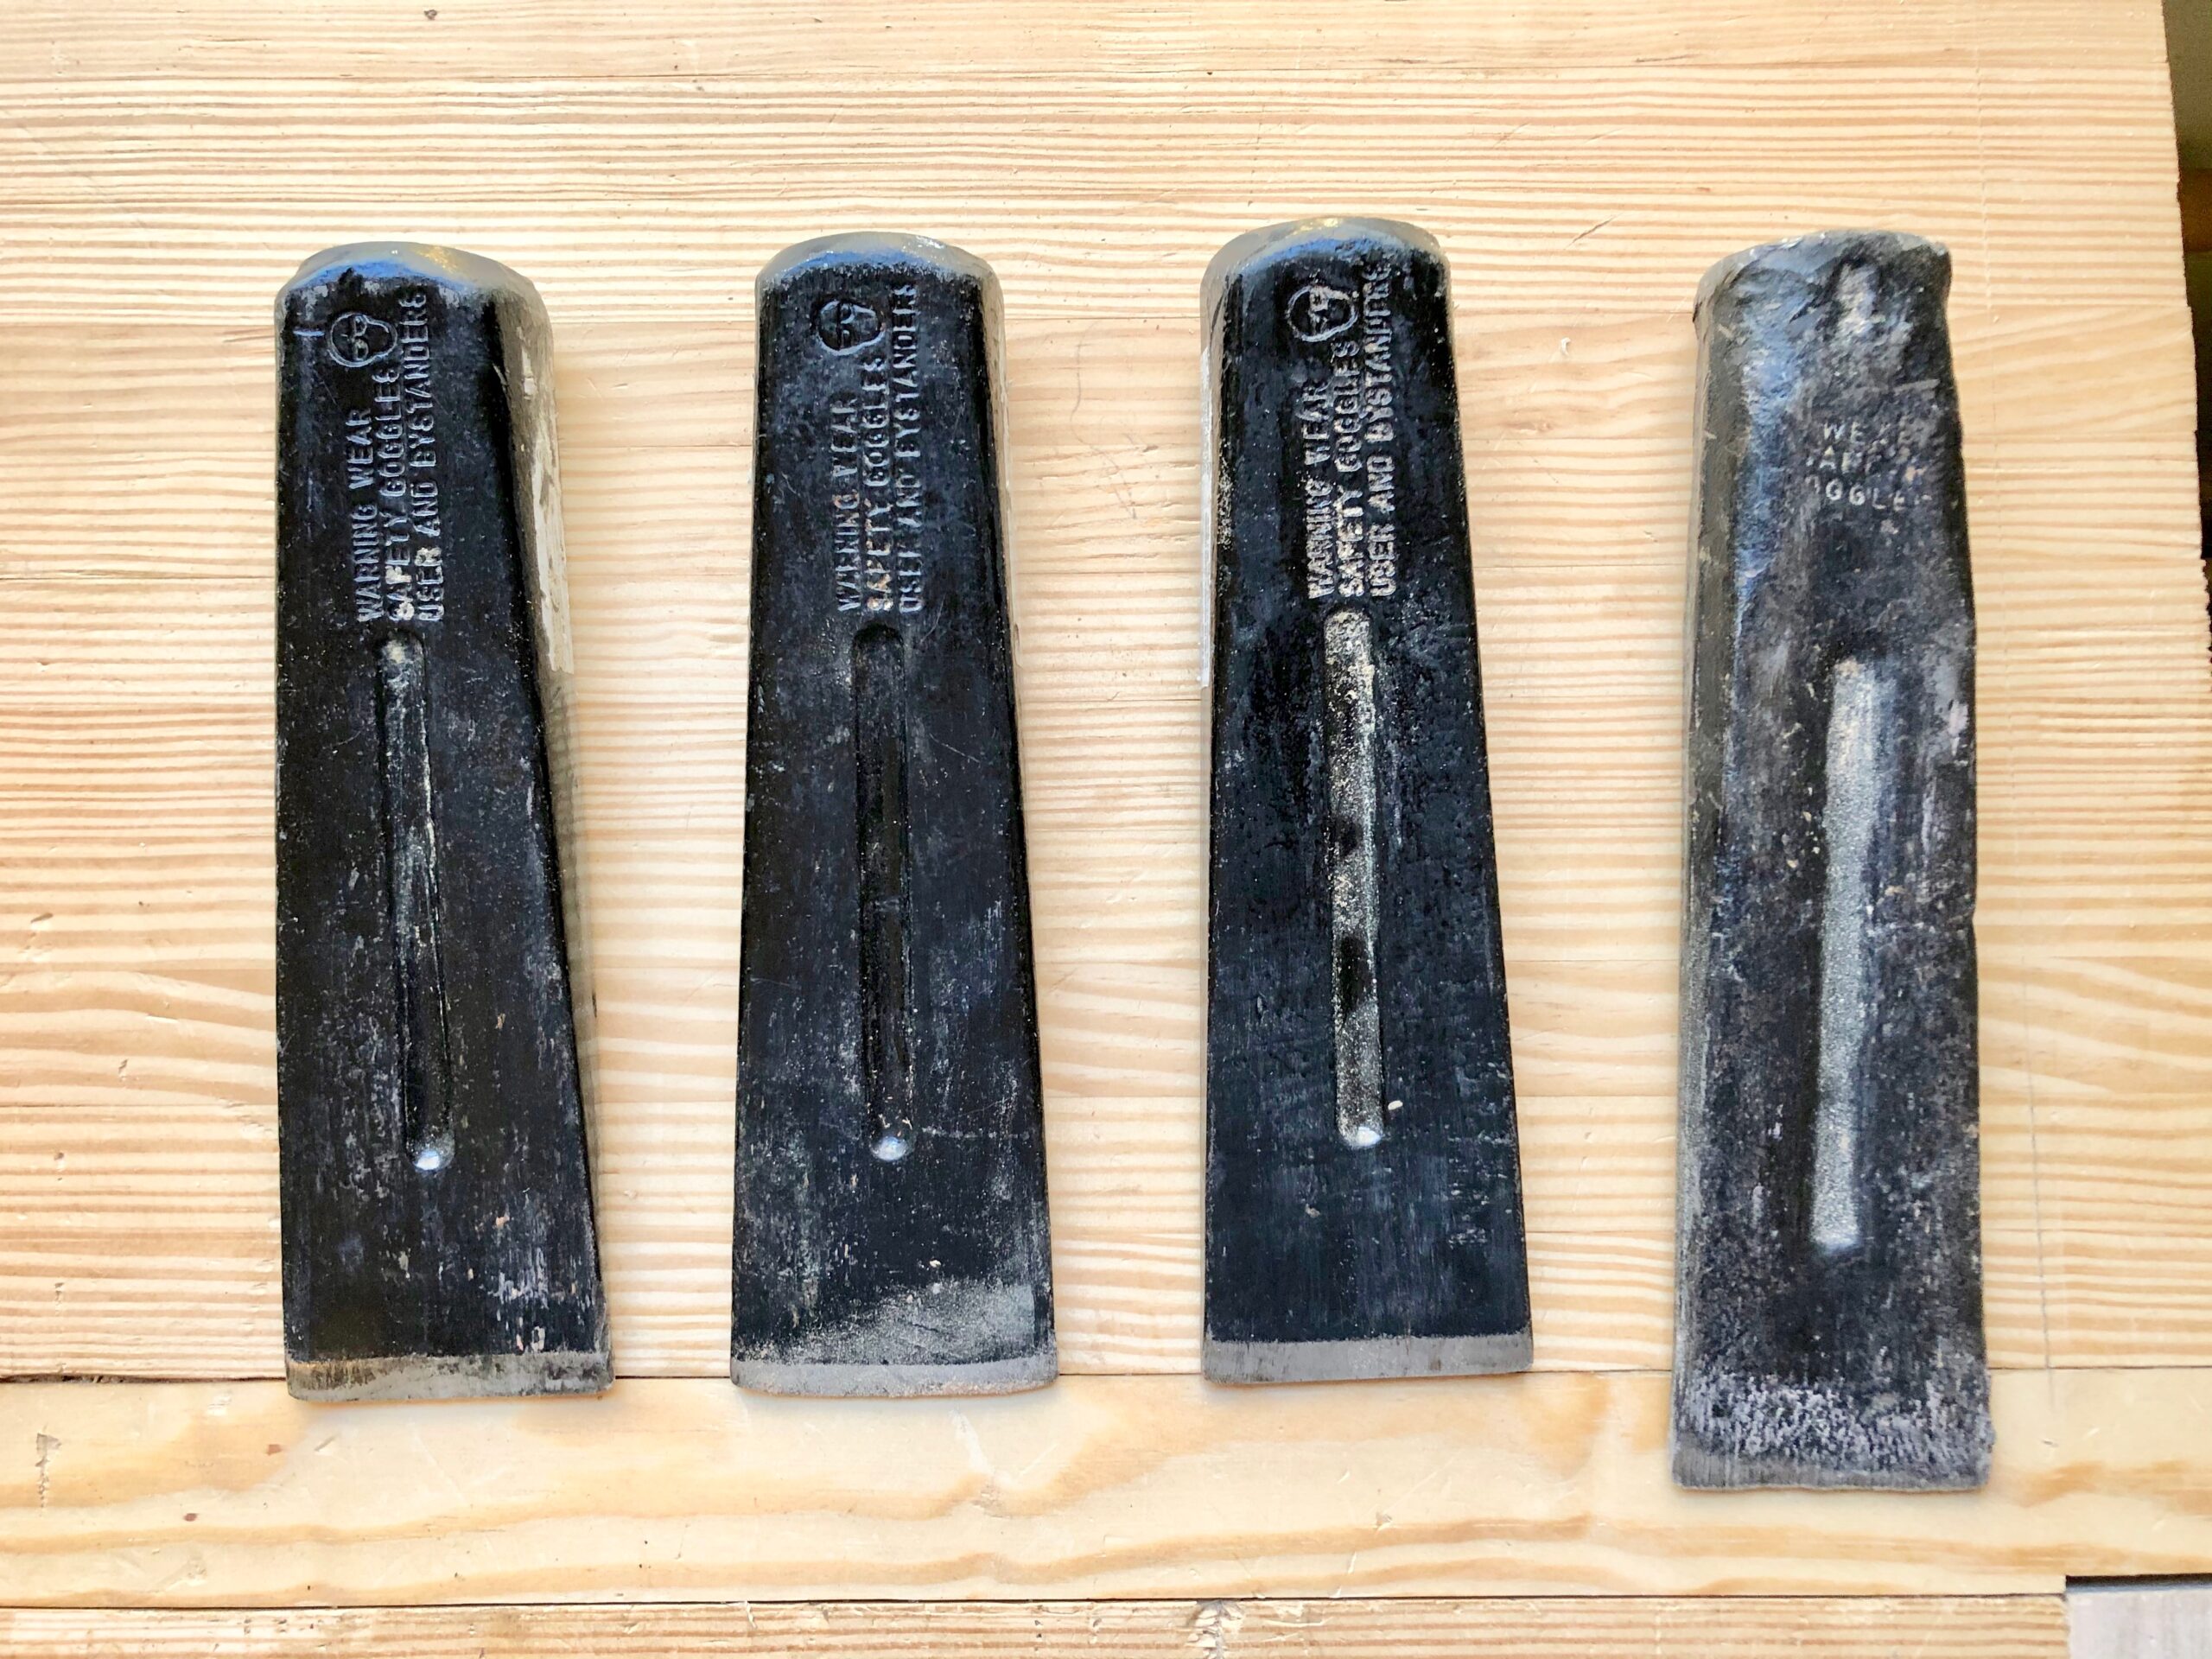
Two large-diameter pins secure the frog in place. These pins have tapered holes that align with tapered frog clamping screws. As the screws are tightened, they act like wedges, locking the frog down with exceptional rigidity. If the pins are removed, they must be reinstalled with the tapered holes aligned to the screw tips.

Adjusting the mouth for fine or coarse work is quick and easy. Just loosen the clamping screws, reposition the frog using the center adjustment screw, and retighten. No need to remove the iron or lever cap.

Finally, the contoured sidewalls of the Bedrock body aren’t just aesthetic—they add stiffness and provide excellent bearing surfaces for shooting work or side use.

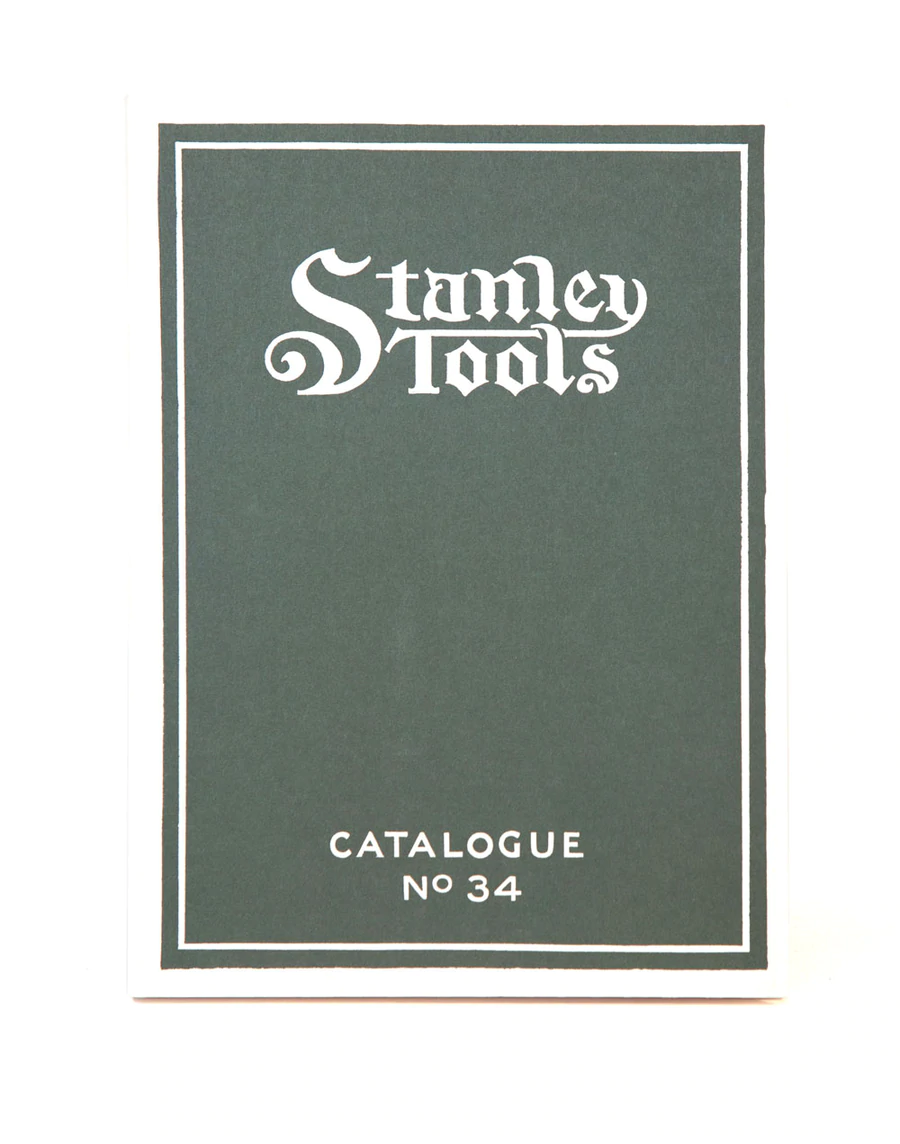
The description of Stanley Bedrock Planes starts at Page 54 in the 1922 edition of the Stanley Catalogue No 34.

2. Where Can I Get Them?

Stanley Bedrocks are no longer in production, but they’re still relatively available but they were not produced in the numbers that standard Stanley planes were made as such they will be more expensive following the law of supply and demand, but they still can still be a much cheaper option than new premium planes:

  • eBay – Best selection, but watch for inflated prices or poor condition.
  • Tool Dealers – Sites like Jim Bode Tools, Just Plane Fun, Hyperkitten, or The Superior Works offer vetted tools.
  • Facebook Marketplace or Craigslist – Be patient and picky. There are some real dogs out there and you don’t need anyone else’s problem plane.
  • Estate sales and flea markets – Good deals can be found if you’re persistent.
  • Online forums – Places like Garage Journal, Reddit’s r/handtools, and woodworking Facebook groups.

3. How Much Should I Pay for Them?

Prices vary by model and condition, but here are rough ranges for unrestored, usable Bedrocks:

ModelExpected PriceNotes
603$125–$200Smallest and often most expensive per size
604$100–$180Popular smoothing size
605$90–$160Common and great all-around size
606$100–$175Mid-size jointer
607$150–$250Desirable for edge jointing

Tip: You can save significantly by purchasing planes that need cleaning and tuning, as long as they’re structurally sound—no major cracks, deep rust pits, or swapped parts.

Please note: Buyer beware! You can get great deals on eBay and other auction sites, but make sure the seller takes returns otherwise you may want to pass. Please inspect for any major pitting, cracks, damage, repairs or welds. Check for missing or wrong parts. Ask seller for more detailed photos if not provided. Educate yourself on what a complete and correct Bedrock should look like for the appropriate type.

4. How to Clean and Tune a Bedrock Plane

Please watch some of the video content for cleaning and tuning your planes before jumping in and doing it. These are very valuable planes from both a historic and a usage standpoint, so do research and please be respectful of their history. I used to be way more aggressive in my refurbishing of my old planes. As I have more experience, I now take a more minimal approach to getting these antiques into working order.

Restoring a Bedrock is very manageable. This is owner preference, but please keep in mind you are probably not the last owner of this plane. My preference is, I like to get the plane to usability and respect the tools long history as much as possible and preserve as much of it’s history for future owners to appreciate. Here’s a checklist to guide your process:

Cleaning & Prep

  • Rust removal: I prefer Simple Green and 000 and 0000 Steel wool to retain some of the patina. I clean and oil all the metal hardware and am careful to avoid damage to the Japanning in the process. Use Evapo-Rust in extreme cases, but generally, these are not the planes you’re looking for. Heavily rusted barn finds for great deals may be an exception.
  • Surface gunk: Scrub with simple green and a nylon brush or #0000 steel wool.
  • Brass: This is very subjective. Some just clean the dirt off and call it good. I like bright brass. Even when cleaned bright it gets a nice color after a few years.
  • Handles: Less is more here. Only in extreme cases do I refinish the handles and knobs, like if majority of the shellack or finish has cracked and come off and is not renewable.

Tuning

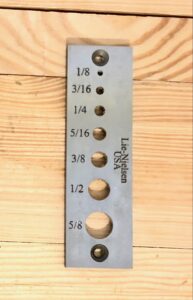
  • Sharpen the iron: Use a honing guide and water/oil stones. Add a slight camber for smoothing planes.
  • Check the sole: Use a straightedge; lap on granite or glass with sandpaper if needed.
  • Check for square cheeks: Use a machinist’s square for registration surfaces.
  • Adjust the frog: Move forward or back for fine or coarse work without removing the iron.

Parts

Sometimes you get the perfect plane but it’s got a cracked tote, knob or the lever cap has issues. All is not lost, you can find replacement parts and bring the value of your find up considerably by adding replacement parts.

  • Just Plane Fun – Michael Jenks is a pleasure to work with and a wealth of knowledge.
  • eBay – Purchase with caution from a reputable dealer

5. Resources for Learning More

Whether you’re learning to use a plane or restoring one, these resources are gold:

6. Would a New Premium Plane Be a Better Choice?

If you want a ready-to-go tool with perfect machining, a new premium plane is worth considering—but it’ll cost you.

  • Premium smoother: $300–$500
  • Premium jointer: $400–$700+

Restored Bedrocks often match or beat this performance with a bit of work—and for much less money. But if time is more valuable to you than the restoration process, modern tools might be a better option.

7. Who Offers Modern Premium Planes?

Final Thoughts

Upgrading to a Stanley Bedrock plane is more than a practical decision—it’s a step toward precision, history, and a deeper appreciation of craftsmanship. If you find satisfaction in restoring tools and working with something that connects to over a century of woodworking tradition, the Bedrock upgrade is well worth the investment.

And remember, a little rust or grime isn’t a dealbreaker—it’s just the start of a good story.

“A Marriage of Convenience”

Stanley Number 3 Type 5 as it was when purchased

Up until now, this blog has almost exclusively focused on tools either made in the golden era of woodworking or new tools based on tools from that period. Well, today’s blog will be covering something a bit more modern—something new from the 21st century: 3D printing (I know there was 3D printing in the 20th century, but it was only in this century that it became available to home enthusiasts).

The story begins like a lot of my tool stories: a trip to the local tool monger’s shop owned by Ed Lebetkin. He offered me a deal on a very nice Stanley No. 3 type 5 that I could not pass up. He said I might have to put some effort into getting it into working order. I did not hesitate and I said to Ed, “Take my money.”

After getting it home and having a chance to look it over, I did find the issue Ed was talking about. The lateral adjuster scraped on the tote even when the frog was moved as far forward as it could go. Also, in this position, it was not possible to let the blade out without moving the edge too far past the chip breaker, making the plane unusable.

I thought about the issue for a while and the possible fixes that I could do. The actual problem was that the original tote had probably been broken and replaced with a newer No. 3 or No. 4 tote from the sweetheart era. I could tell it was from that era as it still had remnants of the Stanley decal, and it had an hourglass brass nut. The solutions were to 1) buy an old tote and hardware from eBay or another supplier, 2) shape the current handle to fit the plane (not really an option, as I dislike disfiguring any part of an old tool), or 3) buy just the hardware and make my own tote.

As I call myself a woodworker, I chose option 3. The next choice was where to get my hardware. As I have been watching a lot of videos about Stanley planes and hardware, I found the “Just Plane Fun” YouTube channel. Michael Jenks runs that channel and also sells plane parts. I contacted Michael through the Facebook group, and we worked out a fair price, and the part was in my hands two days later.

Next, what wood species should I use? Early Stanleys used Rosewood and Cocobolo. Those woods are exotic and expensive if you can get them at all. What about domestic hardwoods, like Cherry, Apple, or even Maple? Readers of this blog know how much I love Lie-Nielsen tools, and they use Cherry on their totes and knobs. Well, stay tuned. As I write this, the wood for this project will be here today, and I will let you know in the next blog post what I chose and why.

So now, with the hardware and wood species sorted, how was I going to make the tote? I have repaired totes before, and I have made some pretty nice saw handles as well. But I did not even know what shape to make the tote in. I do have a Stanley No. 3, but it has the newer larger handle, so I couldn’t use it as a pattern. So I did what I always do: I went online and found some plans from Lee Valley for number 3/4 totes, but I was no closer to an actual pattern.

As a bit of backstory, I have learned how to use 3D modeling software (Onshape) over the last year and have gotten pretty good at fabricating parts I need for my electronics shop and around the house. So I decided to load the pattern I downloaded and make a 3D model of the larger handle. I then modified it to fit the smaller size on my actual plane. This is where the the Marriage of Convenience of comes in. By marrying 3D printing with old school woodworking, I can do a better job fixing up my new old plane.

After 3 prototype 3D prints, I had my model close enough to be able to cut out and drill my test tote. That is where I am currently. My next step is to cut out my test tote and do a test fit. Then I will make a complete test tote of some wood I have on hand to make sure I can do the final tote. Also, while I was at it, I made a model of the knob as well. So here is a picture of the plane with the 3D printed prototype tote and knob. As I do not like plastic handles on my woodworking tools, these are of course only plastic (PLA) prototypes and not what will end up on the plane.

Stanley Number 3 Type 5 fitted with PLA test Tote and Knob

Be sure to tune in for part two of this story as I make the test tote.

Hickory Bark and Ash Stool

Hickory Bark Stool

I recently attended the Greenwood Wrights Fest 2022 and took the “Stool Making with Terry Ratliff” class where we made a Hickory Bark and Ash Stool. This was a very informative and fun class and Terry was an excellent instructor. I ended up finishing my stool at home by weaving the hickory bark seat. Thankfully, I had exactly enough bark to seat my stool ( my stool was a fair bit larger than the example stool). These are made with a very few and basic tools (Axe, Maul, Wedge, Draw knife, Shaving Horse, and sloyd knife) but the design is highly evolved.

We started by splitting and then riving out the billets for our legs. We shaped the legs with and axe and then on the shaving horse with the drawknife. You start by making a square leg a little larger that an 1 1/2″ on a side. The you make the square an octagon and your done. You make the rungs about 3/4″ from smaller stock and make the ends 11/16 round. The top rungs (where the seat is woven) you make in a wing like shape.

After getting all the pieces done, it’s time to drill the holes and assemble the frame. Finally, I wetted the hickory bark and wove the seat. Hickory bark is very supple when wet, but tough as leather when it dries. It makes a beautiful seat and only gets better with age.

Peter Follansbee, wrote a great article for Fine Woodworking on making a Post-and-Rung greenwood stool here.

Now for my next greenwood project…

Peace,

Aaron

Plane Catalogs – And Other Resources

Lets face it, I love my planes. They do so many jobs from rough stock prep with the scrub or Jack plane to fine surface smoothing with the No. 3 or No. 4 Smoothing planes. The plucky little Block plane can take off end grain with gusto.

I wrote a blog post about my planes here “Tools series part 3 planes” where I go into detail about types of planes I own and New vs. old Planes.

Parts of a Stanley Bailey Plane

This entry is to just remind everyone that there are some really good resources and references out there about vintage planes, one such resource is Archive.org You can specify a topic like “Hand Planes” and you will get lots of results. There have been a lot of old and new texts added recently, so if you’ve not visited this site in a while, it may be time to go back and check it out.

When searching, you may want to narrow your search, just put “subject:”hand planes”” in the “Search” field and check the ” Search text contents” radio button and and you’ll get a large number of texts listed. When you get there on the “Sort By” bar, hover over the “Date Archived” and click “Date Added” menu item to get the latest texts added first.

There are generally two types of texts, “Books to Borrow” and “Community Texts”. You can borrow books from the Books to Barrow section if you create an account. You can freely download most books that are in the Community Texts section without an account. Just click on the text you’re interested in and it will be displayed on it’s own page. I like to right-click and choose “Open Link in New Tab”.

After the page loads Archive.org shows a preview and reading section at the top and text information and download links in the bottom section. I like the PDF format to portability so I usually click the “PDF” or the “PDF WITH TEXT” links to get a text searchable PDF link.

These search techniques apply to any subject on Archive .org. This site can be really fun to explore. So go find some cool references and if you find a particular gem. leave a comment so other folks can see it too.

You can also order a new copy of the Stanley Tools Catalogue No 34 (cover at the top of this article) from Lost Art Press.

These are fun to pursue on days when you just can’t get into your shop. I have found the old Stanley, Record, Millers Falls etc. catalogs invaluable for helping me identify and sometimes help me repair old planes.

Until next time, keep making shavings and sawdust.

Peace,

Aaron

ATC Part 2 – Glue and Skirts

Day 2 of the Anarchist’s Tool Chest (ATC) build. To start todays blog, I’m going to talk a bit about the workshop at Lost Art Press (LAP). This place is very special. Yes, special, special in a really good way. The folks at LAP have poured a lot of love, energy and obviously money into this place. The attention to details and the design choices complement this old structure. Each space in the first floor and the outside machine shop are setup with woodworking and efficiency in mind. They have turned a smelly, dank old bar into a beautiful and fully functional residence and workshop where they can ply their trade. It’s a real pleasure to work in such a historical and functional space. I would not hesitate to go back and take another class at this magical place. The people, the smell of wood and general atmosphere are very inviting. Also, they have the best coffee and pastries. The pastries come from local bakeries and are delicious. The are many local restaurants to choose for lunch and dinner. This place was such a pleasure to visit.

Back to my project at hand, the ATC build. Yesterday, I had mostly chopped out the dovetails for all four sides, they just needed some cleanup and fine tuning. This is a very satisfying process, seeing your hard work literally coming together. I had to wait my turn for glue-up as two other students were ready first and the shop only has so many clamps and one instructor.

Box Glue-up – Lots of clamps

After my box was in the clamps, it was time to start laying out the skirt boards these wrap around the bottom of the chest and help protect it from coming apart and the case from day-to-day use and abuse. The choosing of the sides and the marking are pretty much the same as the box itself, except the tails are on the sides 90 deg out from the front to help hold the box together (on the box the tails were on the front and back boards).

By the end of the day all 5 students had their boxes glued and stacked up ready for the next days activities. I had my skirt pieces marked and one corner chopped out.

Tomorrow, Part 3 – More Skirts and Some Mistakes

ATC Part 1- Dovetails, Dovetails, Dovetails

The Anarchist’s Tool Chest (ATC) is the first book written by Chris Schwarz and published by Lost Art Press (LAP) in 2011. Ths book had a major impact to my woodworking mindset. Before the ATC, I was primarily a power tool user and used hand tools as an afterthought.

For those of you that are concerned about the word “Anarchist’s” (because it has been used in a negative context before) in the title, here is Chris Schwarz’ explanation: This is not scary at all unless you sell cheap flatpack stuff made of termite spit.

My interpretation of the Anarchist part of the title speaks to the philosophy of shrugging off the mentality of buying expensive (or cheap) poorly made disposable big box furniture and acquiring a set of high quality tools and making furnishings (and shop appliances) and chairs yourself that will outlast the maker. In other words, “Anarchy is a society being freely constituted without authorities or a governing body”. This frees the woodworker from the current state of systems put in place by organizations or corporations who would like you to buy their products and dictate what you should buy or if you desire, how you should make things.

Getting to the ATC, I noticed that LAP was having a class on the ATC in August 2021, taught by the excellent Megan Fitzpatrick. I decided I would love to build the chest for myself and I signed up for the class as soon as registration was open. I secured my spot in the class and got an AirBnB across the street. I was set. Because of Covid-19, we all had to be vaccinated, which is good as cases were increasing while I was there.

Roubo Clamps with makers triangle

After introductions of the instructor and students, the first day was examining the boards for the sides, putting the cabinet makers marks on the pieces (the triangle that indicates the orientation of all the pieces as seen in the image above) then marking and chopping out the 28 dovetails on the main box. This was a lot of fun and I learned a lot from Megan and I think I have improved my dovetailing skills as a consequence.

Chopping Dovetails

The day ended with most of the dovetails cut out.

Next up ATC Part 2 – Glue and Skirts

Tools Series – Part 7 – Workbenches

My mostly complete Roubo Split-Top Workbench with Benchcrafted vises

Workbenches

No workshop tool discussion is complete without discussing workbenches and chests and other ways to safely secure and protect your tools. This week we will be focusing on workbenches. Workbenches are, to some, considered workshop furniture. I think this is incorrect; workbenches are a tool, and in my opinion, the most important tool in your shop.

Without a workbench, you cannot properly hold your project pieces to do basic operations. Oh sure, you can put pieces on saw horses and I have, but a nice bench makes a world of difference when it comes to comfort and efficiency. I can say after finishing my bench, all operations have become 100% better than my old bench. It stays put and does not “walk” all around my shop when doing simple planing and it is very stout when chopping mortices and hammering over a leg. Long boards are a breeze. I can work on small pieces and thin pieces too.

Disclaimer: I will be referencing Chris Schwarz of Lost Art Press and Roy underhill of “The Woodwright’s Shop” a lot in this and the upcoming blogs. Chris and Roy have heavily influenced me and countless others during this renaissance of hand-tool wood working. Chris and his team at LAP have propelled this craft to levels not seen since at least the early 20th Century. Roy with his three decades of woodworking shown on PBS’ “The Woodwright’s Shop” had a very early influence on me personally. I also want to thank the many YouTube content creators (links below) who have also given new life into the craft.

I started my seriously fun woodworking adventure late in life (I’ve been dabbling all my life, but really went all-in around age 50) and with very little knowledge of the craft (more on my lack of knowledge later). I mainly knew about power tools and didn’t fully digest Roy’s show content until I actually took a class at his Woodwright’s School.

Published in 2011, LAP’s “The Anarchist’s Tool Chest” was truly a turning point in my understanding of the craft and reinforced my ideals about hand-tool woodworking, self-reliance and the state of todays furniture industry (it sucks by the way). I just finished re-reading “The Anarchist’s Tool Chest” and it is just as fresh and relevant today, 10 as it was ten years ago when it was published. The good news is the state of hand-tool working today is much more widely accepted than a decade ago. There are also more tool makers today that recognize that woodworkers demand quality products and are actually making them.

Crappy 1st workbench

My first workbench was purchased with an abundance of enthusiasm and ignorance. Those are a bad combination because the ignorance can lead you to a purchase an item that can kill your enthusiasm. Fortunately, this did not happen in my case. I just realized I just spent too much money (money that could be spent on materials for a real workbench) on a crappy and poorly designed workbench-shaped object. Okay, so now you know, so please don’t make the same mistake I did. Curb your enthusiasm a bit, and do your research before laying out big bucks for anything. Flashy ads and marketing hype are designed to tap into our lizard brains and trick us into wasting our hard-earned cash. Lesson learned; now let’s talk about real workbenches.

The famous Roubo Plate 11 – Figure 1 – 18th Century Workbench

The Great Roubo

I have detailed my Split-Top Roubo Workbench journey on several earlier posts, just click on the Workbench tag under Categories on the right to read more on those.

The Roubo Workbench above is from A-J Roubo’s – L’Art du Menuisier – Planche 011 published in 1769. This is what a workbench should look like. Heavy, really heavy, stout legs, and rock-solid joinery.

I chose the Split-Top design to make the bench easier to move. It can be broken down into 6 major pieces and easily transported. You do sacrifice some joint rigidity using breakdown barrel nuts and bolts in the legs and securing the top to the base, but so far I have not had an issue with rigidity and fasteners coming loose.

There are many different workbench designs out there, but I found the Split-Top Roubo design perfect for my needs. I choose the BenchCrafted vises as they are the best metal vises made today. They’re not cheap, but they’re very nice and I love using them. They have smooth action and work with little effort. Do not cheap out on bench hardware, you will regret it if you do.

Here is a picture of my new bench stop made by Master Blacksmith, Peter Ross. This has yet to be installed on the bench but it’s a beautifully crafted piece and I look forward to installing it (soon) and using it.

Links

Books and Supplies
o Andre Roubo’s – With All the Precision Possible: Roubo on Furniture – Translation published by Lost Art Press)
o Roy Underhill – The Woodwright’s Shop – Publications
o Lost Art Press – The Anarchist’s Workbench – Chris Schwarz 2020
o Lost Art Press – The Workbench Book – Scott Landis 1987
o BenchCrafted – Vises and Hardware
o Peter Ross – Master Blacksmith

Video and Blogs
o Roy Underhill – Woodwright’s Shop – PBS
o Chris Schwarz – Blog Search “Workbench”
o Paul Sellers – Paul Sellers Woodwork
o James Wright – Wood by Wright
o Matt Estlea – Matt Estlea
o Joshua Farnsworth – Wood and Shop
o Rex Krueger – Rex Krueger

Please subscribe (on right hand side on computer and very bottom on phone) to the mailing list to get future blog updates.

Until next time, keep making shavings and sawdust.

Peace,

Aaron

Copyright 2021 © W. A. Henderson

Tools Series – Part 6 – Drills and Boring Tools

From Left to Right – Millers Falls – No, 05, No. 77 and No. 2A with homemade side handle

Drill Humor, barely …

Do you know how they make small drill bits?
A little bit at a time.

Ok, now that we have the boring drill humor out of the way, we can proceed with the blog. I’ll be showing you my drills and drill bits. I have been through 3 electric drills in the time I have been using my hand drills. To be fair, one of the electric drills was used while I was doing some electrical contracting work. But the fact remains, electric drills are not as robust as hand drills and I love using the beautiful old drills from Millers Falls.

The drills pictured above are drills I have collected over the years through yard sales, CraigsList, tool meets, etc. I have upgraded over that time to the set you see above. The Millers Falls No. 05 is the drill I keep in my tool chest as it is small but very robust. The No. 77 and No. 2A are kept on my wall next to my bench ready for action. I made a side handle out of Maple for my No. 2A as it was missing one and I had an extra ferrel I was not using that was perfect for the job.

The “eggbeater” drills and braces are plentiful and usually not very expensive (but I have noticed the prices creeping up recently). They do not require batteries and they just keep working. If you buy one of these vintage drills from a dealer, make sure you can return it if you have any issues. Here are some things to look for before buying one of these vintage tools: Make sure they have all their teeth on the gears and have smooth action. On the eggbeater drills, three gears is better that two. They do require lubricating oil occasionally, and should rotate freely without any effort when checking the action without a bit. Check that the chuck jaws move in and out smoothly. Put a bit in it to see if it rotates straight. A wondering bit is a deal breaker as the threaded shaft (in eggbeater drills) is bent and that is an expert fix, unless you have spare parts.

You normally use the 4-sided shank bits in braces and smooth shank bits in the eggbeater drills. You can use the smooth shank bits in braces, but beware of slippage as your brace chuck design may not grip the bit as tightly.

STANLEY YANKEE NO. 2101-10 inch “BELL SYSTEM” Bit Brace 10″ Swing, Single Speed Reversing Drive

Drilling is a skill that does take time and practice to get right. There are techniques that allow you to drill a specific angle or square to the wood. One technique for braces is the ring method. With this method you can put a ring on an auger bit to see if you are level or not. Check out this post from 2011 from LumberJocks on how to do this.

Irwin Bit Set – Sizes 4 – 16. Or 1/4″ – 1″ each number is a 1/16″ increment, Adjustable Bit on right for larger holes

This set is an Irwin design. I bought these off of CraigsList for $60. There are also Jenkins bits on the market and they also work well with braces. I do not have a preference of the set types, I just happened on this set. The lead screw on the set above is a course design used for softer woods. I may still purchase a smaller set with fine lead screws for hardwood work.

I consider Brad-Point bits essential to my woodworking. I purchased this set from Lee-Valley in 2012. It is a very good quality high-speed steel set. One note on these bits: If you use them in a drill press, make sure to line up the exit hole with the bit. You do not want these brad-points hitting the metal of you drill press bed.

Vintage Drill Bit Set with wooden case.

Some people don’t use twist bits on fine woodworking projects. I use them in areas that do not need to be pretty as they can and do chew up the wood. You can mitigate this a little bit by placing a sacrificial backer board clamped on the back to reduce the exit tear-out. They can also be used in metal on very slow speeds. I got the set pictured above at a MWTCA meet in Sept 2015.

Freud PB-107B 7Pc Forsener Bit Set – Used with Power Drill for larger work

The forsener bit set above is a recent purchase from 2020. I love these bits for clearing out a ton of waste very quickly. I only use these with power tools as the require a lot of torque. They a great for boring smooth-walled holes and nice flat-bottom holes. They do not usually tear up the top surface like other bits can.

I’m just scratching the surface of drills and bit types. The ones I have shown above are the most common in woodworking shops, but not exclusively. There are a lot of “specialty bits” that are used in all sorts of unique operations. I like to keep my tool set as focused as possible, but do buy the occasional speciality bit like when I was building my Split-Top Roubo Workbench.

Drilling is one of the most frequent activities in any woodworking shop. When you buy drills and bits, again make sure you buy quality. If you do, and you take care of them they will give you a lifetime of good use.

Please subscribe (on right hand side on computer and very bottom on phone) to the mailing list to get future blog updates.

Until next time, keep making shavings and sawdust.

Peace,

Aaron

Copyright 2021 © W. A. Henderson

Tools Series – Part 5 – Chisels and Gouges

Narex Richter – See it’s surprising test result in James Wright’s Chisel Test – link below

Chisels

Back in my early days while beginning my woodworking journey, I believed a chisel was a chunk of metal with a plastic handle. You’d pound them mercilessly to remove wood during construction. They were not precious or even to be well cared for. They were a rough tool, to be used and abused and forgotten about after the work was done.

My enlightenment began slowly. Yes, I had seen Roy Underhill use them to great effect on his show the “Woodwright’s Shop”. But until I started my personal journey, it did not click about their proper uses until later in my life. My first step was with a shop class. I asked the shop teacher to show me how to sharpen a chisel. He took me over to the grinder in the shop and proceeded to use it to sharpen my Stanley Handyman set (1/4″, 1/2″, 3/4″ and 1″) from the early 80’s. They were OK for use in a power tool shop and they did sharpen and hold an acceptable edge. They were also heavy, unwieldy and unbalanced. A few years later…OK, like 15 year later, I attended Roy’s Dovetail class; this is when I learned what sharp was and specifically a sharp chisel.

I went home determined to “tune” my Stanley chisel set, but then I though to myself, maybe if I got a new set and sharpened those I’d be in business. So I purchased a new Buck Bros. Set. I had studied up on sharpening a bit on the internet and discovered the “Scary Sharp” sharpening method using sandpaper.

Buck Bros Chisel – Not Recommended

Now armed with my new set of chisels and my newfound sharpening knowledge, I went to town sharpening these so-called chisels. After sharpening them, I excitedly started testing them on the edge of some soft pine and they cut it like butter. This is what I wanted, so I started a new project (using white pine) with them. It was’t long before I noticed they weren’t as sharp as when I started and then I looked at them closely with a magnifying lens. They looked like I had be pounding them into concrete. The teeth were jagged and chipped. Remember, this is soft pine (no knots either).

So I did the obvious, I resharpened them again and they had a beautiful gleaming edge and I resumed using them on my project. Next thing I know, they were back to the snaggletooth shape as before. This would not do. I was so disappointed and it was about this time that I read Chris Schwarz’s book “Anarchist’s Tool Chest” (buy it, read it, you’ll thank me later). In it, Chris goes into great detail on what makes a good chisel.

I had some old chisels I had been collecting for the past couple of years. I started cleaning them up and sharpening them. Some needed new handles, so I made some crude ones to get going (I made better handles later after I got my lathe.) I started using these old chisels and they were orders of magnitude better that those lumps of crappy metal and plastic with a label that said “Chisel”. They took a wonderful edge and kept it. They cut through pine, walnut, cherry, hickory and hard maple and kept on going. Now I was getting somewhere.

I needed a more complete chisel selection at the time. My vintage tools had some major gaps in sizes. After more research and some soul searching, I decided to save up some money and get the Lie-Nielsen Bevel Edge set (3/4″, 1/2″, 3/8″, 1/4″, and 1/8″). This was not a cheap purchase, but it was an investment. I had just proven Chris’ statement “Buy the best tools” or you’ll buy them twice, once for the cheap tool and second, you’ll buy the quality tool. Save yourself a step and just buy the quality tool and get to work.

If you are looking for the best chisel for you, you may want to go here to watch James Wright’s chisel comparison video (you may also want to subscribe to his channel, if you’re not already). He has performed a very exhaustive study of the currently available brands and the results are quite surprising and very interesting. This study will save you time and money in choosing your next chisel or set of chisels.

Based on James’s results, I ordered the Narex Richter 1″ Chisel to fill a gap in my set. This should be fun to compare to my LN set. I’ll let you know how I like it in a future blog entry.

There are several types of chisels available to the modern woodworker as I own just a few types, I will only discuss those in detail.

  • Beveled Edge Chisel – This is the workhorse of the chisels, It can be struck and removes moderate amounts of material. Its shape makes it ideal to use when making dovetails.
  • Firmer Chisel – Does very heavy work and takes a pounding, used mainly for cleaning out a lot of material quickly. Not a precision tool.
  • Pairing Chisel – Very thin blade for taking fine shavings and never gets struck with a mallet.
  • Mortising Chisel – This is the 900 lb. gorilla of chisels. It can take heavy pounding. It is used in hogging out mortises with abandon.
Mortise Chisels – Left to Right – LN 1/2″, 3/8″ and Vintage 1/4″ with homemade maple handle

There are three basic types of Western chisel handles:

  • Tang – These are easier to manufacture and usually a little less expensive. They are, in my opinion, a little less robust but people have their own opinions about this.
  • Socket – More difficult to make but very robust. These are my favorite types of chisels and I have a pretty complete set of these. One caveat about these, never carry them by their wooden handle. It can shrink with humidity changes and the pointy bits can go careening down towards your feet and at best hit the floor dulling your tool and at worst imbed itself in your tender fleshy foot and you end up with a trip to the urgent care facility.
  • Tang and Socket – Most difficult to make and has it proponents. I do not currently own any chisels of this type.

I believe the Socket chisels are more robust, but people also swear by the Tang type too. As I have a lathe, handle creation for socket chisels is very easy and I have made quite a few handles over the years. You can see me rescue a Union Chisel in this video. If you don’t have a lathe, it may be easier to make handles for the tang variety. I just remember making a tang handle for a morticing chisel I used to own and it was a real challenge for me and I cracked the handle after I was almost through making it.

Gouges

As with chisels, there are many types of gouges, and like before, I’m going to stick to the ones I own in this BLOG. Most of the larger gouges can be struck with a large mallet, while the smaller ones need a bit more finesse. Gouge Types:

  • Incannel Gouge – Used to carve a concave groove
  • Outcannel Gouge – Used to carve a convex or rounded shape

Gouges can be either straight or have a curved shaft. The curved shaft version allows you to work closer to the surface of a board or project. All of my gouges are vintage that I have collected over the years. I cannot recall where or when I acquired any of these, just that I have collected them between 2012-2019.

Until next time, keep making shavings and sawdust.

Peace,

Aaron

Copyright 2021 © W. A. Henderson

Tools Series – Part 4 – Striking Tools, Hammers, Mallets, etc.

Poster – courtesy of Lost Art Press

There’s something very satisfying about driving a nail home or hitting a chisel with a mallet where you take just the perfect chunk of wood off. Mallets and Hammers offer the woodworker a great opportunity to make their own tools. At least this was the case for me. I have made several striking tools and I love using them. Woodworking mallets are simple to make and can last you a lifetime (more on that later). Good hammers are easy to re-handle and a joy to use. I have just a drop in the bucket of types of striking tools available to the modern craftsman, but every one of them gets plenty of use.

The nail on the magnet pictured on the left, is a nail I found at the homestead of my 5th Great-Grandfather. It’s a forged 18th century nail used in the construction of his first homestead in 1756. He would have recognized most of the tools in my current shop (the metal planes are “New” inventions, but he would know what they are) as hand woodworking tools have not changed all that much in the 270 years since then. I keep it next to my hammers to remind me of what came before and to keep in mind the ingenuity, resilience and fortitude of our ancestors.


“When you wish to make mortises, you begin by fastening the work on the bench with the holdfast and as close to the workbench legs as is possible so that the hammering has the strongest support for the cuts.”

Andre Roubo – With All The Precision Possible

Left to Right – Vaughan DO16 16 OZ, , Workforce 7 oz., Lie-Nielsen 4 oz. Steel Cross Peen Hammer, Homemade 7 oz. Brass Hammer, Estwing MRW16BP 16 oz. Ball Peen Hammer

Hammers

My hammers are used on every project. I’ve seen people with dozens of hammers, but I prefer to keep only the ones I need and will use regularly. My Vaughan 16 OZ Octagon Hammer is very nice. I bought it in 2012 from a local hardware store but it had a “singing” problem. Some hammers made with hardened steel sing or ring when struck. Some folks just accept it and others like me find it a bit annoying. I’ve looked for a solution for a while but I finally thought of a fix. Because it’s the claw that “sings”, I thought maybe some CA glue at the apex of the claw would dampen it. Sure enough it did, by about 70%. I can live with the reduced volume and it’s no longer a concern. I’m hoping the glue will not break off after lots of use, I’ll let you know it it does, but for right now I enjoying the softer songs it produces.

The 7 oz. Homemade Brass hammer (Jan 2015) was a really great addition to my hammer set. I blogged about it here and I have used it as my primary plane iron adjuster. It’s also used any time I don’t want the mar the surface of metal object I’m striking.


Left to right, top to bottom – Lathe Center Striking Mallet. Spoon Carving Baton, Impossible Mallet, Small Soft Maple Mallet, Small Hickory Mallet, Large Hard Maple Mallet, Estwing 16 oz. Soft Face Mallet.

Mallets

There are myriad of different mallets for different uses. But I will concentrate on just the few types I own.

I made my first mallets in 2010 from hard maple I bought from the lumber yard. The first was a small mallet like the one pictured above, made from an article in an old wood-working magazine. I laminated the head from three pieces of the maple. I was using this first mallet in my first class at the Woodwright’s School making dovetails. While I was chopping out some wood the head exploded into 3 different parts (my understanding of gluing was still in it’s early stages). I embarrassingly looked around me to see if anyone noticed the mishap (I was at the rear most bench) and thankfully no one did. Only the handle survived.

It was about this time that I was able to get a stump from a maple that my Dad had cut down on the property where I grew up. I shaped this head and put in on the surviving handle and it has served me well ever since. I made a second small mallet just like the first except I used a solid piece of hickory rescued from my wife Beth’s childhood home. The hickory used to host a tree-swing in her childhood and gave her many happy memories, but the tree was toppled by a storm. I liked this mallet a little better as the Hickory was tough as nails and weighted more than the Soft Maple version. We have since started using the first mallet in our kitchen for pounding chicken breasts flat.

The second mallet I made was made at the same time and manner as the first “exploding” mallet and it is used for my heaviest tasks. It works great and time will tell if it has the same fate as the first. It has lasted 10 years, so I think I’m good.

The third mallet is a Estwing 12 oz. Soft Face Mallet. I use this as a “dead blow” mallet even if it’s not really one. I like its weight and it does the job I need done. Granted I haven’t done any really “big” jobs that need that kind of persuading (except the Split-top Roubo Workbench), so I may have to resort to an actual dead blow mallet in that instance.

Lastly, I have a Lathe Maple Mallet I use to pound mercilessly on my lathe center to set it into a turned piece. The mallet “takes a hit for the team” and gets damaged on every use to spare my center from being damaged.

  • Small Soft Maple Head Mallet (replacement for the exploded mallet)
  • Small Hickory Head Mallet
  • Large Maple Mallet
  • Estwing 12 oz. Soft Face Mallet with 12 in. Hickory Handle
  • Turned Maple Lathe Mallet
  • Roy Underhill’s “Impossible Mallet”

Left to right – 4 lb. Sledge Hammer, 3 lb. Straight Peen Hammer

Sledges

What can you say about sledge hammers, they’re heavy and they “persuade” things to move. They are invaluable in splitting logs and processing raw timber. I have had the 4 lb. Sledge for probably 30 years and I do not remember where I got it. The 3 lb. Straight Peen Hammer was a more recent acquisition from a yard sale.

  • 4 lb. Sledge Hammer
  • 3 lb. Straight Peen Hammer

Spoon Carving Baton

Batons, Gluts and Mauls

I only have one Baton, it’s used in my spoon and bowl carving kit. I turned this specifically for driving the meat cleaver I use for splitting wooden spoon blanks. It looks like a rolling pin with just one handle and that is probably what inspire me to give it this shape. Gluts and Mauls are usually made from tough wood stumps or tree sections.


Tools That Get Struck

Chisels (there are a lot of different types of chisels so I’ll create a dedicated blog about them in this “Tool Series”), Nail Sets, Steel and Wooden Wedges (not pictured). The Drawbore Pins are a couple of Craftsman Drift Pins that I pressed into service as Drawbore Pins. The nail set, punch set and wedges I’ve had for ages and could not tell you where I got them.

  • Drawbore Pins
  • Old Nail Set set
  • Old Punch Set
  • Steel Wedges

Accessary Tools

Hammers hang out with a many different tools that help them do what they do. Dowel plates, vices and anvils, these are all tools that are used with my hammers. The Dowel Plate is exactly that, used to make dowels. Best used with green stock, the dowel plate can also be used with dried sticks. Just make sure to reduce the stick to a square or better yet an octagon to get the best results. This is a nice tool to have when you need just a few dowels of a specific size. The small vise is used in so many ways, I can’t list them here. The Narrow Gauge Rail Track Anvil came from my father in-law and its origin is from a small coal tunnel in Appalachia. The Small Iron Curved Anvil came from a yard sale. The anvils are used primarily for peening pins and rivets and also clinching nails.

  • LN Dowel Plate
  • Small Modelers Vice
  • Narrow Gauge Rail Track Anvil
  • Small Iron Curved Anvil

Please subscribe (on right hand side on computer and very bottom on phone) to the mailing list to get future blog updates.

Until next time, keep making shavings and sawdust.

Peace,

Aaron

Copyright 2021 © W. A. Henderson