Category Archives: Tools

This is the overall tools category

Spring Pole Bookshelf?

2013-05-26 20.53.36 
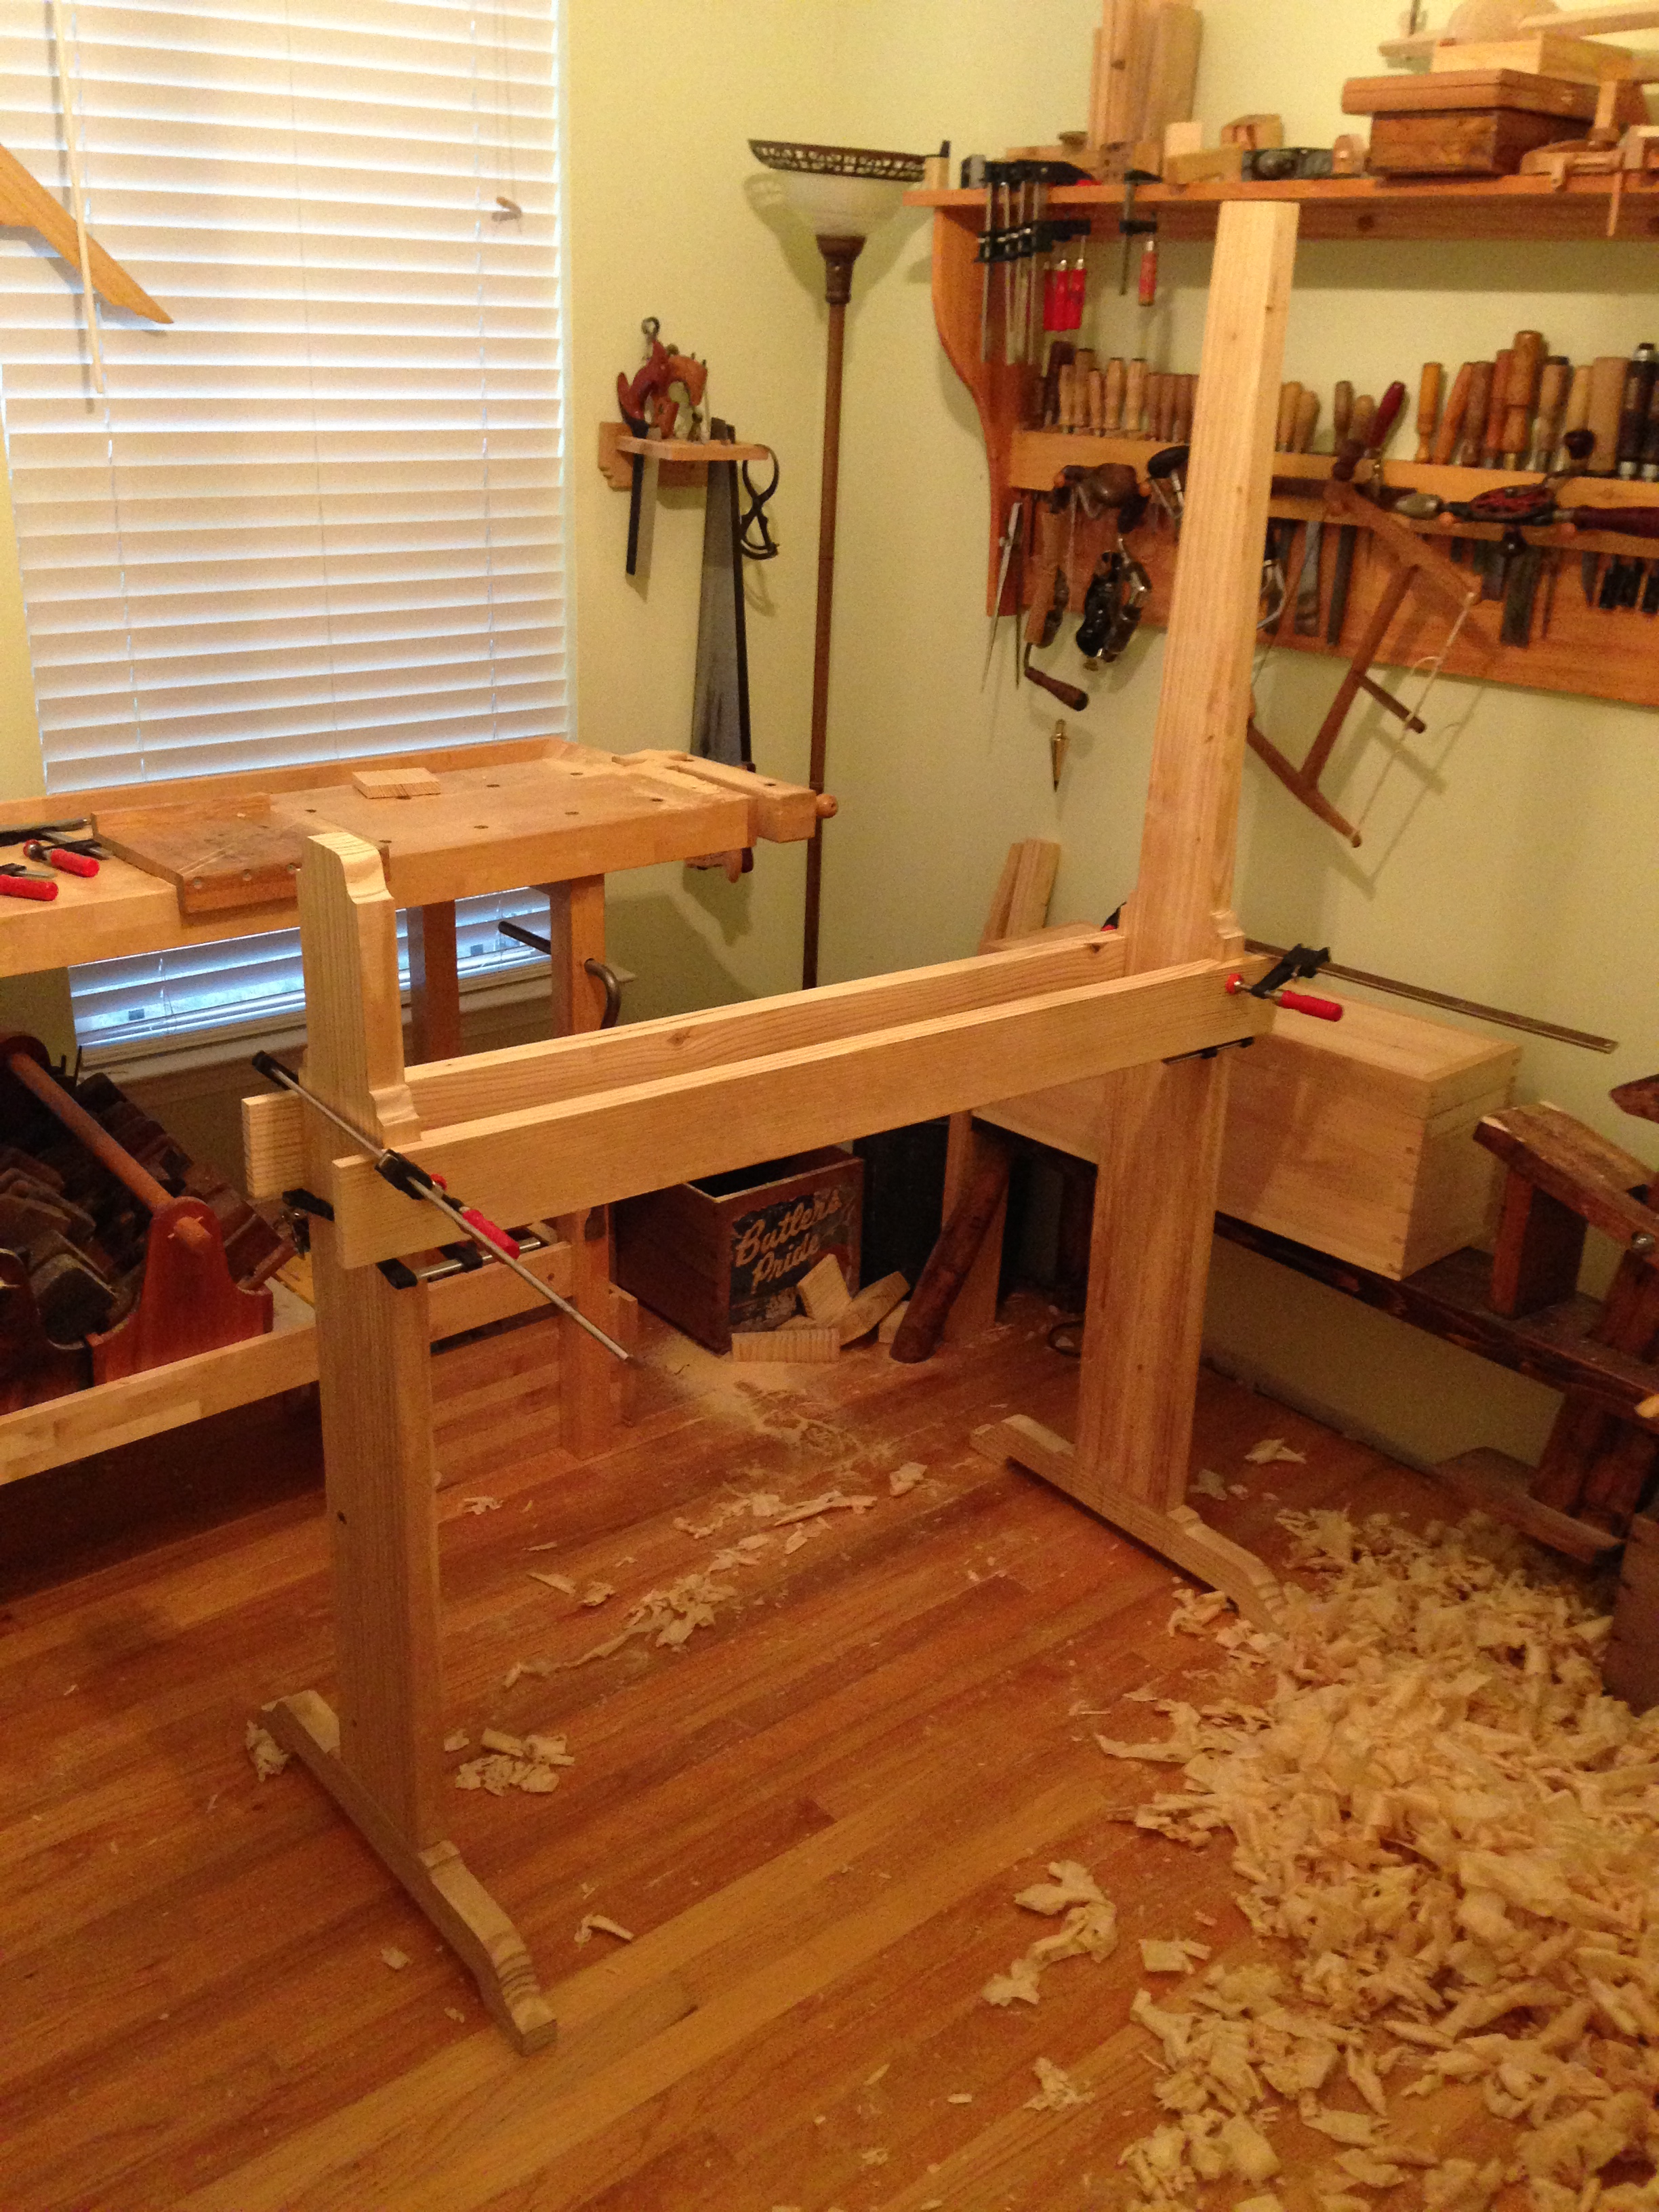
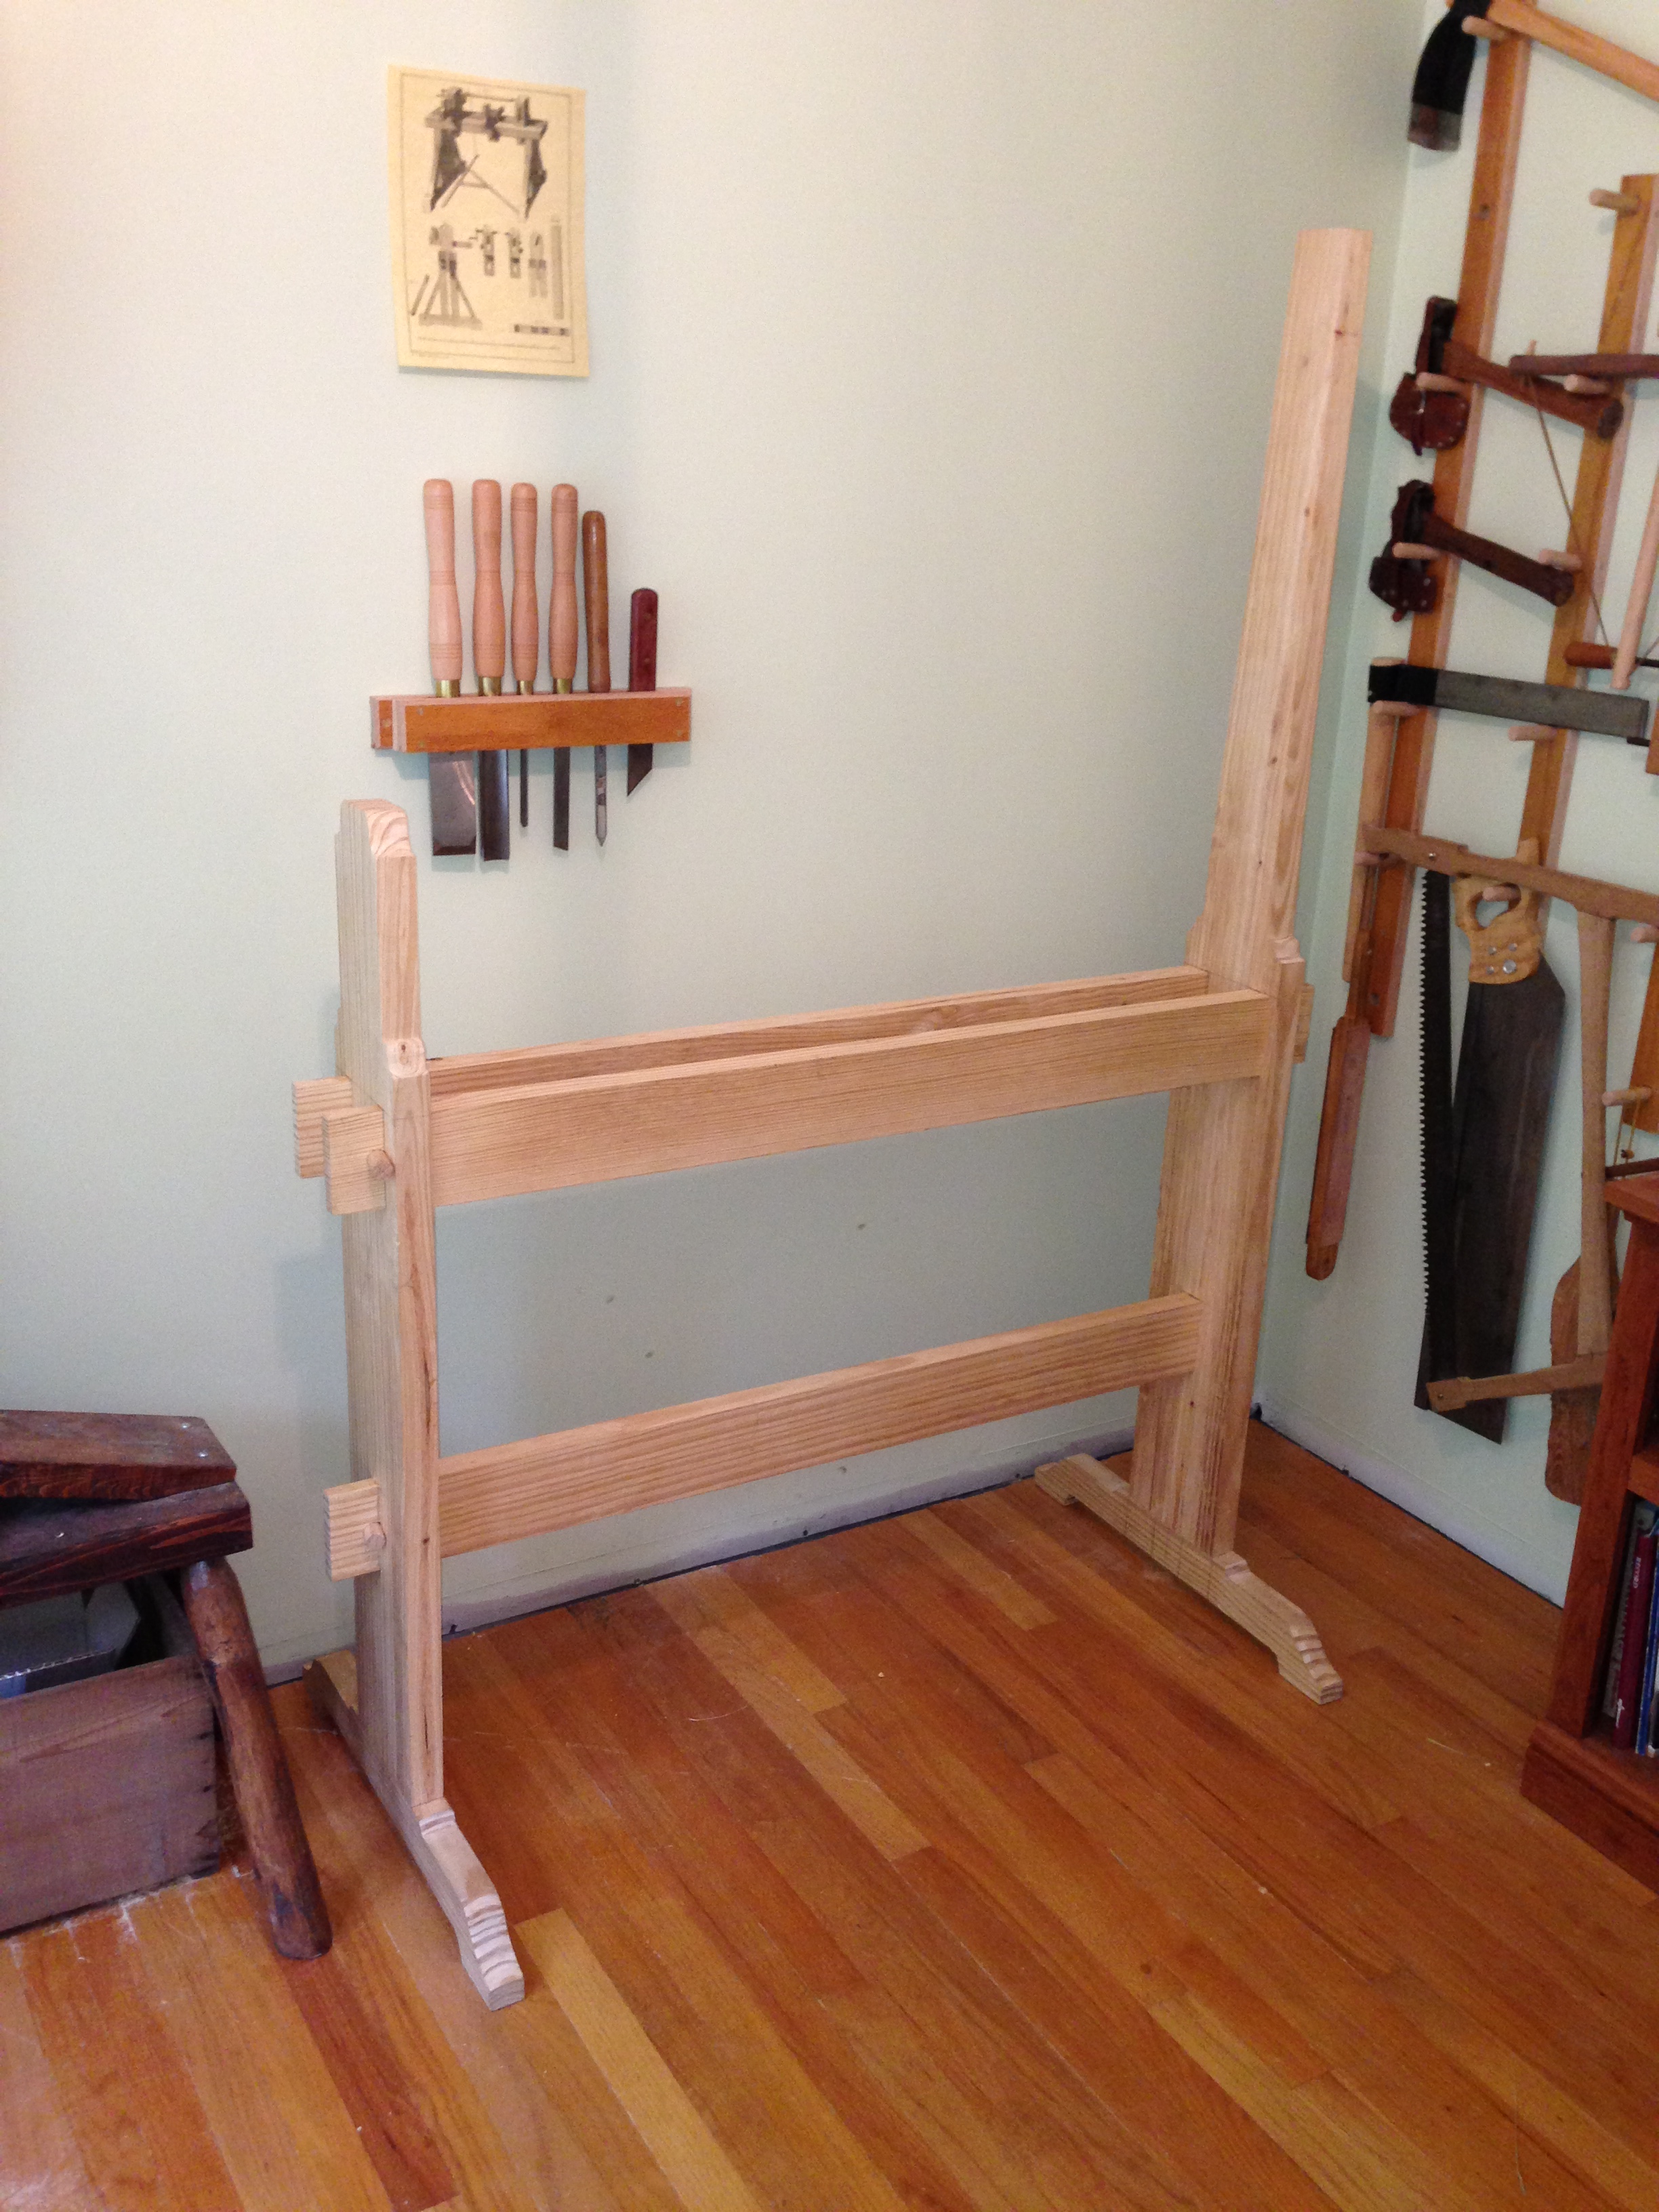
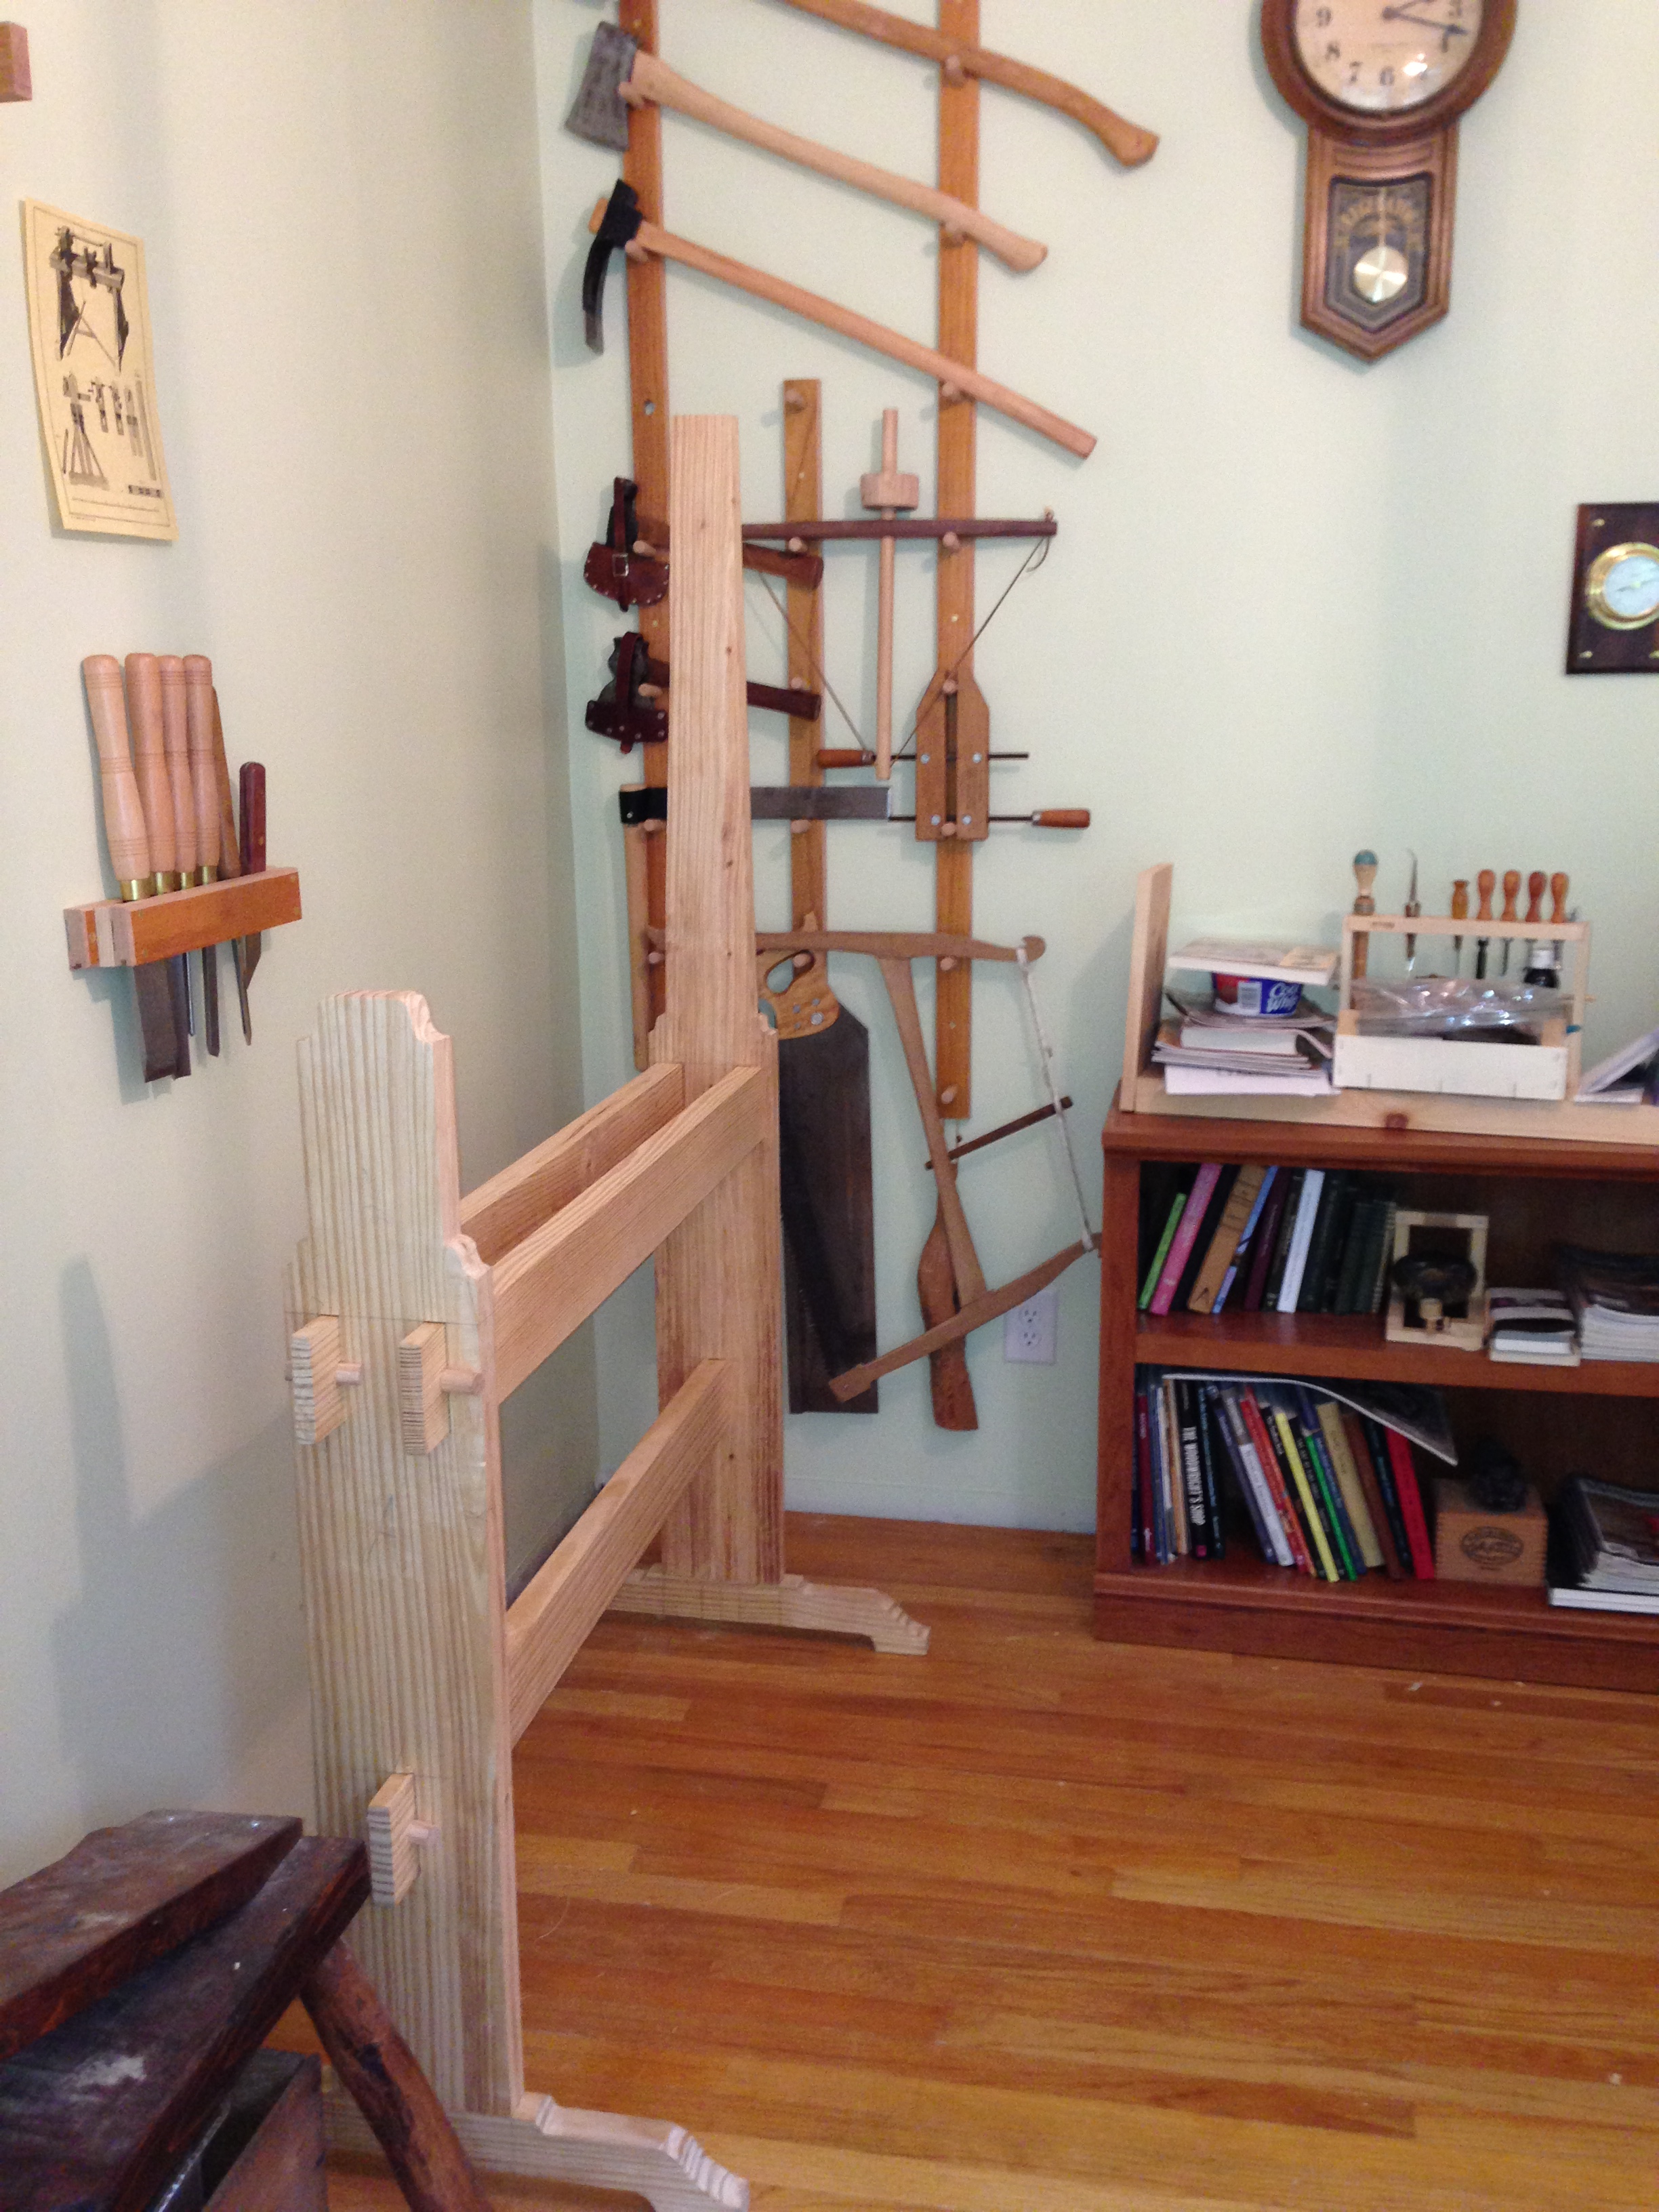
A few weeks ago, I posted some pictures of my spring pole lathe and the great progress I was making.  Well, as always, life happens, and manages to alter the best laid plans of men.  The lathe was to a point where it was looking really good.  After chopping out the mortises, I noticed a bit of stiffness in my arm.  I stopped working for the day and rested for the night.  My arm was very swollen and I could not fully flex it.  Where does the “Spring Pole Bookshelf” come in you may ask?  Please bear with me and I will explain.

I rested my arm for a week, and took anti-inflammatories, and it was feeling better, although still a little swollen.  Then, I made the mistake of using it again to install a storm door that was a Mother’s Day gift for my very patient wife.  It re-injured my elbow so badly that I had to do the unthinkable; I had to cancel my Moravian Workbench class at Roy’s Woodwright’s School.  I cannot tell you how disappointed I was when I realized I would not be able to physically stand up to a solid week of punishing mortise chopping, but I contacted Roy and let him know I was not going to be able to make the class.

Fast forward a couple of weeks to this past weekend, and after going to the Doctor and getting some stronger medication and a new arm brace, my injury was doing better.  I decided to take it slow and do some limited work.  I did some plane refurbishing, which amounted to some sanding of the sole of the plane and blade sharpening.  I took frequent rests and iced my elbow after each session.  I was not feeling any pain afterwards, and I could tell it was healing.

After doing some deep thinking about my predicament, I surmised that the root cause of the problem was the height of my workbench.  I have not discussed my workbench a lot as it is a commercial bench I bought from Grizzly before I knew any better.  It’s funny, for what I paid for this bench, I could have purchased the material for a really nice bench.  I have made do with this light-weight, thin-topped, crappy-vised bench-shaped object for almost 3 years now, and I have never adjusted the height.  That all changed.  I reduced the height of my bench by 4 inches.  I must tell you, this really made a huge difference.  Planing is easier and so is sawing.

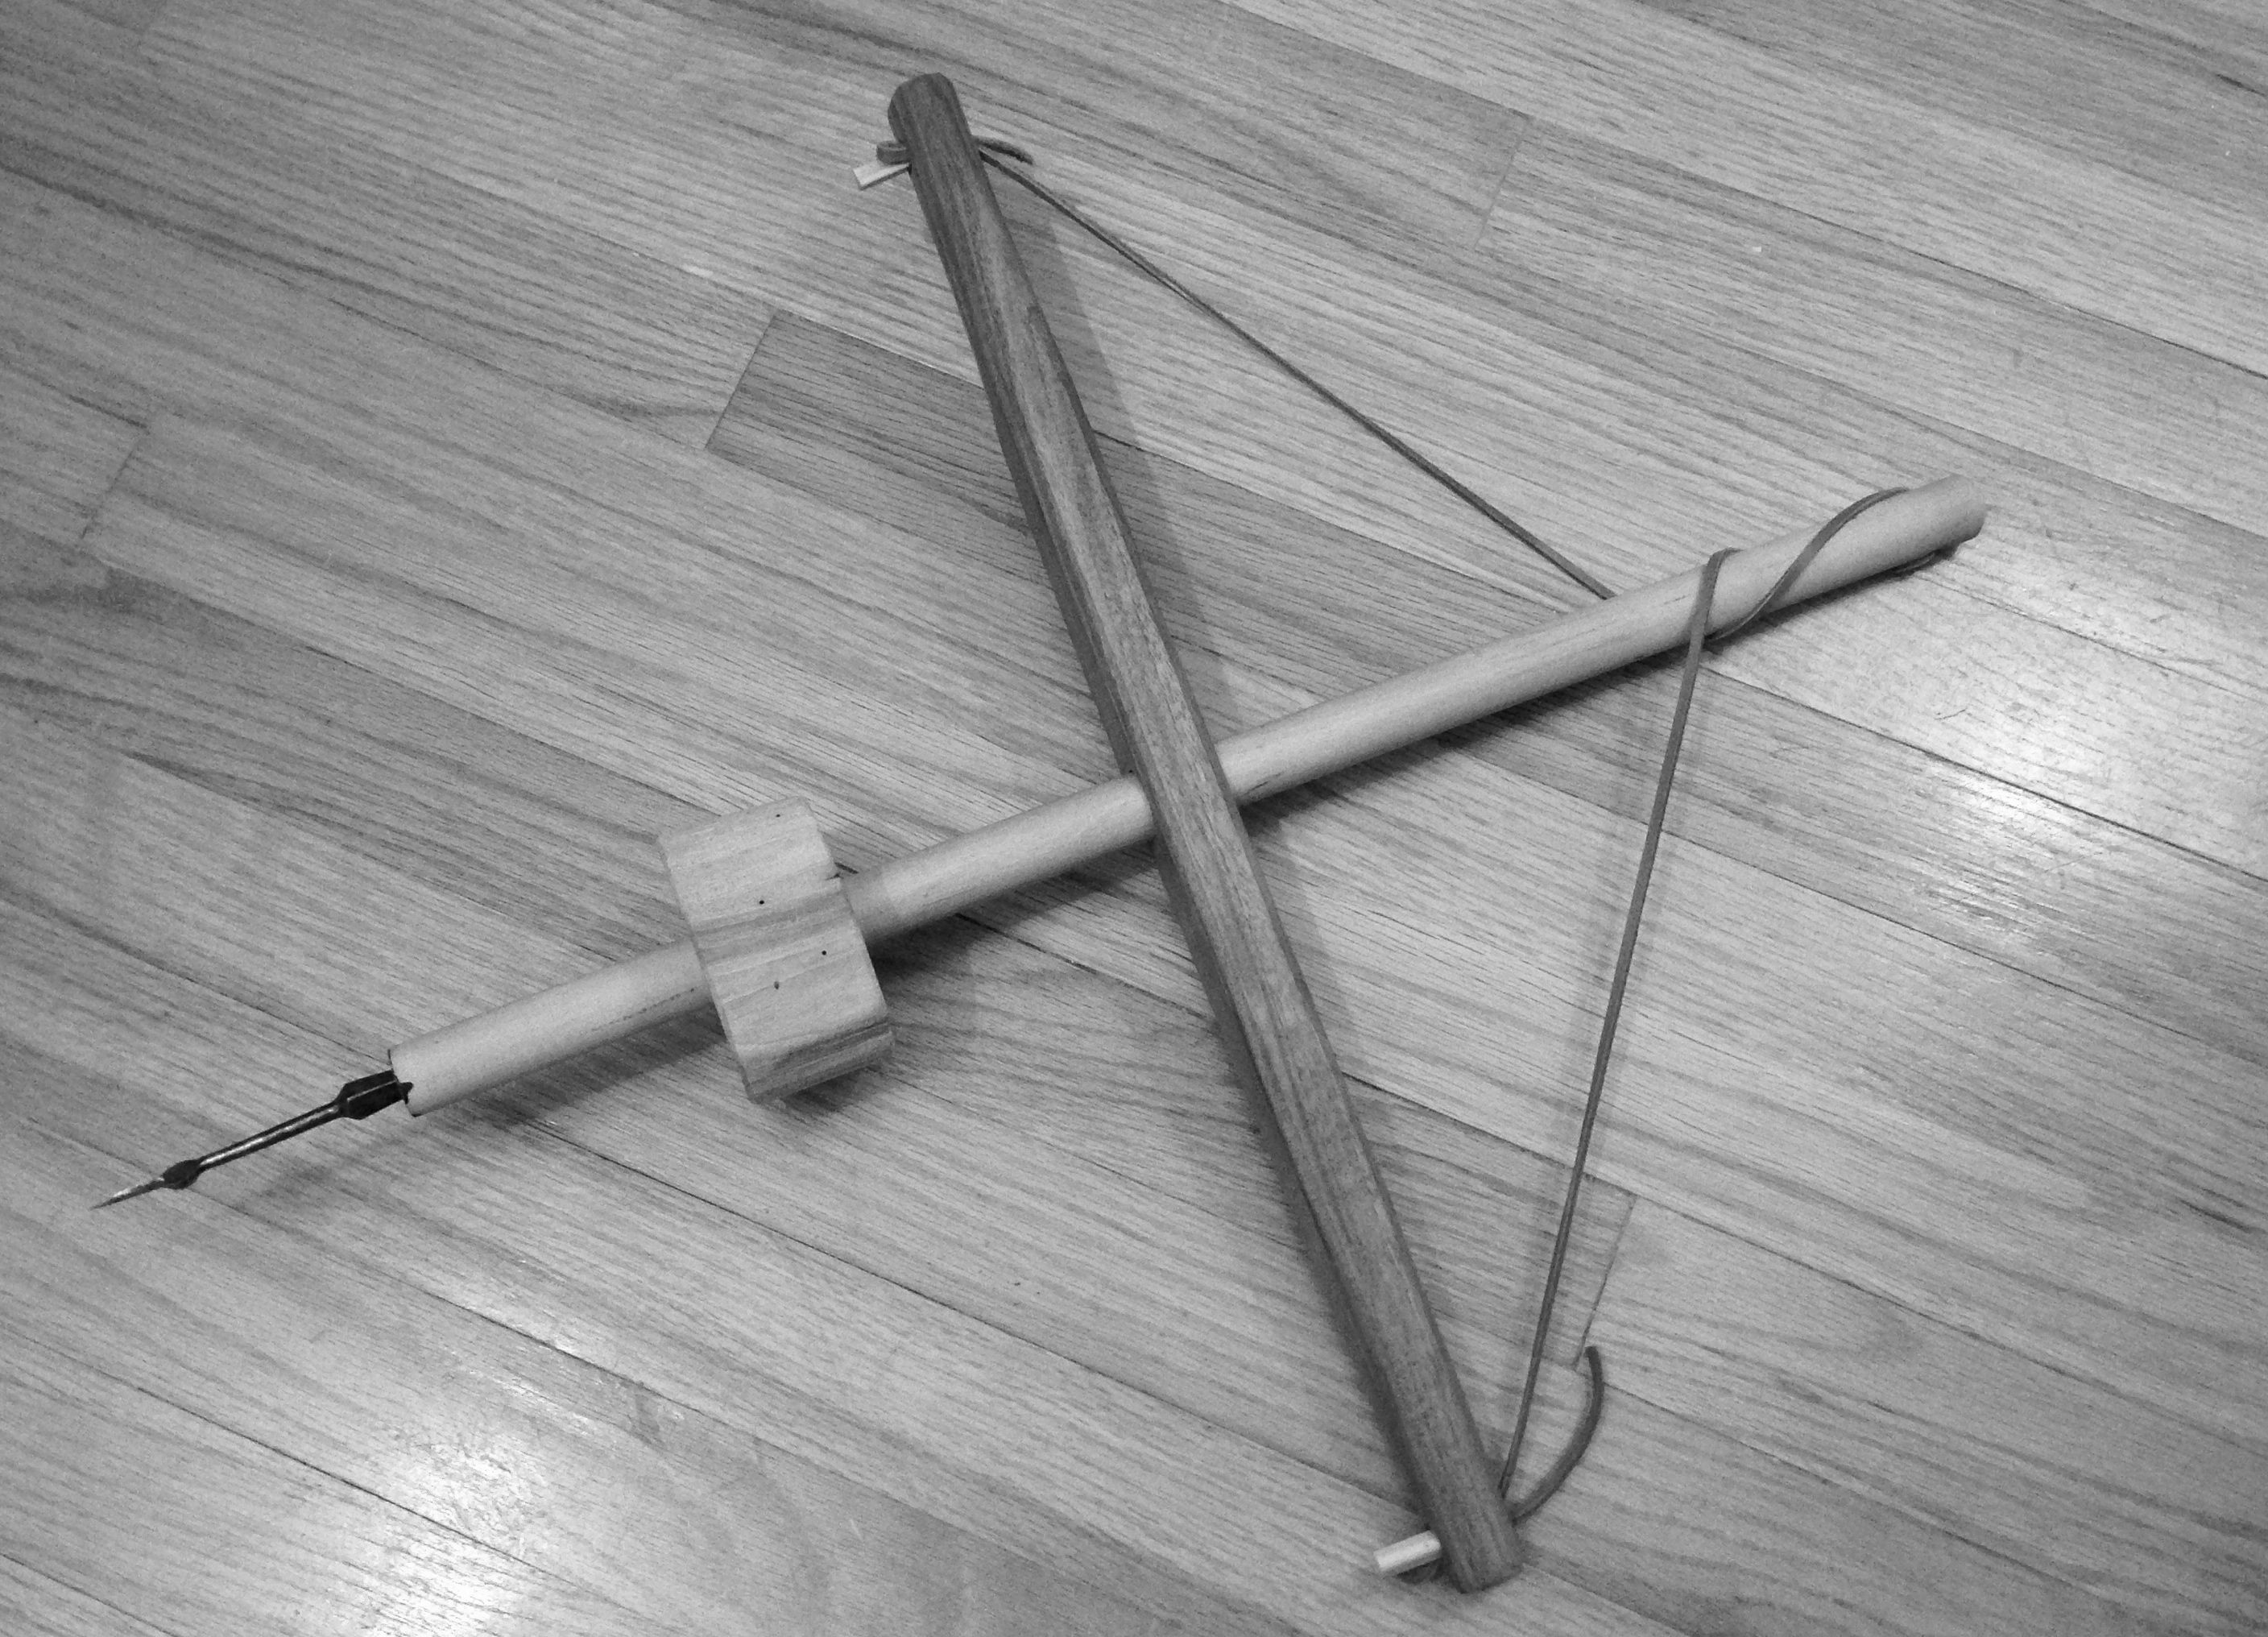
Now we get to the “Spring Pole Bookshelf” part:  As I was piddling around the shop this weekend, I was cleaning, and I placed s few books on my lathe.  They fit nicely on the bed and it got me thinkin’….If I cut a board the same shape as the tail stock, I could use it for a sliding bookend.  This was just the small project I felt I could tackle with my limited elbow capacity.

I sawed out the block of wood and drilled a hole for a 1/2″ dowel rod and inserted the rod after placing the bookend on the lathe bed.  I put my woodworking books on the lathe bed and adjusted the new bookend.  I cut a wedge to set the bookend in place and it worked great; who needs a lathe when you have such a nice bookshelf!  I took a few pics and then went to rest my arm and elbow on some ice.

2013-05-26 20.54.41

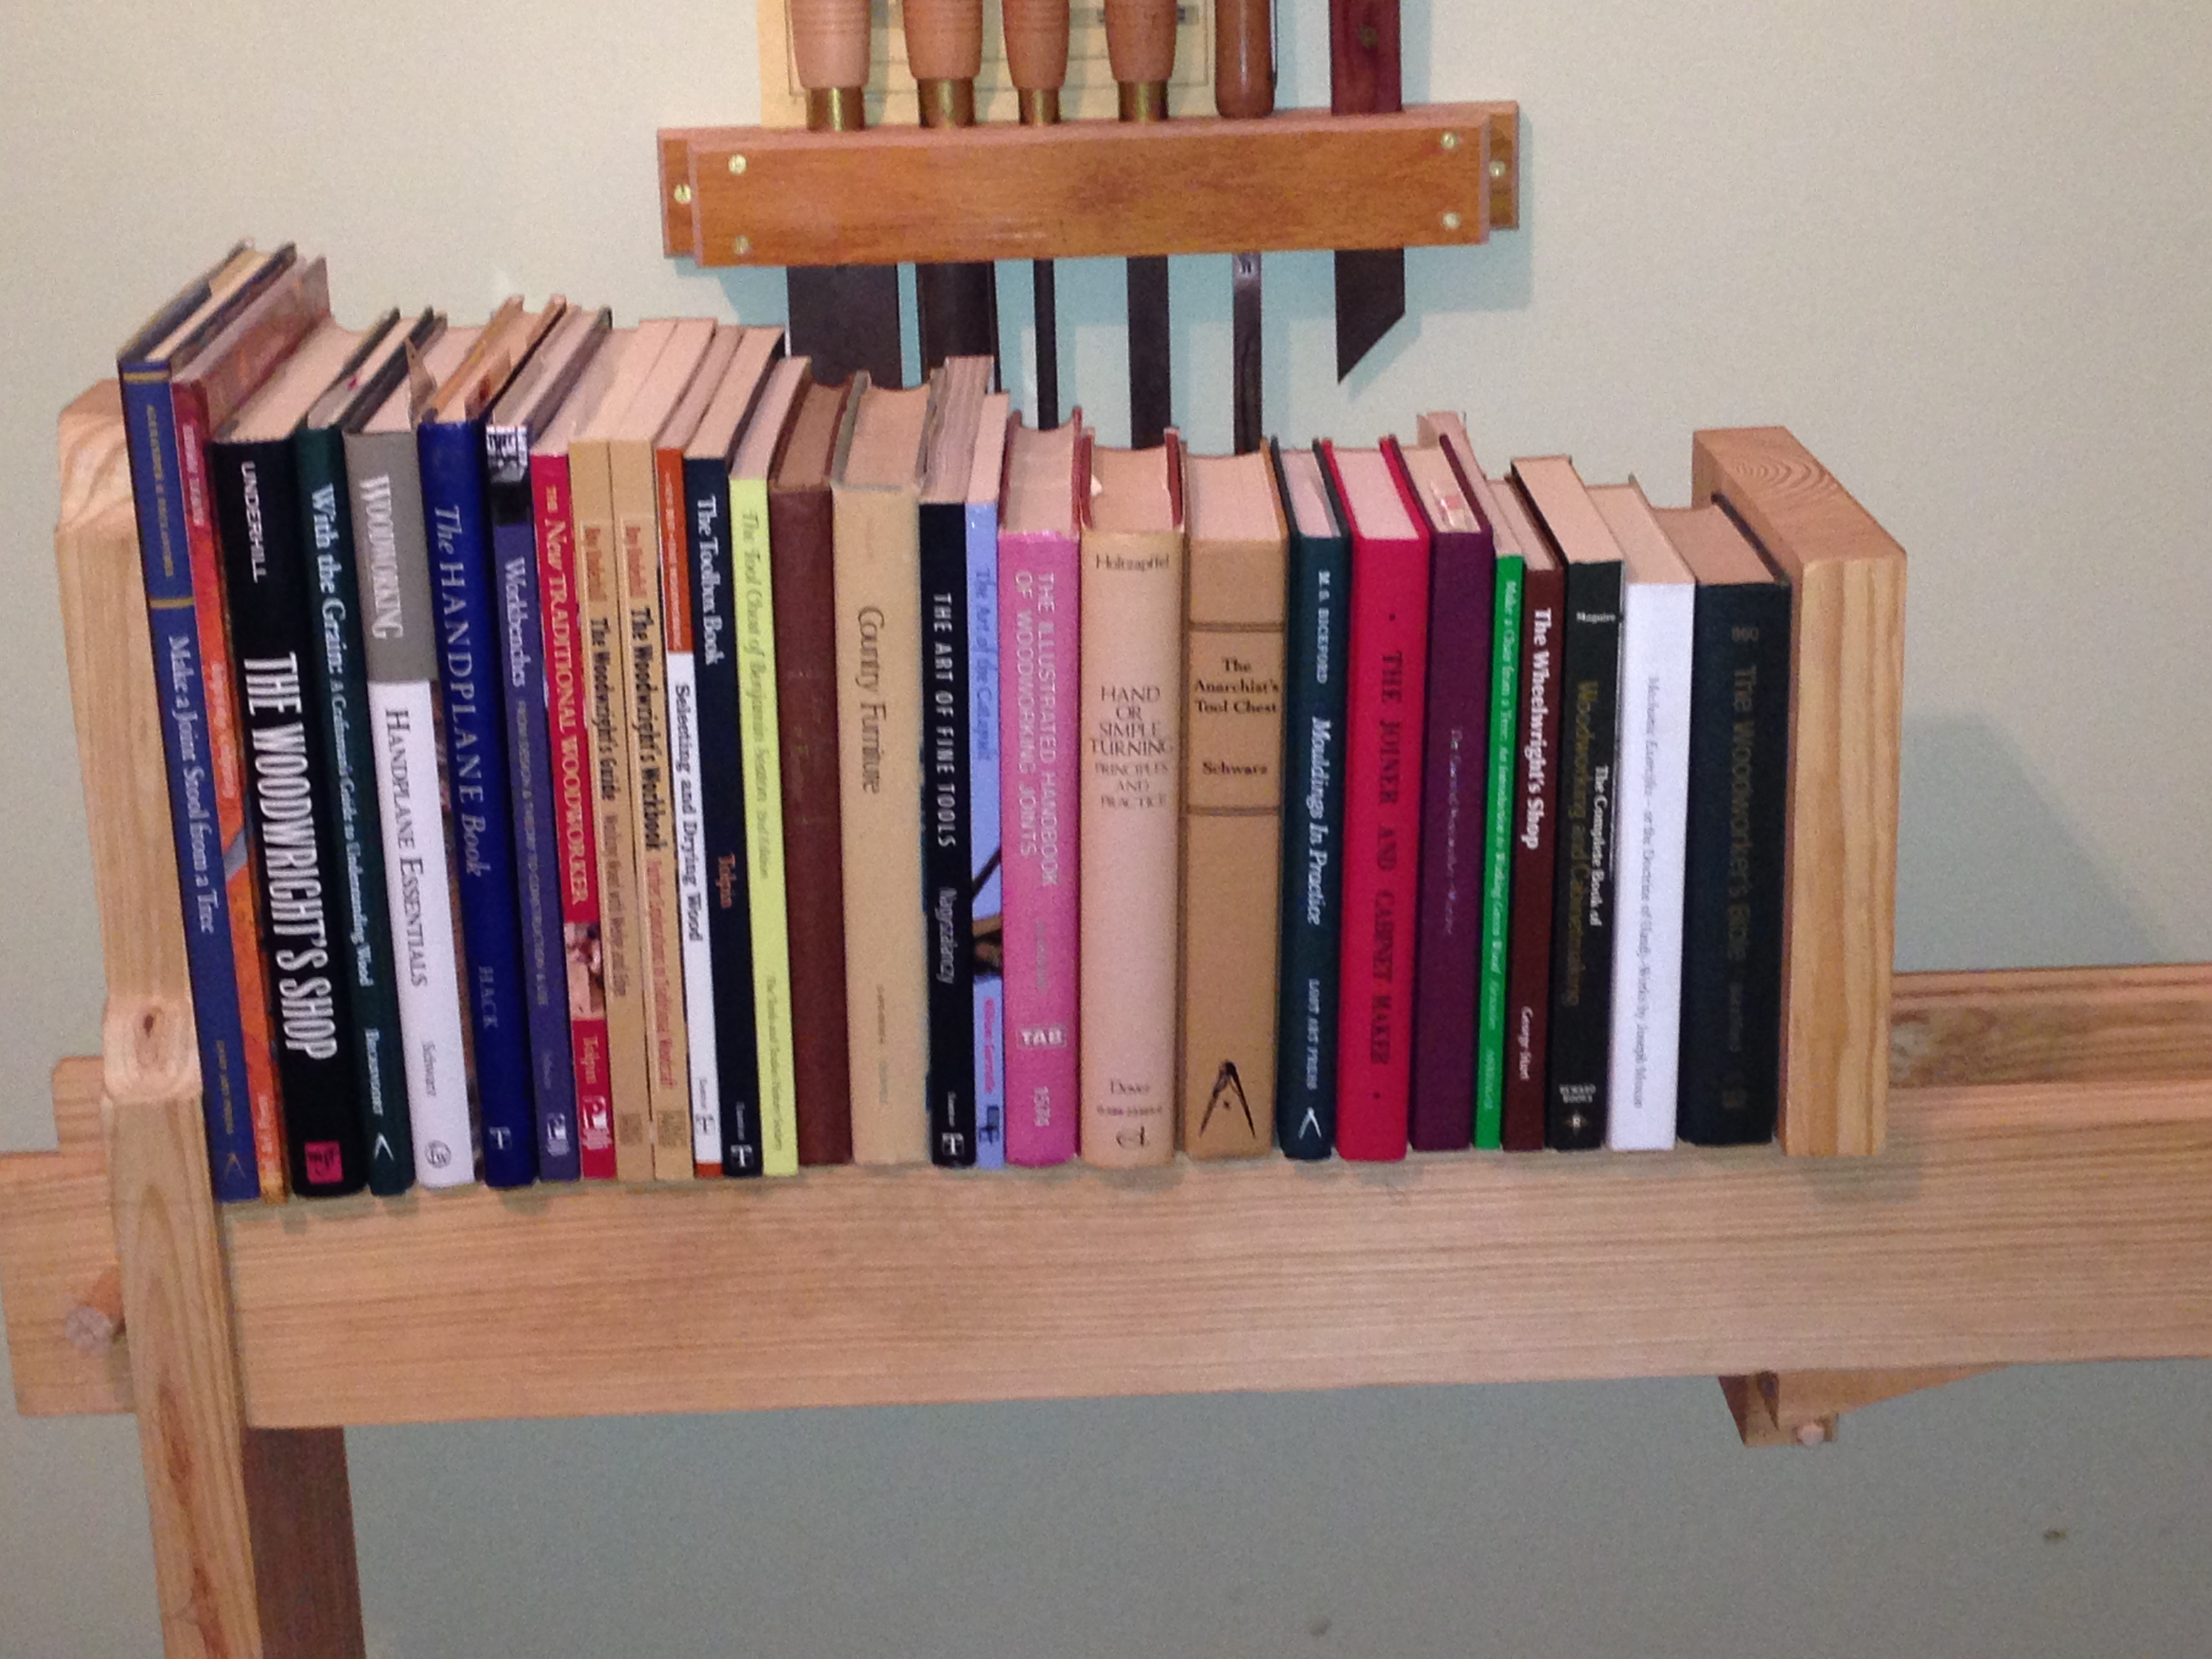
I like this design concept and I will probably make a bookshelf similar to this after I complete the spring pole lathe.  Yes, I plan to finish the lathe.  This bookshelf was only a side-diversion to entertain me until I am physically able to continue the lathe project.

I will publish a list of my books in a later post.  This is a combination of deliberate purchases, books I’ve had for years and lucky finds in the annual library book sale.  All of the LAP or Lost Art Press books I own are definitely deliberate purchases.

One side note, I was planning on doing a “The Onion“-esque post with a title like “Traditional Woodworker Injures Self in Freak Strain-Related Accident” but decided I’m not the professional humorist like those that populate “The Onion.”

-Aaron

It’s about time – let’s get this lathe started

Well, it has been too long since my last blog post.  I have had a lot of things going on and have not had a lot of shop time, but that dry spell has ended, and I finally got some time to work on my Spring Pole Lathe (SPL).  Earlier, I completed the short vertical side, but I did not blog that, so this will cover all my SPL efforts to date.

I am making my SPL out of Southern Yellow Pine (SYP).  First, I would like to discuss the condition in which you find SYP.  This stuff comes very heavy with moisture from the the home center, Home Depot, in this case.  The only good board that I found was really dirty.  After I cut it up to rough size, I had to plane it to get the top dirty layer off.  I did not want to use my good vintage jack plane for this, as I did not want to dull it, so I used my crappy late-model Stanley #5  jack plane (I made it somewhat better by replacing the plastic front knob and the tote – thanks, Ed!).  I used my scrub plane on surfaces that had a lot of material to remove, or were really dirty…I love my scrub plane, it saves me so much work.

After planning the stock, I squared and trued it.  Then, it was time to start laying out the short vertical.  As you can see on the plan here,   (http://www.woodturnersofthevirginias.org/wova_documents/treadle_lathe/spring_pole_lathe.gif) the mortise and tenon are split, and this was a challenge.  I just plunged ahead and drilled 1/2″ holes and chopped out the rest with my new Lie-Nielson 1/2″ mortising chisel.  This chisel is definitely a much nicer chisel than my old one I bought from Lee-Valley on sale for a set of 6 Narex.  The LN chisel cost more than the whole set of the Narex but it’s worth it.  Another example of “don’t cheap out on tools, you’ll just waste your money.”

One note about the feet of the SPL.  I find it very difficult to cut out long straight runs where the saw cannot start the cut, like under the foot in the hollow section.  So I drilled out the curve with a 1″ drill bit and used a keyhole saw to bring the cut around to the straight section.  I went far enough to fit my panel ripsaw in the slot, and proceeded to cut the rest of the way to the far end.  This worked great, and this is how I will do this operation from now on.

The ogee curves on the the feet presented me with a challenge.  Should I saw them out, chisel them, or what?  I decided to do both.  First, I saw cut a tangent that intersected both high points.  Then, I cut out a “V” in the valley of the ogee curve.  This got me close enough to use the chisel to chop away even more; being careful not to go too deep, and always chiseling downhill to the grain.  Then, I followed the chiseling with my rasps; first the course rasp to remove the most material, and then, the fine rasp to clean up after the coarse.  This left a really nice finish, and will require only minor sanding.

I repeated the same process for the tall side, and then it was time to put the ogees on the shoulders and cut out the upper portion on the tall side.  I used a compass to draw 1/2″ arcs of the small ogees on the shoulders, and for the top of the short side, I used 3/4″ arcs.  I then marked out the taper on the upper portion, and cut both sides with my rip saw.

Next, came the two bed rails and the the bottom stretcher.  I trued them up and cut all three pieces to the the same length.  I then aligned all ends, and marked them all at the same time for the tenon locations, with a framing square.  This ensured consistent spacing on all three tenons, and the uprights are parallel.  I cut out the tenons on the bed rails, and the stretcher rail, and then started on the mortises.

Side view getting an idea of the bed rail fit

Side view getting an idea of the bed rail fit

For the bed rails, it is important to have them planed to the same height.  The bed rails have to be level to allow the tail stock to slide freely and not bind.  Likewise, the inside faces need to be planed flat to each other.

Before putting the mortises in, I trued the uprights.  After cleaning and ensuring both upright-end’s mortise and tenons were tuned, and a good fit to the feet, I used a block plane to shave off the high-side foot, until the upright showed level and square to the floor.

To mark the mortise locations, I used a 3″ spacer between the bed rails, and clamped a support stick on the upright to support the rails while they were being marked on the uprights.  I was very careful in setting this up as to ensure the bed would be level, and consistent, in width along its length.  I really took my time to ensure this step was done precisely.

Round or square wedges?  Well, Roy used round so that is what I chose.

Side view

Side view

Beauty Shot of end of lathe

Beauty shot – end view


Next Entry: I will cut the slot and holes for the poles and finish the tail stock and rocker-arm assembly, and maybe the tool rest.

-Aaron

Up and Down and Round and Round

Pump_Drill

There are times in-between the major projects that I do small side projects just to see if I can get something cool to work.  One of my interests is primitive fire starting techniques.  There is some good overlap with this interest and my traditional woodworking.  Well, a Pump Drill is definitely a project that has both aspects.  It can be used as a drill or a fire starting tool.

First the fire starting.  It is not certain if the Iroquois invented this for fire starting or were culturally contaminated by seeing the pump drill used by the settlers from the Old World.  Either way, it is a very effective fire starter if built right.  I have not used mine for lighting fires yet, as I have not built a proper chuck to house either a drill bit or a piece of fire drill stick.  If you are interested in the fire starting aspects of this tool I am providing below a few links that will give you more information.

Primitive Pump Drill fire starter

Field and Stream Pump Fire Drill

As this is a woodworking blog, I will concentrate on the boring aspects of this tool.  There is really very little information on when this tools was invented, but it is known to have been used as far back as middle ages and evolved from the bow drill.

I have seen this drill used in a few videos and decided to make one of my own.  I had the basic components on hand a 7/8″ dowel, a nice heavy piece of hickory, a scrap of walnut and some leather thong strapping from my recent leather work.

pump_drill2

Construction

1) Make the flywheel from the hickory.  This took the most time.  As my lathe is not built yet, I had to resort to, shall we say, more crude techniques for making a round disk out of a really, really hard piece of wood.  I made the disk about 1 1/2″ thick and 3″ in diameter.  I could have made it a bit wider, but a too large flywheel will block your view of what you are drilling.  I then drilled a 7/8″ hole in the center as true to 90 deg. as I could.

2) Make the shaft.  Well I already had the dowel and so I just cut it to length at about 18″ and put it through the hole in the flywheel about 4″ from the bottom tip.  I drilled a 1/4″ hole thru the flywheel into the shaft and drove a 1/4 dowel in to secure the flywheel (no glue needed). Then drill a 1/4″ hole in the top end of the shaft for the strapping.  I also, very carefully, drilled a 1/4″ hole in center of the tip of shaft.

3) Make the pump stick.  Drill a 7/8″ hole in the center of my walnut scrap that was about 18″X2″X7/8″.  Then drill a 1/4″ hole for the strapping in each end about 3/4″ from the ends.  To finish I tapered the ends on the shaving horse with my draw knife and spokeshave and beveled the sharp edges with my new LN block plane.

Assembly

This could not be easier, I added some bees wax to the shaft where the pump stick would be sliding up and down.  Then slide the pump stick on the shaft and then attach the leather strapping thru the hole in the tip and secure with a small wedge.  Next pass the strap through the top hole in the shaft and then back to the other end of the pump stick and secure in the same manner as the other side.  You should adjust the pump stick to hang about 1″ – 1 1/2″ from touching the flywheel.

IMG_0724

In the video below, you will see that for demonstration purposes, I added one of my spring pole lathe centers to the tip on the shaft so that it would spin when I pumped it.  I did make a trip to ED Lebetkin’s awesome tool store and purchased two drill “spoon” type bits that work really well in these types of drills.  Ordinary twist bits will only cut on half of the strokes and are not very efficient.  These spoon bits cut on every stroke as they have a cutting edge on each side.

Next Steps: Make a chuck for the square tapered bits and one for the fire starting too.

One final note; once my lathe is finished, I want to make a really nice version of this drill with a polished stone flywheel and turned components in a couple of different sizes.

-Aaron


Got me some SYP

As I mentioned in my first entry for the Spring Pole Lathe, I will be making regular updates on my progress for this project.  We had company this weekend and I had the pleasure to share some shop time with my new friend who’s name is also Aaron.  We had a blast and I hope he had as much fun as I did.  After our guests continued on their vacation, I decided to go to my favorite lumber store, Capital City Lumber, and purchase the southern yellow pine, or “SYP,” for this project.  Much to my dismay, they do not carry dimensional SYP.  I could not believe it, then I remembered I bought some SYP at my local Home Depot for our raised bed garden last year.  Armed with this information I headed straight for the nearest Home Depot.

If you have never purchased or worked with SYP, then let me tell you, it is heavy stuff!  I remember the 2x10x12s I bought last year were really heavy.  This time I was buying 2x12x12s and they are almost too heavy for me.  I had a lot of difficulty choosing boards because they were so heavy and the selection was less than desirable.  I settled on two boards and used the cut list I had prepared to have them cut the boards to a more manageable size.  I loaded up the boards and headed home.

Once home, I had some additional cutting to do on the table saw.  I know, I know what you are saying:  “You used a power tool?”  But 24+ feet of ripping 2x stock is not what I consider fun.  Please remember even the olde timers had access to sawmills and were able to buy pre-dressed stock.  This is just a modern sawmill.

After I had rough cut all my stock to length and width, I created a lettered parts list and a cut diagram from the drawings.  Next it was time to surface plane.  When I said that this lumber was less than desirable I mean, among other things this lumber was dirty.  I do not have a thickness planer so I hand-surfaced the stock with a non-valuable junk plane so as to protect the sharp blades of my good planes.  As you can imagine, we are taking about 10s of linear feet here so this will take me a while to finish.  This is just as well as this stock is a little wet.  Once planed, the stock looks really nice, see the before and after pics below.

Clean on the left and needs work on the right

One other thing, I purchased two “Gramercy Hold Fasts” from “Tools For Working Wood” on Friday and they were delivered on Monday.  A hold fast is a clamping device used on a bench in predrilled holes and is very convenient for holding stock while chieseling, sawing, and chopping mortises to name a few.  I added small pieces of leather to the flat ends to help keep from marring my work pieces.  Here is a picture of the hold fast in and out of the bench hole.

One interesting factoid about these is they work better in thicker benches (The manufacturer suggests a minimum of 2″) and not so much in thinner benches.  My bench is very thin, it is 3/4″ and only have one hole bored that is about 5″ deep.  I had figured that the 5″ inch hole would work best and the thinner ones would be useless.  As it turned out the thinner ones work best.  I think the 5″ hole may actually be too deep.  I do not want to use them too much on the thinner holes as the hold fasts will probably damage them.  I will add a piece of leftover oak flooring to the back of my bench to give the holes more thickness, making them stronger and less likely to be damaged.

When I complete the workbench class this spring, I will finally have a bench made for traditional woodworking and the hold fasts will have a nice place to play.

Stay tuned for more, later, on the SYP and spring pole lathe.

-Aaron

First Step

André Roubo's illustration of a Spring Pole Lathe

You know the saying:  “Every journey begins with the first step,” well this is true for my woodworking projects as well.  Last month I attended the MWTCA tool meet in Hillsborough, NC and I purchased a old loom shuttle for $5.00.  If you are not familiar with loom shuttles, they are used to pass the horizontal thread through the vertical threads and they have steel cone shaped points in each end.  It is these points that I am interested in as centers for my upcoming project – a Spring Pole Lathe.  These points make excellent dead centers as they are perfectly round and smooth.  I did not mind destroying this particular shuttle because it was made out of some sort a laminate and was not very old.  I would have had a much harder time bringing my self to destroy a wooden antique, even for a good purpose.  One other plus, I was able to re-purpose the spool in the shuttle as a leather burnisher.  It works great for this task.

What is a “Spring Pole Lathe” you might ask.  A lathe is a machine used to turn round objects like spools, spindles, bowls and tool handles.  A Spring Pole Lathe is a more traditional type of lathe that has been around for 1000’s of years.  This is a reciprocal, driven by a cord wrapped around the piece being turned, and only cuts on the down-stroke of the foot treadle.  There is more information at the end of this article about this amazing tool.

Back to the shuttle points.  Well, saying that they were smooth is stretching it a little; they had a very light coat of rust.  Fortunately, they have a nice 3/8″ shaft and mount in a drill chuck perfectly.  A few minutes with course to finer sandpaper and they will have a nice smooth finish.  I hope to provide each step in the lathe building process in as much detail as possible to show how this is built.

I will be using Roy Underhill’s plans for a breakdown model for easier transport.  I have been planning to build this for some time and I have just finished a lengthy house project and I have promised myself that the lathe is my next major woodworking project.  I know Roy is tired of me asking tons of questions about the design.  I just want to have a usable tool that I will get many years usage out of.

Here is the online information and some pictures of the lathe.  The Woodwright’s School has a class on making the lathe Making the German Spring Pole Lathe with Roy Underhill.   I have enough experience now that I should be able to make this myself without the class.

Here is a link to the Wood Turners of Virginia’s web site. This is the plan I will be using to make my lathe.

Here is a link to a Lee-Valley article about spring pole lathes and some of their history: http://www.leevalley.com/us/newsletters/Woodworking/5/5/article2.htm

The Woodwright’s Shop featured the spring pole on a couple of episodes, but the one I am making was shown on Season 24 episode 5.  Unfortunately that episode is not currently available online.

My son Will with Roy being Roy

The picture on the left is Roy, who was helping my daughter, Malena, with her turning.  This was taken in Jan. 2012 during the Lie-Neilson tool event at the NCSU Crafts center. The picture on the right is my son, Will, and Roy being Roy at the Jan. 2013 Lie-Neilson tool event at the NCSU Crafts center.  Kids change but Roy stays the same.

The wood that I plan on using is strong, hard, cheap and plentiful SYP, or Southern Yellow Pine.  This stuff is heavy and strong.  It is a good choice for this lathe, and it available most anywhere in my area.  I will be getting my supply from Capital City Lumber, local in Raleigh.

I cannot wait to get started and I hope you will join me in this fun, and useful project.

-Aaron

“Keep those Olde Tools sharp”

English Layout Square

I hope you had a nice Holiday!  I sure did.  I got a chance to spend some quality time in the shop the last few days.  This English Layout Square is a project I have been meaning to take on for some time, but just never got around to it.  After seeing the re-run of the Woodwright’s Shop online where Roy and Chris built this, I had to make one too; it looked like too much fun to pass up.

I stopped by Home Depot for some errands and decided to get a 1/2″ piece of poplar to do this English Layout Square.  I knew it would not take long to build and would be a fun project.

This project was also published in the December 2010 issue of Popular Woodworking, and there is a free Sketchup drawing available as well.  That is what I used as a reference and I was able print out the nice curves, and transferred them to templates which I made out of some scrap maple.

It took me two days to complete the square and another day to tune and apply the finish (boiled linseed oil and paste wax topcoat).  I also took the time, while the linseed oil was drying, to make the holder out of some cherry and scrap poplar; it really accents the square and keeps it secure on the wall.

This may look like an easy project, but it did challenge my budding skills.  First, I had to make some pretty accurate cuts on the half lap joints.  Then, clean them up with the router plane…I love the router plane; it makes flattening cheeks on a half lap possible.  I also got to use my shoulder plane to true the shoulders and really make a clean joint.  I also had to cut out the areas between the horizontal stretcher with a saw and chisel – this is harder than it seems.  The final challenge was the half laps on the legs.  You cannot just saw these out.   I used a saw to cut 3/4 of the way and used a chisel to remove the bulk of the waste and then switched to the router plane once again to flatten it out.

After all that cutting and fitting, my joints were flat and tight.  I am really pleased with this square and hope to get many years of use out of it.

Here is a picture of the square out of the holder.

I spent s little more of my Holiday thinking about future projects.  For a Christmas present to myself, I bought John Alexander’s “Make a chair from a Tree” DVD video how-to, and I also bought a used copy of the book which is out of print  (real pricey) second edition book by the same title, originally published in 1994.  I am inspired to make some chairs from newly dead trees and start a whole new aspect of my woodworking journey.

Here is another book I own that was also authored by Alexander, as well as Peter Follansbee, titled “Make a Joint Stool from a Tree.”  For the project in this book,  I will need to complete my lathe first in order to make the legs…but it is on my to-do list.

-Aaron

A Good Day

Mystery Mallet, Popular Woodworking, Saw Box

You know, woodworking is so much fun.   I just love the chance to carve up some wood with sharp tools and a little skill; after which, you have something new that you made, and can be proud of.  After my previous weekend escapade (see A Bad Day post), I was in the need of some serious fun.  The chance came in the form of a class at Roy Underhill’s Woodwright’s School.  I was scheduled for the Mystery Mallet class on Saturday.  This is a whole day class where you make an intriguing and beautiful woodworking puzzle.  The class fit the bill perfectly to balance the experiences of the previous weekend.

Whenever I take classes at the Woodwright’s School, the time passes so quickly.  I guess that is a good indication that I am having a good time.  My neighbor, Bob, and I signed up together for this class.  I always enjoy taking classes with Bob as he provides both humor and frankness to any situation.

My neighbor Bob listening intently

Roy really does a great job of teaching and making you feel at ease.  He is very supportive, and I always learn some new technique or tip to help me improve my skills.  I was a little nervous about taking this class as it does require some precision cuts, and as I mentioned in my last blog,  sawing is one of the areas where I need more experience.  It turned out that my nervousness was unfounded, as Roy showed us some techniques that help keep your cuts clean and straight.

Roy attempting to teach me how to saw

For the most part, the day went very smooth.  I was pleased to see that I was able to do all the cuts very accurately, and I did one the best mortices I have ever carved.  This really gave me a lot of confidence for what was to come.  I was also pleased with the pace of my progress; I was keeping up with the class.  You see, I like to take my time in woodworking, so sometimes I lag the class.

At lunchtime, we ate at the S&T Soda Shoppe (they make the best milkshakes in the world).  This is always a great way to slow down and discuss the class and other topics with Roy and to get to know your classmates.   I also saw Will Myers there; he is the instructor for the Moravian Workbench class that I am scheduled to take in June.  I had met Will in a previous saw sharpening class taught by Bill Anderson.

After lunch, I went to Ed Lebetkin’s tool store.  Boy, this place is wonderful, but care must be taken to not empty my bank account.  My wife, Beth, is pretty understanding, and knows when I go there I usually buy a tool….or five.  This time, I only bought a 24″ folding rule and a #12 hollow moulding plane.  This was money well spent as I needed both of these items.  The #12 plane was a match to my #12 round moulding plane that I already own.  Fortunately, I was through with my purchases when I heard Roy hitting the ceiling with a board, announcing class was commencing.  I hurried downstairs to the classroom, not wanting to miss one minute of class time.

I saw the way

I did not mention it before, but there is some risk involved with this project; it can just “explode” during final assembly.  I know it sounds a bit dramatic, but that is exactly what happens sometimes when assembling these mallets.

Back in the classroom, the class proceed as scheduled until Roy stopped the class to assemble a student’s mallet.  The whole class held its breath as Roy and the student drove the handle into the mallet head.  They finished, and the handle bottomed out; now the moment of truth:  Time to release the vice holding the mallet head.  If everything is good, there will be silence; if not, there will be a “CRACK!”  Fortunately for the student it did not crack and it looked good.

I finished mine next.  I followed Roy’s advice and made all the necessary adjustments to the handle.  I fit it in the top as a test and everything looked good and not a bit tight.  Roy asked me if I wanted to proceed and I said “Yes…” and then he said “You know it could go very wrong,” and I said “Let’s do this” and he said “OK….”

We started hammering away at this thing and it was slowly proceeding, moving very little with each mallet blow.  Roy stopped for a second since we had stopped progressing and decided to get out the Big Mall.  We proceeded to hammer away at it until it bottomed out.  Then we removed it from the vice and found that there was a section that had caught and split off.  Roy knocked it back in place and pronounced it done.  Not planning to actually use this mallet for wood working, it looked pretty good with only a small crack where it had split.  Roy said with some block planing and a little wax (a lot as it turned out), it would look great.

Roy be-knighting me

The rest of the class finished up in short order; all did a good job on their respective mallets.  I had Roy sign the Popular Woodworking article featuring the “Mystery Mallet” and we said our goodbyes.  All in all “A Good Day.”  As I previously mentioned, my next class is in June and it is a five-day class, after which I will have a great workbench.

That week cannot get here soon enough!

-Aaron

p.s. Roy wrote a great article about how to build a “Mystery Mallet” for Popular Woodworking (April 2012 issue # 196) pictured in the beginning of this blog post.

Tools, Tools, Tools!

On Saturday the 15th of September, my brother, Berry, and I went to the Mid-West Tool Collectors Association annual tool meet here in Raleigh, NC.  This is one of my favorite meets as it is not far from my home, the weather is usually not too hot, and there are tons of tools and experts to tell you all about them.

Here are some of the highlights of this years meet:

  • An Estate sale with a lot of different quality levels of tools and lot of bargains
  • Lots of vendors
  • A talk from a couple of members about the “Antique Roadshow” and “American Pickers”
  • Bar-B-Que otherwise know here in this area as a “Pig Pickin”
  • A tool auction

I love the excitement of the meet and how everyone loves to talk tools.  I learn so much, and like to talk to the “Old Timers.”

Height Adjustable Cast Iron Legs

The real action for me this year was the Estate Sale.  The prices dropped throughout the day, and if your item was not snatched up before it got to your desired price, you could get some pretty good deals.

I purchased several items during the meet (I’ll spare you the detailed list) but the one that has the most potential is:

A set of iron workbench legs

I know they don’t look like much now, but when I get them sand-blasted, painted and installed under a marble or stone slab it will be a whole different story 🙂

Now just 362 more days (give or take) until the next meet.

-Aaron


Tool Mod Disaster


It all started when I followed Chris Schwarz’s advice and bought the Glen-Drake Tite-Mark marking gauge.

The Tite-Mark gauge has been as useful as Chris described it, and I love this gauge! It is not the problem.  I also have a 90’s version of the Veritas marking gauge from Lee Valley tools[1].  This is a nice gauge also, and I have used it for years without a problem; however, after seeing how useful it was to fully retract the blade into the body of the Tite-Mark gauge, I came up with what seemed to be, a brilliant idea:  I would drill out the body of the Veritas so I could fully retract the cutter in it.  It is brass and easy to work … right?

I  proceeded to secure this gauge in my wood clamp and started drilling away.  So far so good.  I was making good headway, and then disaster.  The body fell away, leaving only the face of the tool in the clamp.  Apparently,  this was NOT one solid piece of brass. It is made of a solid brass faceplate, with a cylinder turned on it that is inserted into the mystery metal body.  Now I only have one functional gauge again.  Oh the sadness,  I now have a base comprised of two pieces where there was once one.

Actually three pieces, but the base should be one

Determined to fix this, I planned to finish drilling into the black base about 2mm further, drill and tap 2 screws through the faceplate and into the base, and secure with two brass metal screws.  This should be sufficient to rejoin the two parts and I will have achieved my initial goal, albeit with a little extra work.

My plan was to drill screw holes and tap them to fix the faceplate to the base.  After careful examination, I noticed the base was not very thick and the screws would not be very deep, and therefore weaker.  What I decided to do, was finish drilling down to the needed depth in the base, and then glue the faceplate to the base after I finished.

Things never go as planned.  As I started drilling, the remainder of the brass tube came out and got stuck on the drill bit.  After extricating the small brass ring from the drill bit, I noticed a small rubber grommet coming out of the hole.  This grommet provides friction for the rod and helps set the depth more accurately, so I had to make sure to get this grommet fixed back into place.

I decided to file this small ring flat on the drilled side and slide it back into place to hold the rubber grommet in place. After mixing up some epoxy, I glued the faceplate back on the base and now it is a fully functioning gauge with a retractable cutter.  Yea!

[1] The current Veritas gauges now have the retractable cutter.

-Aaron

A Trip to the Store

One of my favorite places for purchasing old tools is located right here in central North Carolina.  The store’s name is “Antique Woodworking Tools” and is run by Ed Lebetkin.  Ed is very knowledgeable and  very friendly. He has a huge array of hand tools in stock.  His store is located above Roy Underhill’s Woodwright School and if you sign up to his mailing list he will send you his store schedule.  So if you are ever in Chatham County N. C. near Pittsboro, do yourself  a favor and stop by his store and you too may leave with some new “olde” toys.  Also, Ed does buy as well as sell, so if you have tools you do not need, or want to offer up for store credit, make sure you bring them along as well.

Here is Ed’s Contact Information:

Antique Woodworking Tools
Ed Lebetkin
edlebetkin@gmail.com
919-967-1757

89A Hillsboro St
Pittsboro, NC

Thanks to Chris Schwarz for this video of Ed’s store