Author Archives: OldeToolWorkshop

Tools Series – Part 2 – Saws

Disston No. 43 Combination Saw

This week I’ll be talking saws. Besides the hammer and knife, the saw is one the oldest human-made tools. Saws come in such great diversity, with different shapes, sizes, type of cut, and tooth geometry. This will be a pretty long blog entry by necessity as I own quite a few different types of saws and they all deserve a explanation of use and a bit of history. I’ll be presenting my saws to you, explaining what I use them for and where I got them (if I can remember). Like other tools I own, my saws cover only a fraction of the saw types available. I tend to use the sharpest and fastest cutting saws of any particular type. Saws are only useful when they’re sharp. I’m not the best saw sharpener, but I do ok. I’d rather be cutting wood than sharpening saws. Rip saws are pretty easy to sharpen, but crosscut saws are a bit more of an art than science. Don’t get me wrong, there’s plenty of science in saw geometry, but the actual sharpening is a lot more of a learned skill. Even so, it is one that is best learned if you plan to do any hand sawing of your work. I will include my saw sharpening tools in addition to my saws in this entry. So let’s get started.


Coping Saws

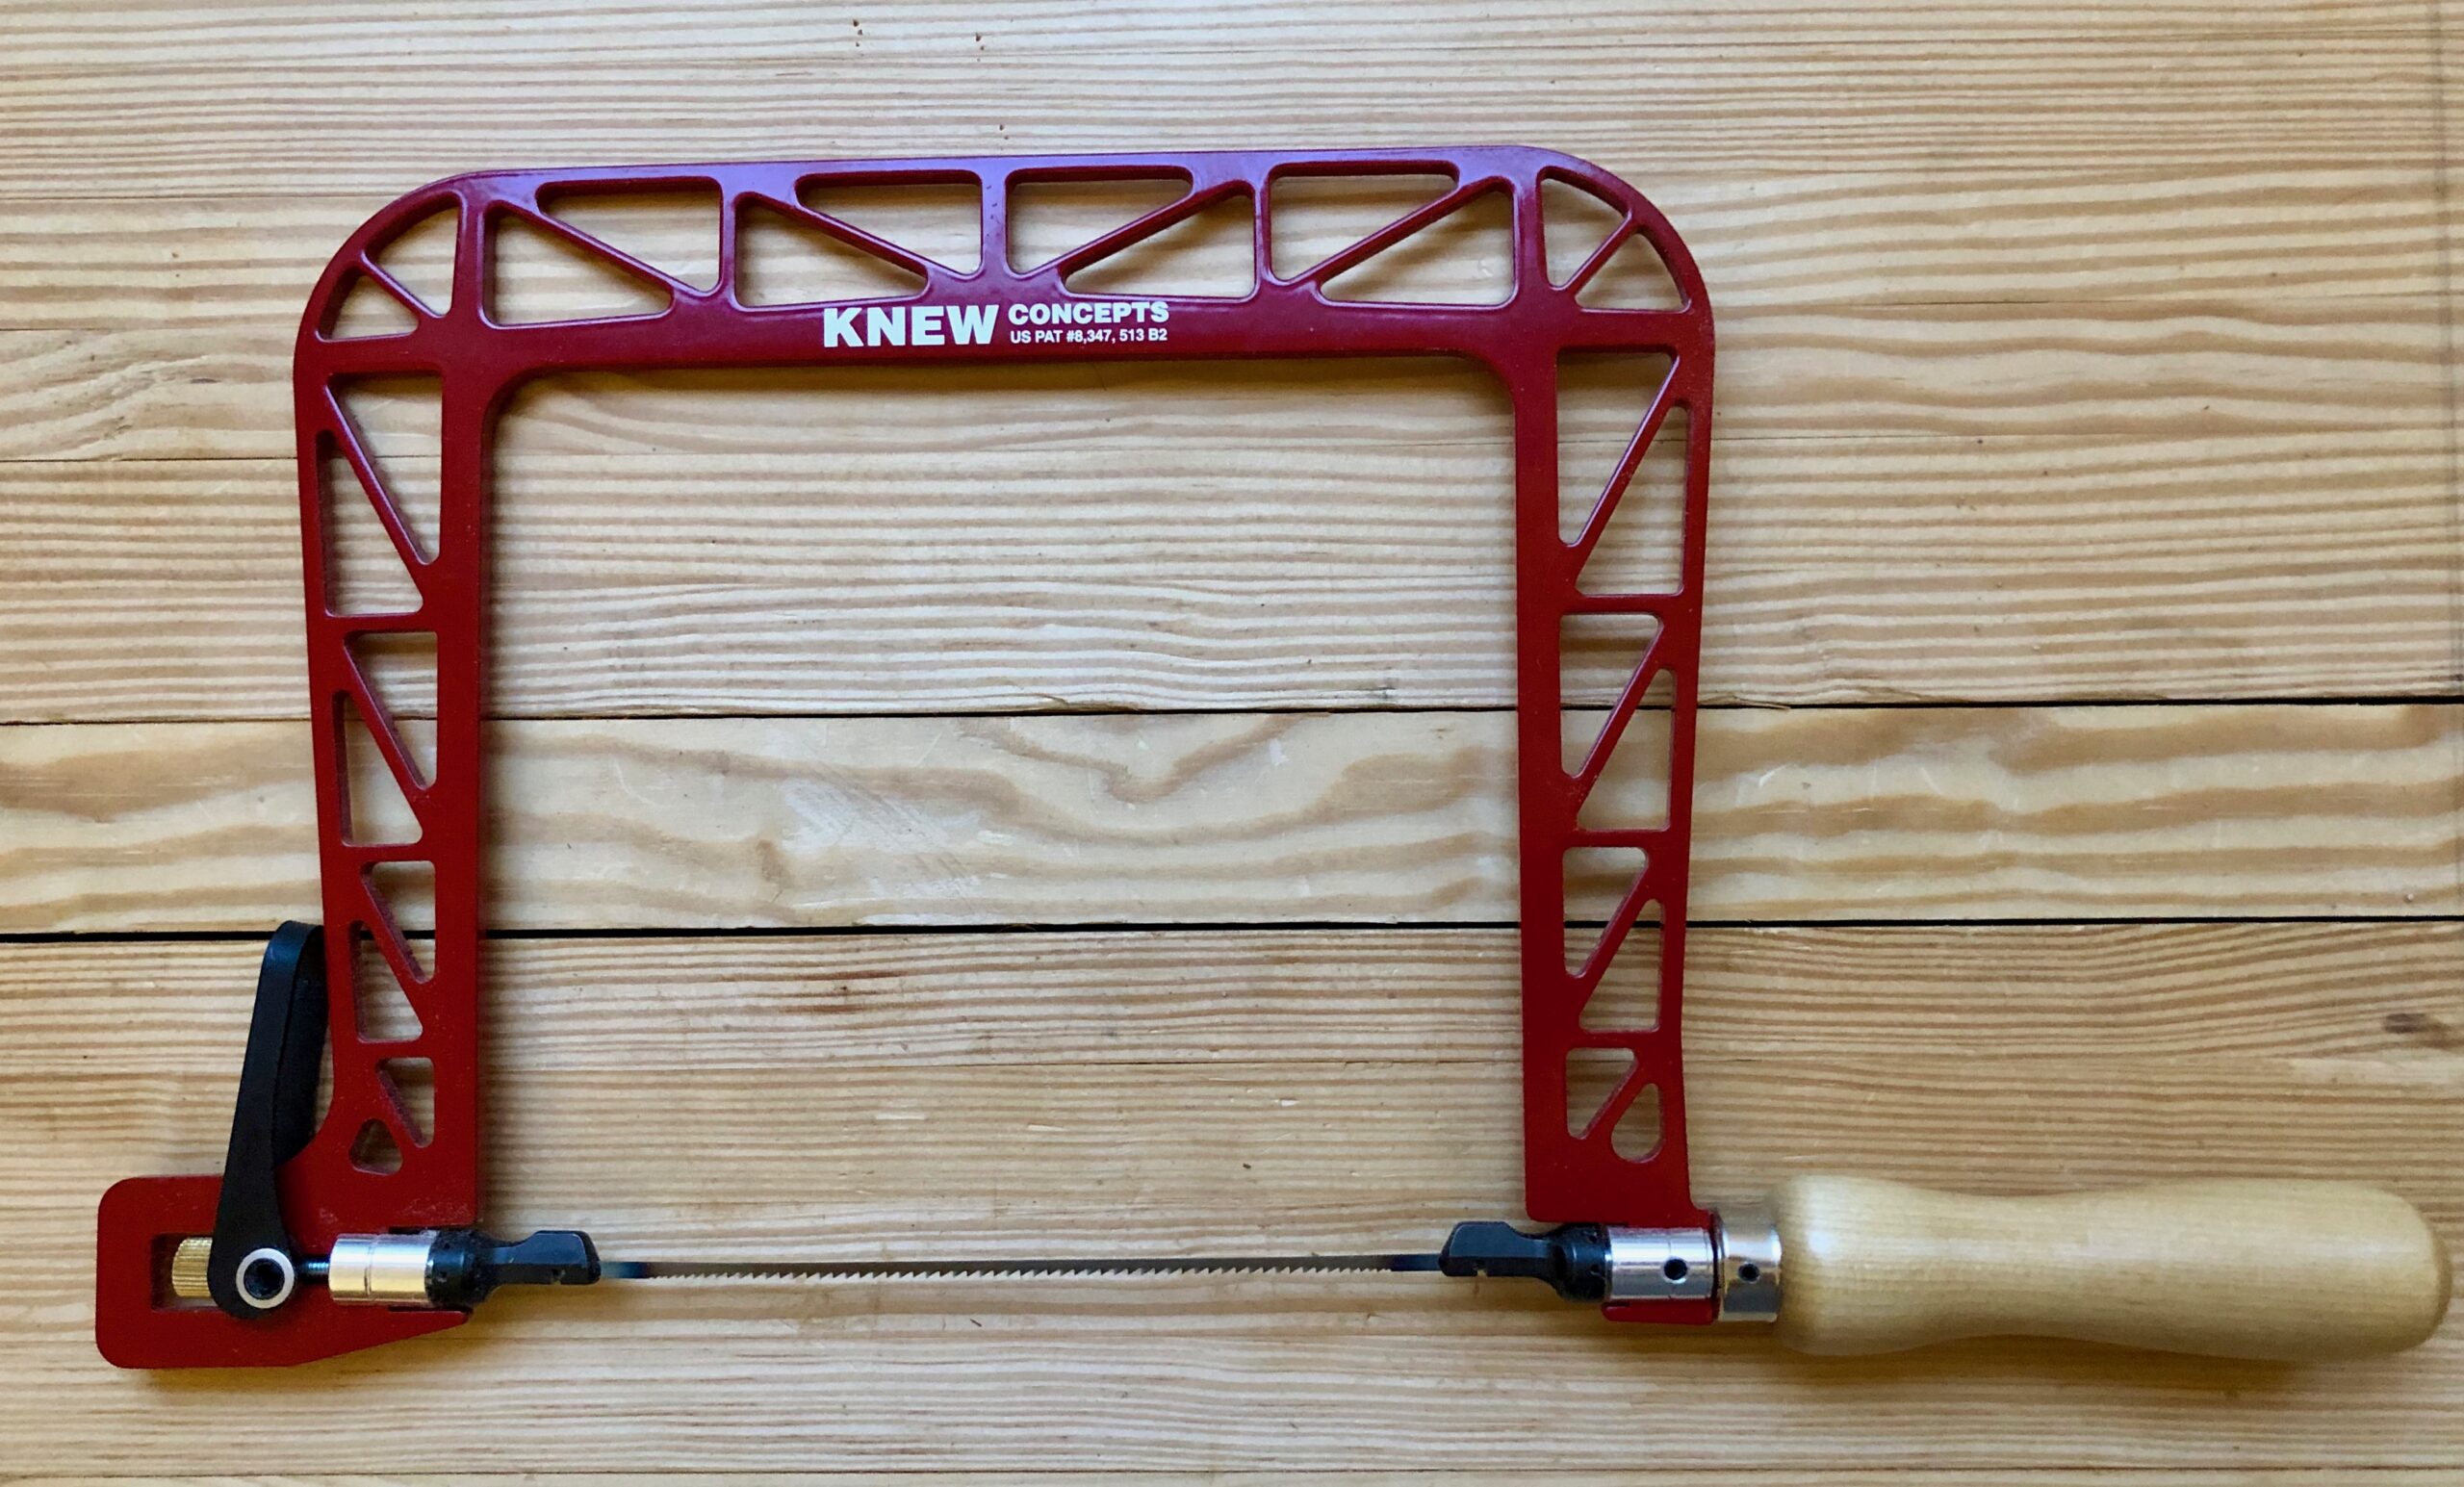
My newest acquisition is the Knew Concepts Coping Saw. Let me first say, I have a love-hate relationship with coping saws. I love how small, easy to wield and how quickly they cut and the fact you don’t need to sharpen them, you just replace the blade (they come in various size teeth for different applications). I do not like that they are fickle wondering beasts and impossible to tighten. That was until I got the Knew Concepts saw. These things are impressive. They tighten down to a crazy high tension and cut like butter. Let’s just say I’ve removed the hate part of the this equation. Some of the positive attributes of the Knew Concepts saw: 1) Easy to load and unload the blades; 2) Easy to adjust blade rotation (not so on other designs); 3) Tightens the blade quickly; 4) Lightweight, and 5) The build quality is second to none. They are a bit pricey, but worth every penny. They are great for smaller jobs like cleaning out waste between dovetail tails and intricate scroll work in thinner material.


Turning Saw

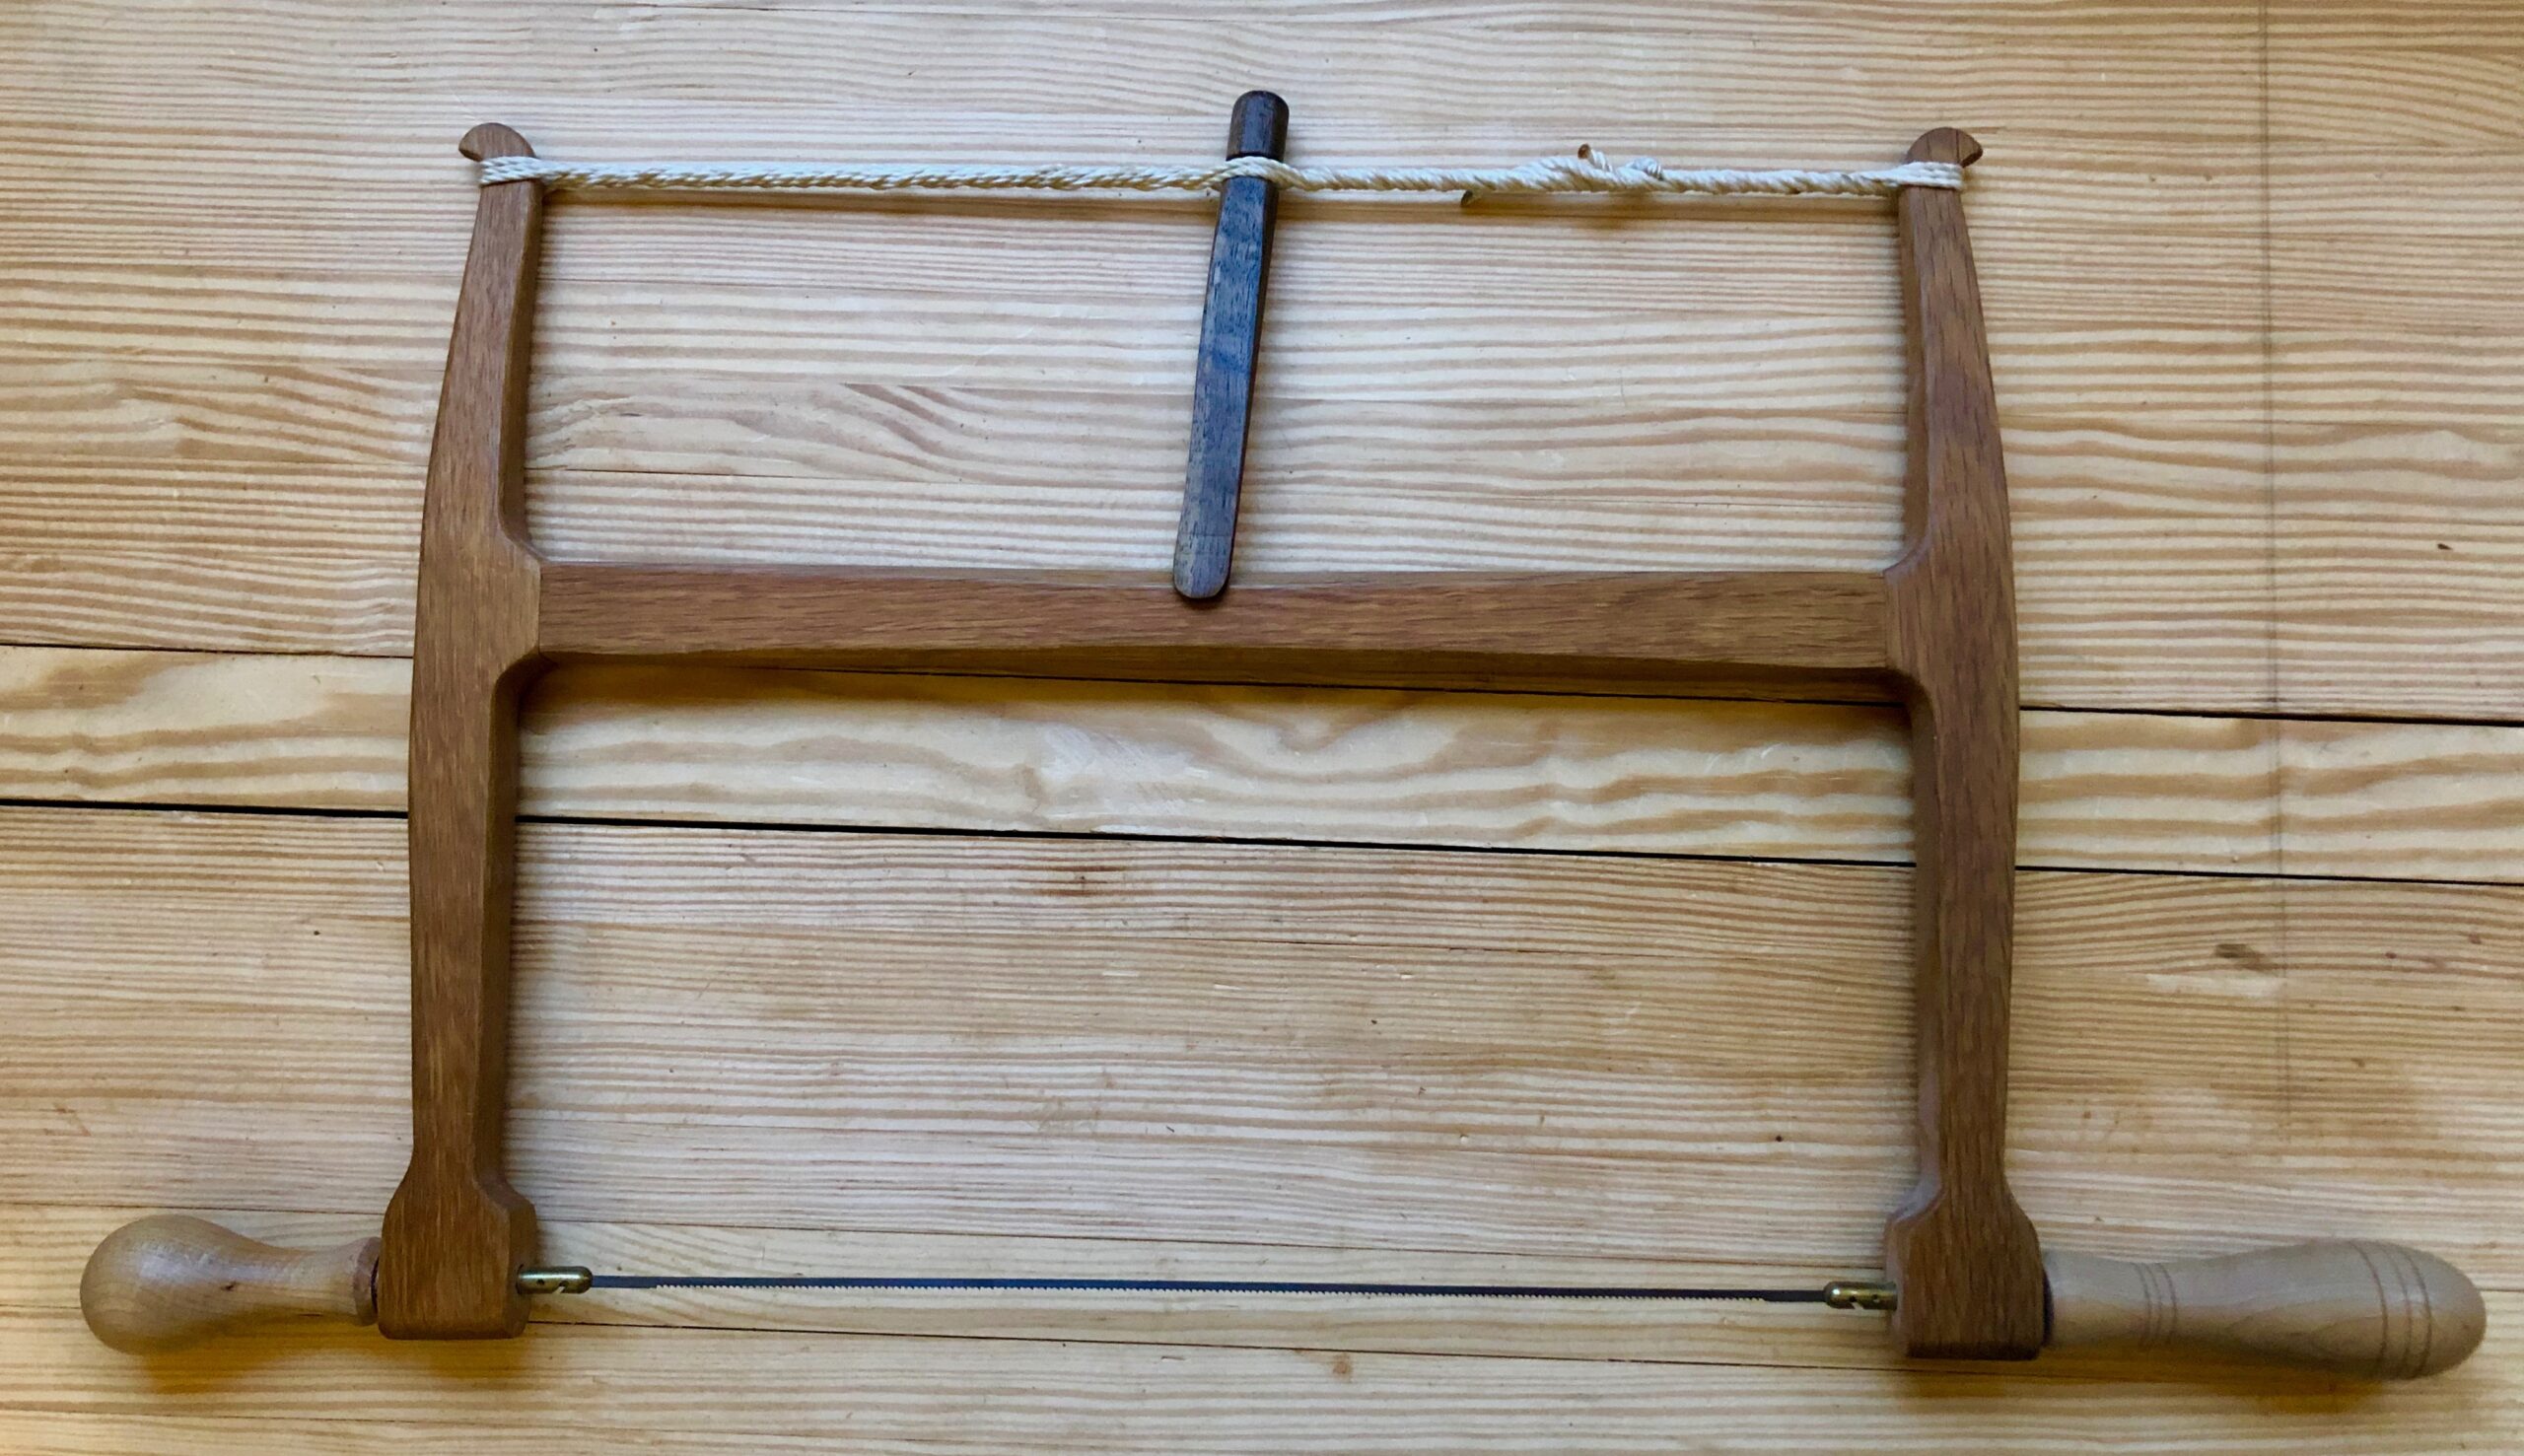
This saw is very similar to the Coping Saw but it does heavier work with its longer and thicker blade. If I need to do a lot of scroll work through thicker material I use the Turning Saw. This is a saw that I made from Gramercy Kit from Tools for Working Wood Turning Saw Parts (Pins and Blades). I used hickory for the frame, walnut for the tension adjuster and maple for the handles. I followed the plans provided by TFWW. One thing you may see on the handles I turned for this saw and tool handles I’ve made in general is the three adjacent lines (i do it more now than on my earlier turnings.) This is one way to show folks that I have made the turned part. If you have one of these saws, please un-tighten it after use so you do not weaken the wood.

Sawing is definitely a skill you can learn in a few minutes and spend a lifetime perfecting.


Panel Saws

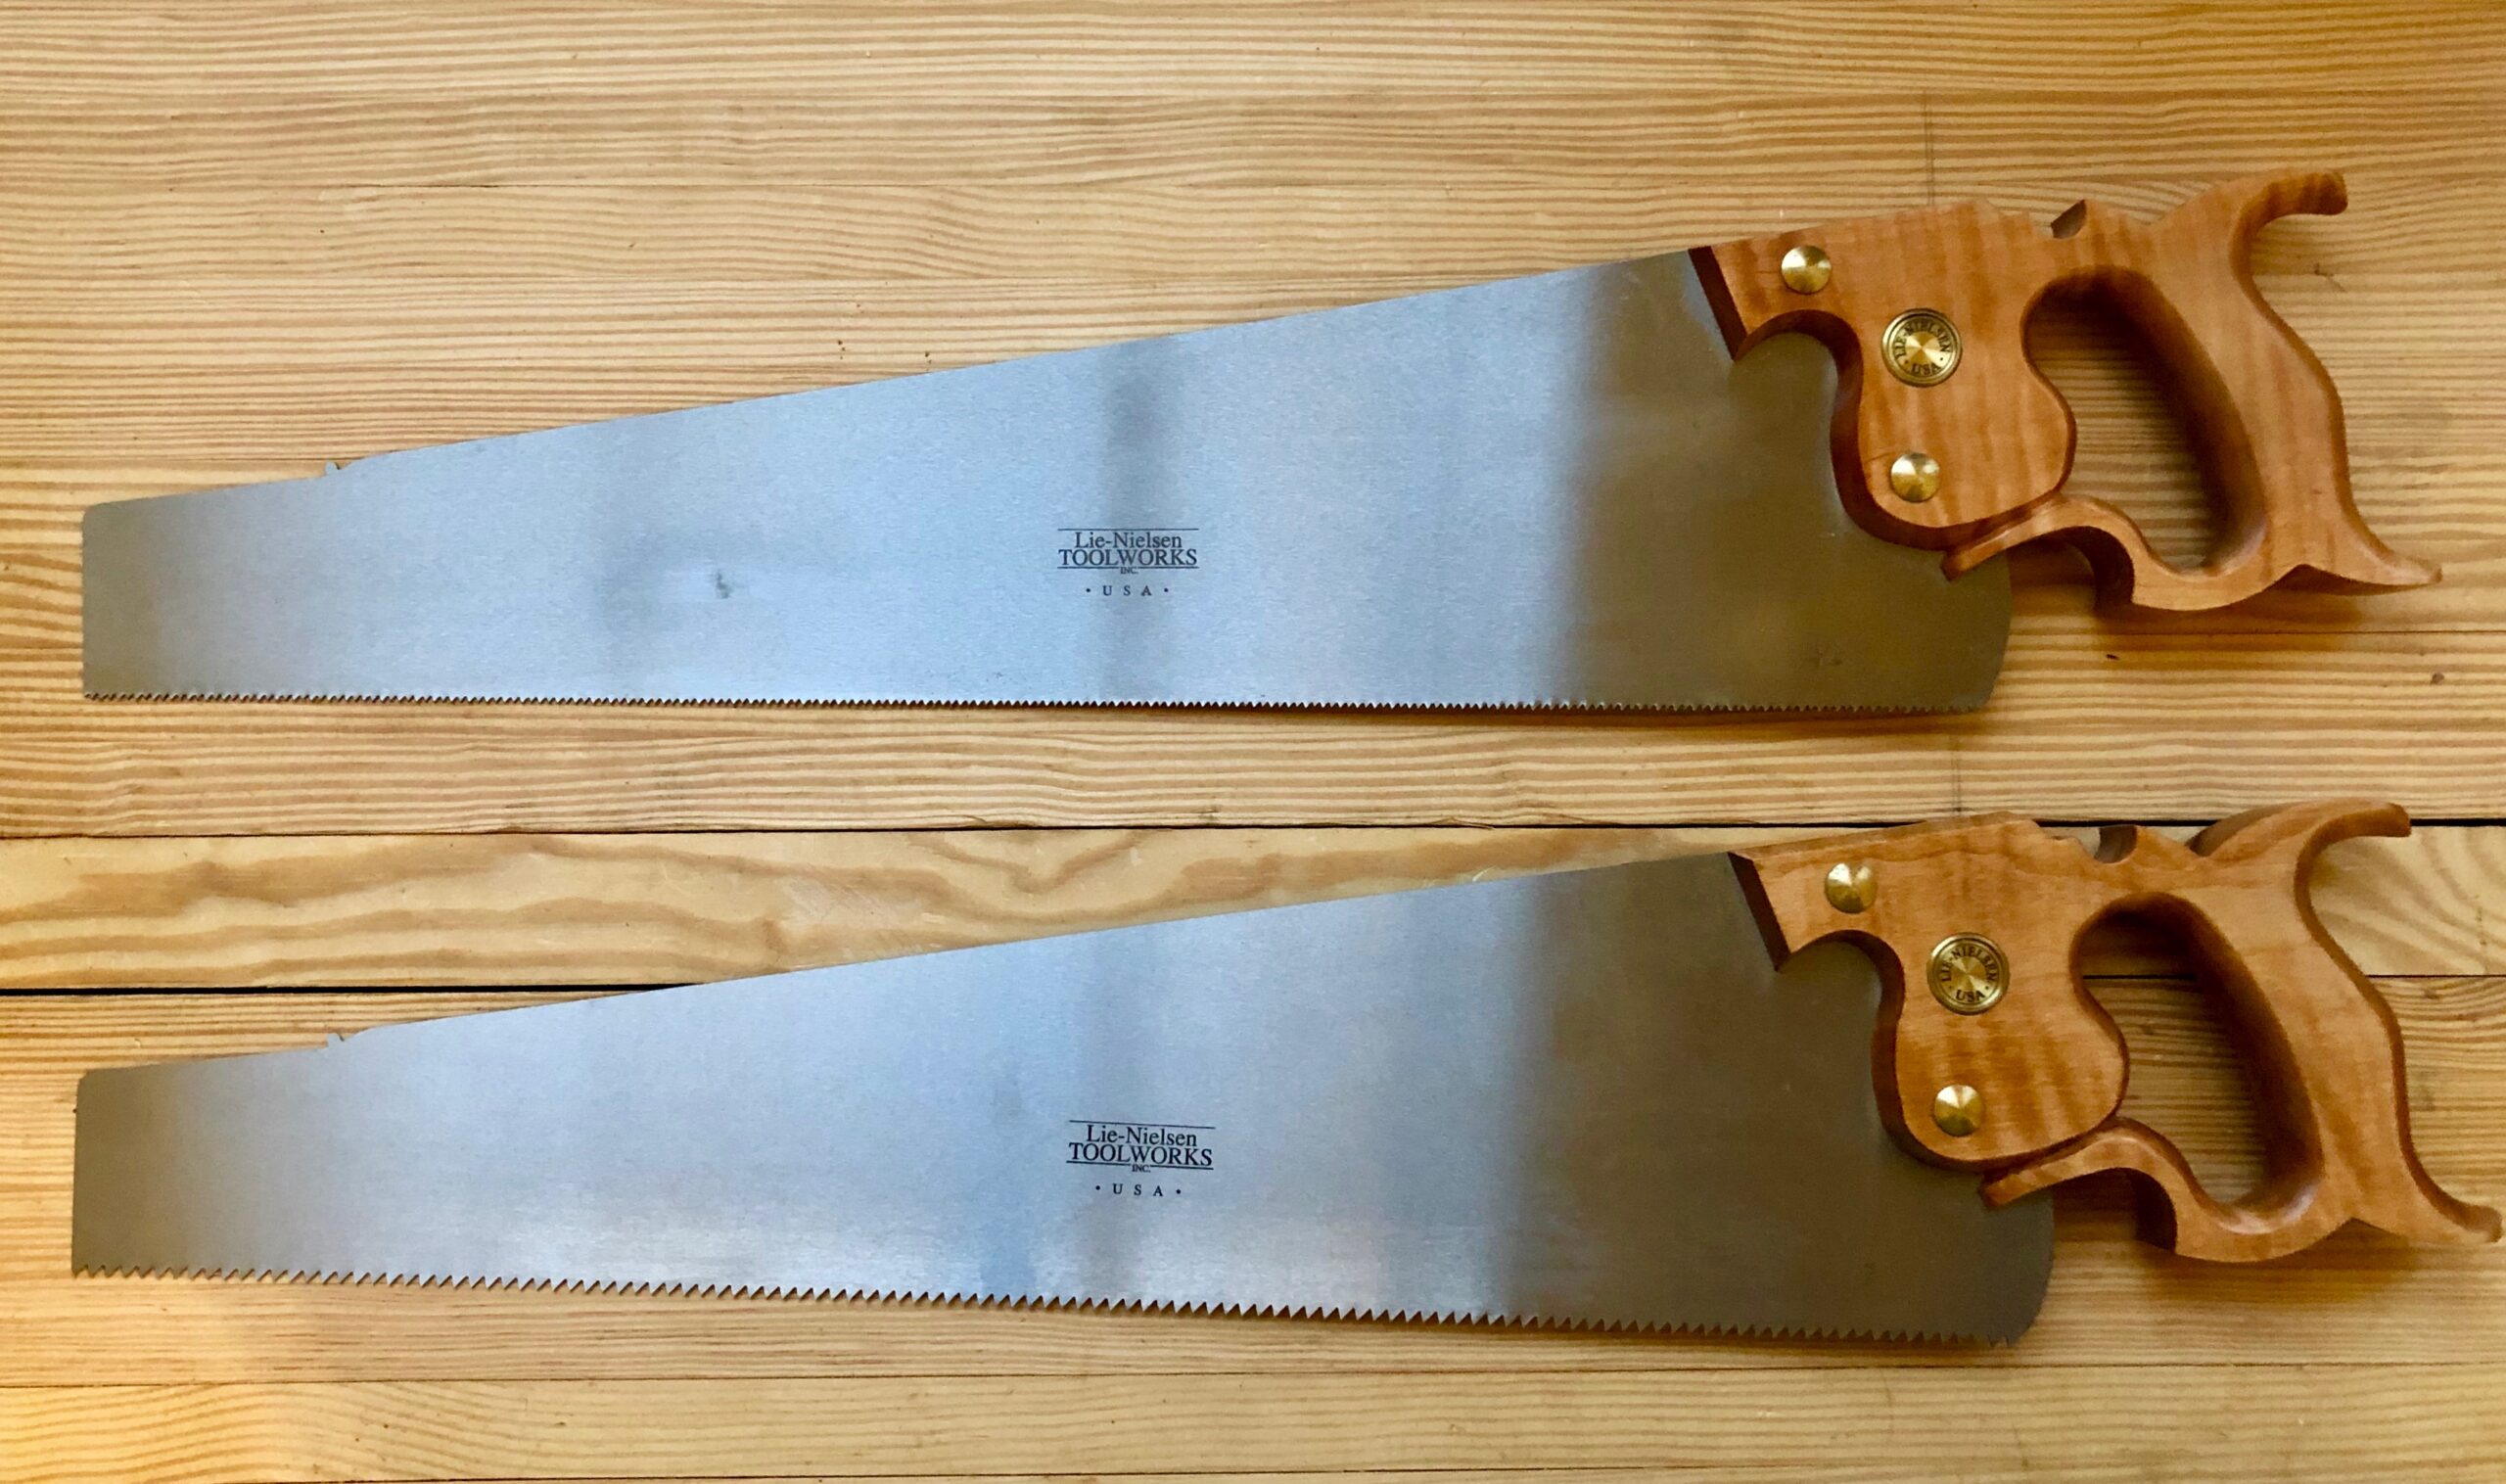
The two saws here are new from Lie-Nielsen. They are the Rip Cut 7ppi and the Crosscut 12ppi. There is nothing wrong with the antique saws I own, but I love the way the Lie-Nielsen saws cut and these are my day-to-day panel saws. One warning though, they only cut as good as you do, so you may have issues cutting straight lines, but after practice sawing a dozen or more feet of board with these, you’ll be cutting like a pro. I spent a lot of time perfecting my cutting abilities and still screw up some times. Just allow plenty of adjustment space on your cuts (especially at first) and you’ll be fine.
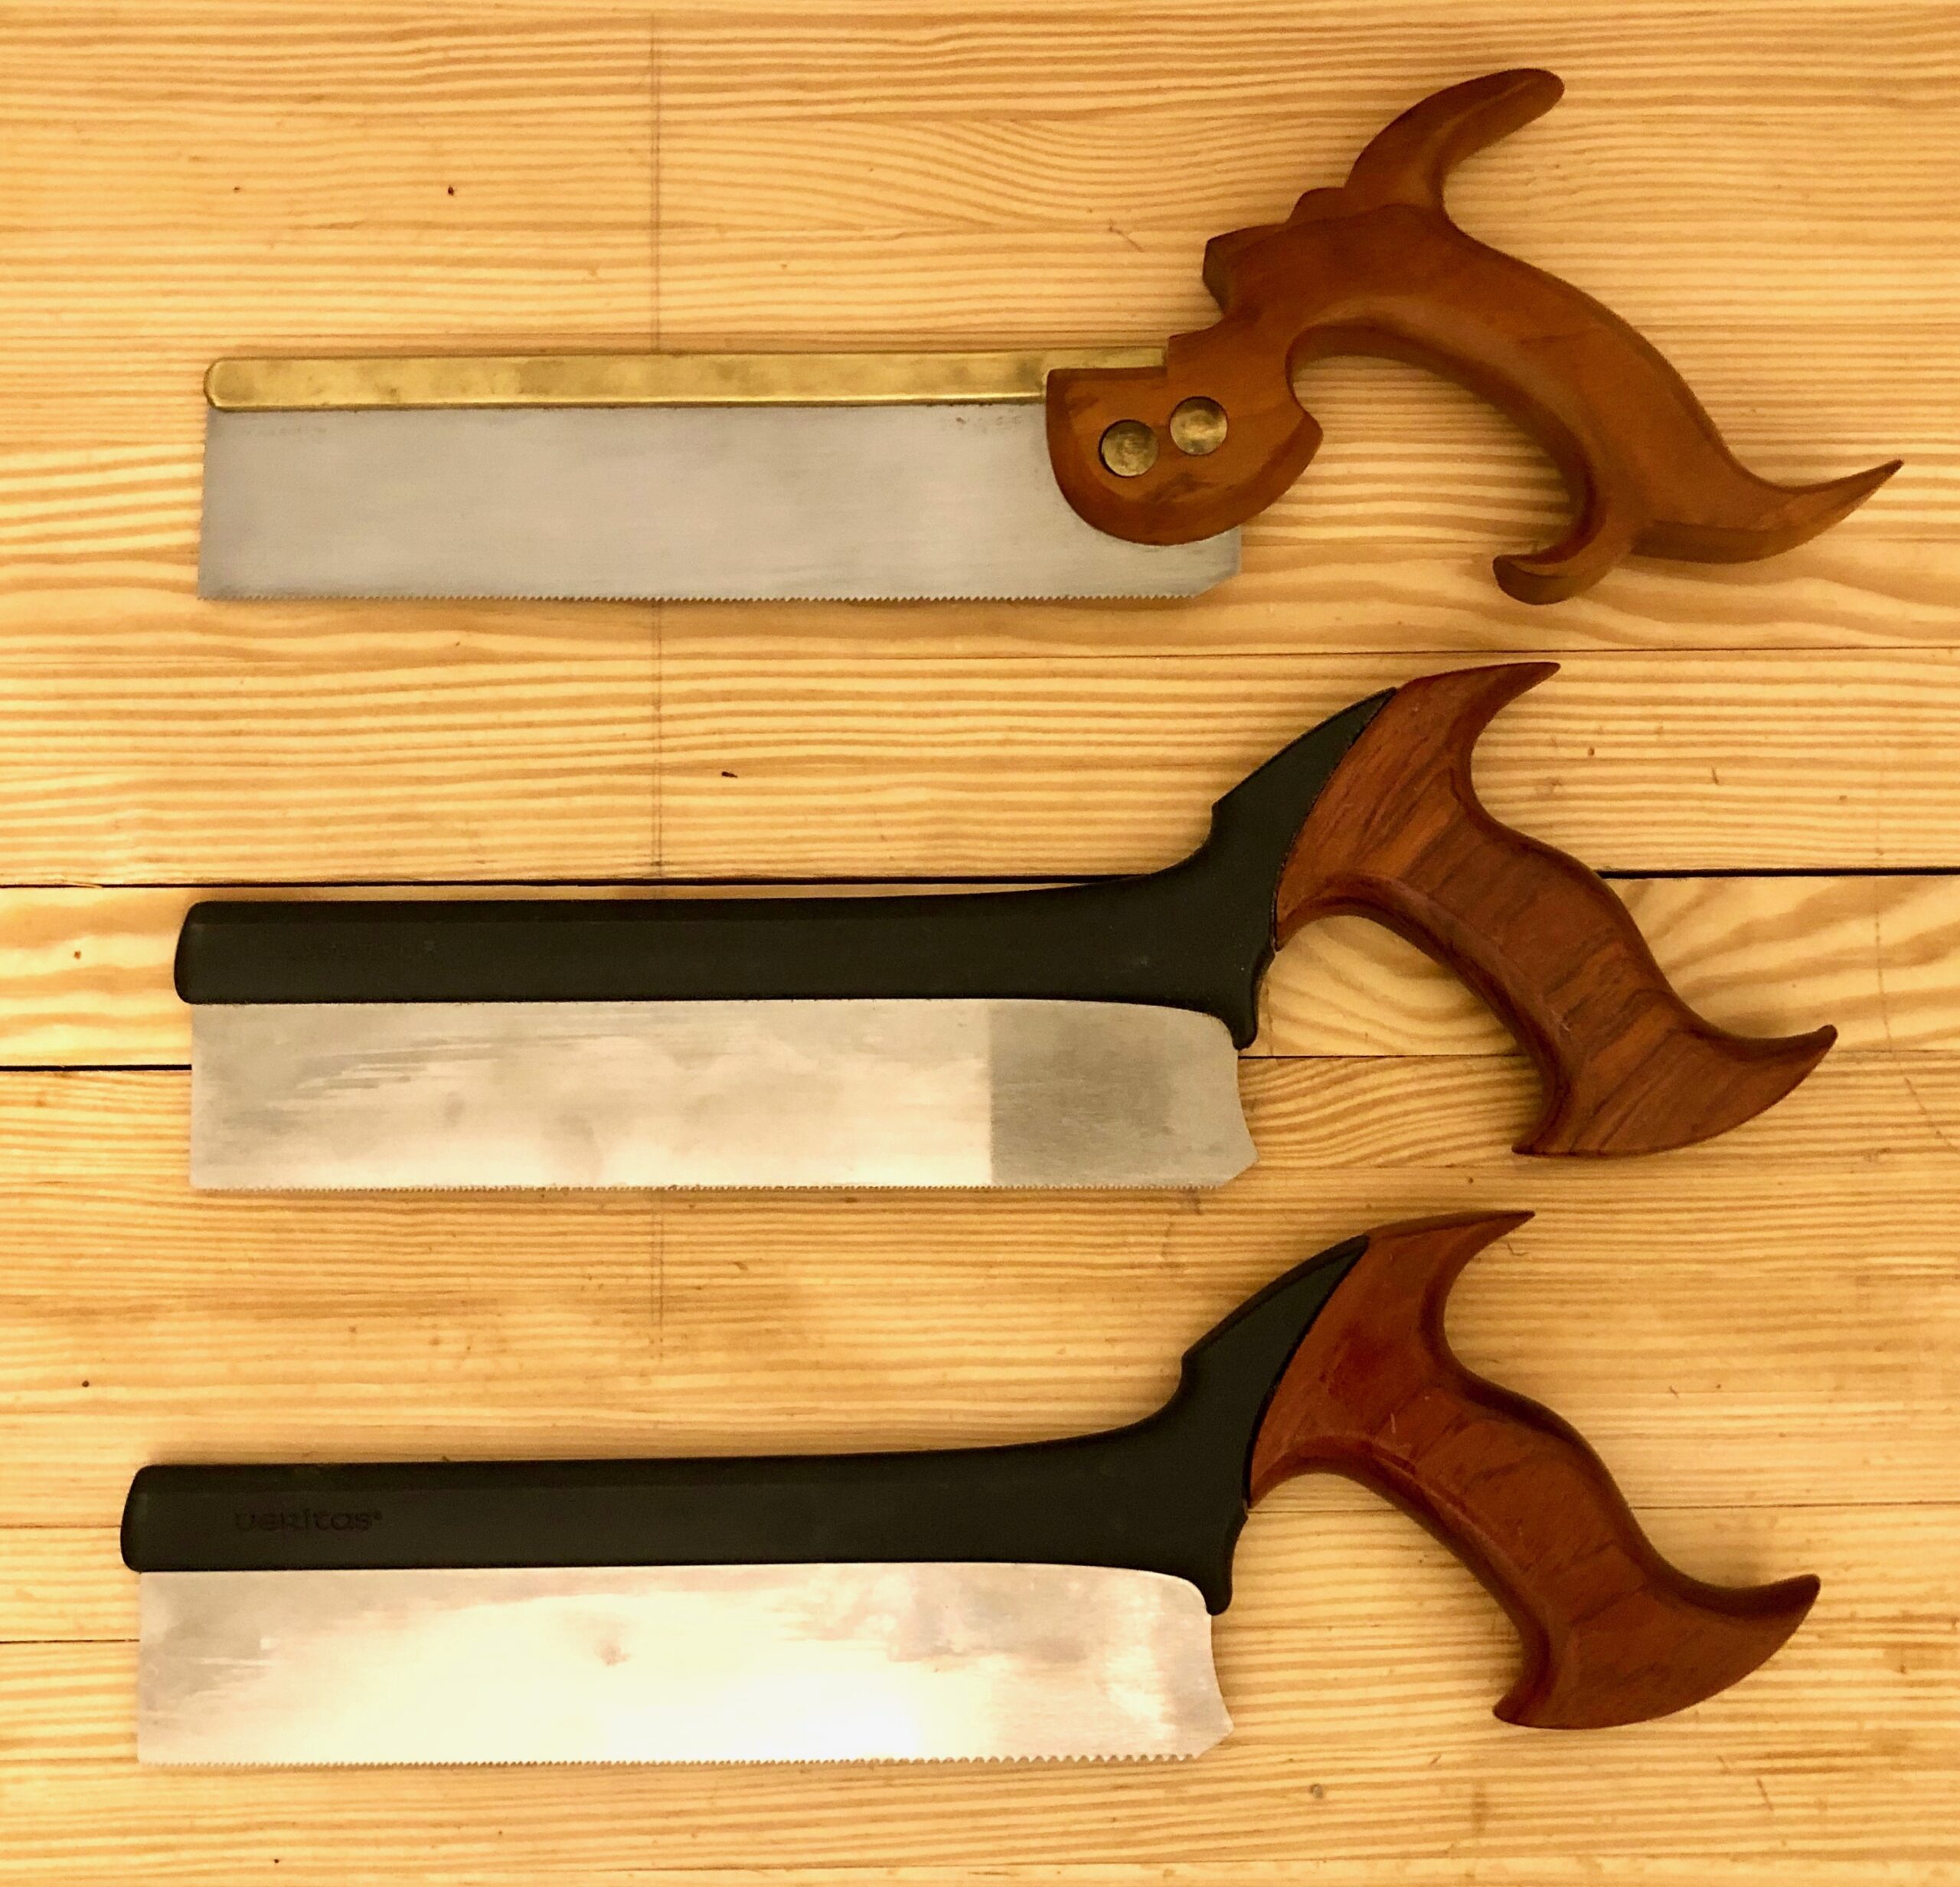

Dovetail Saws

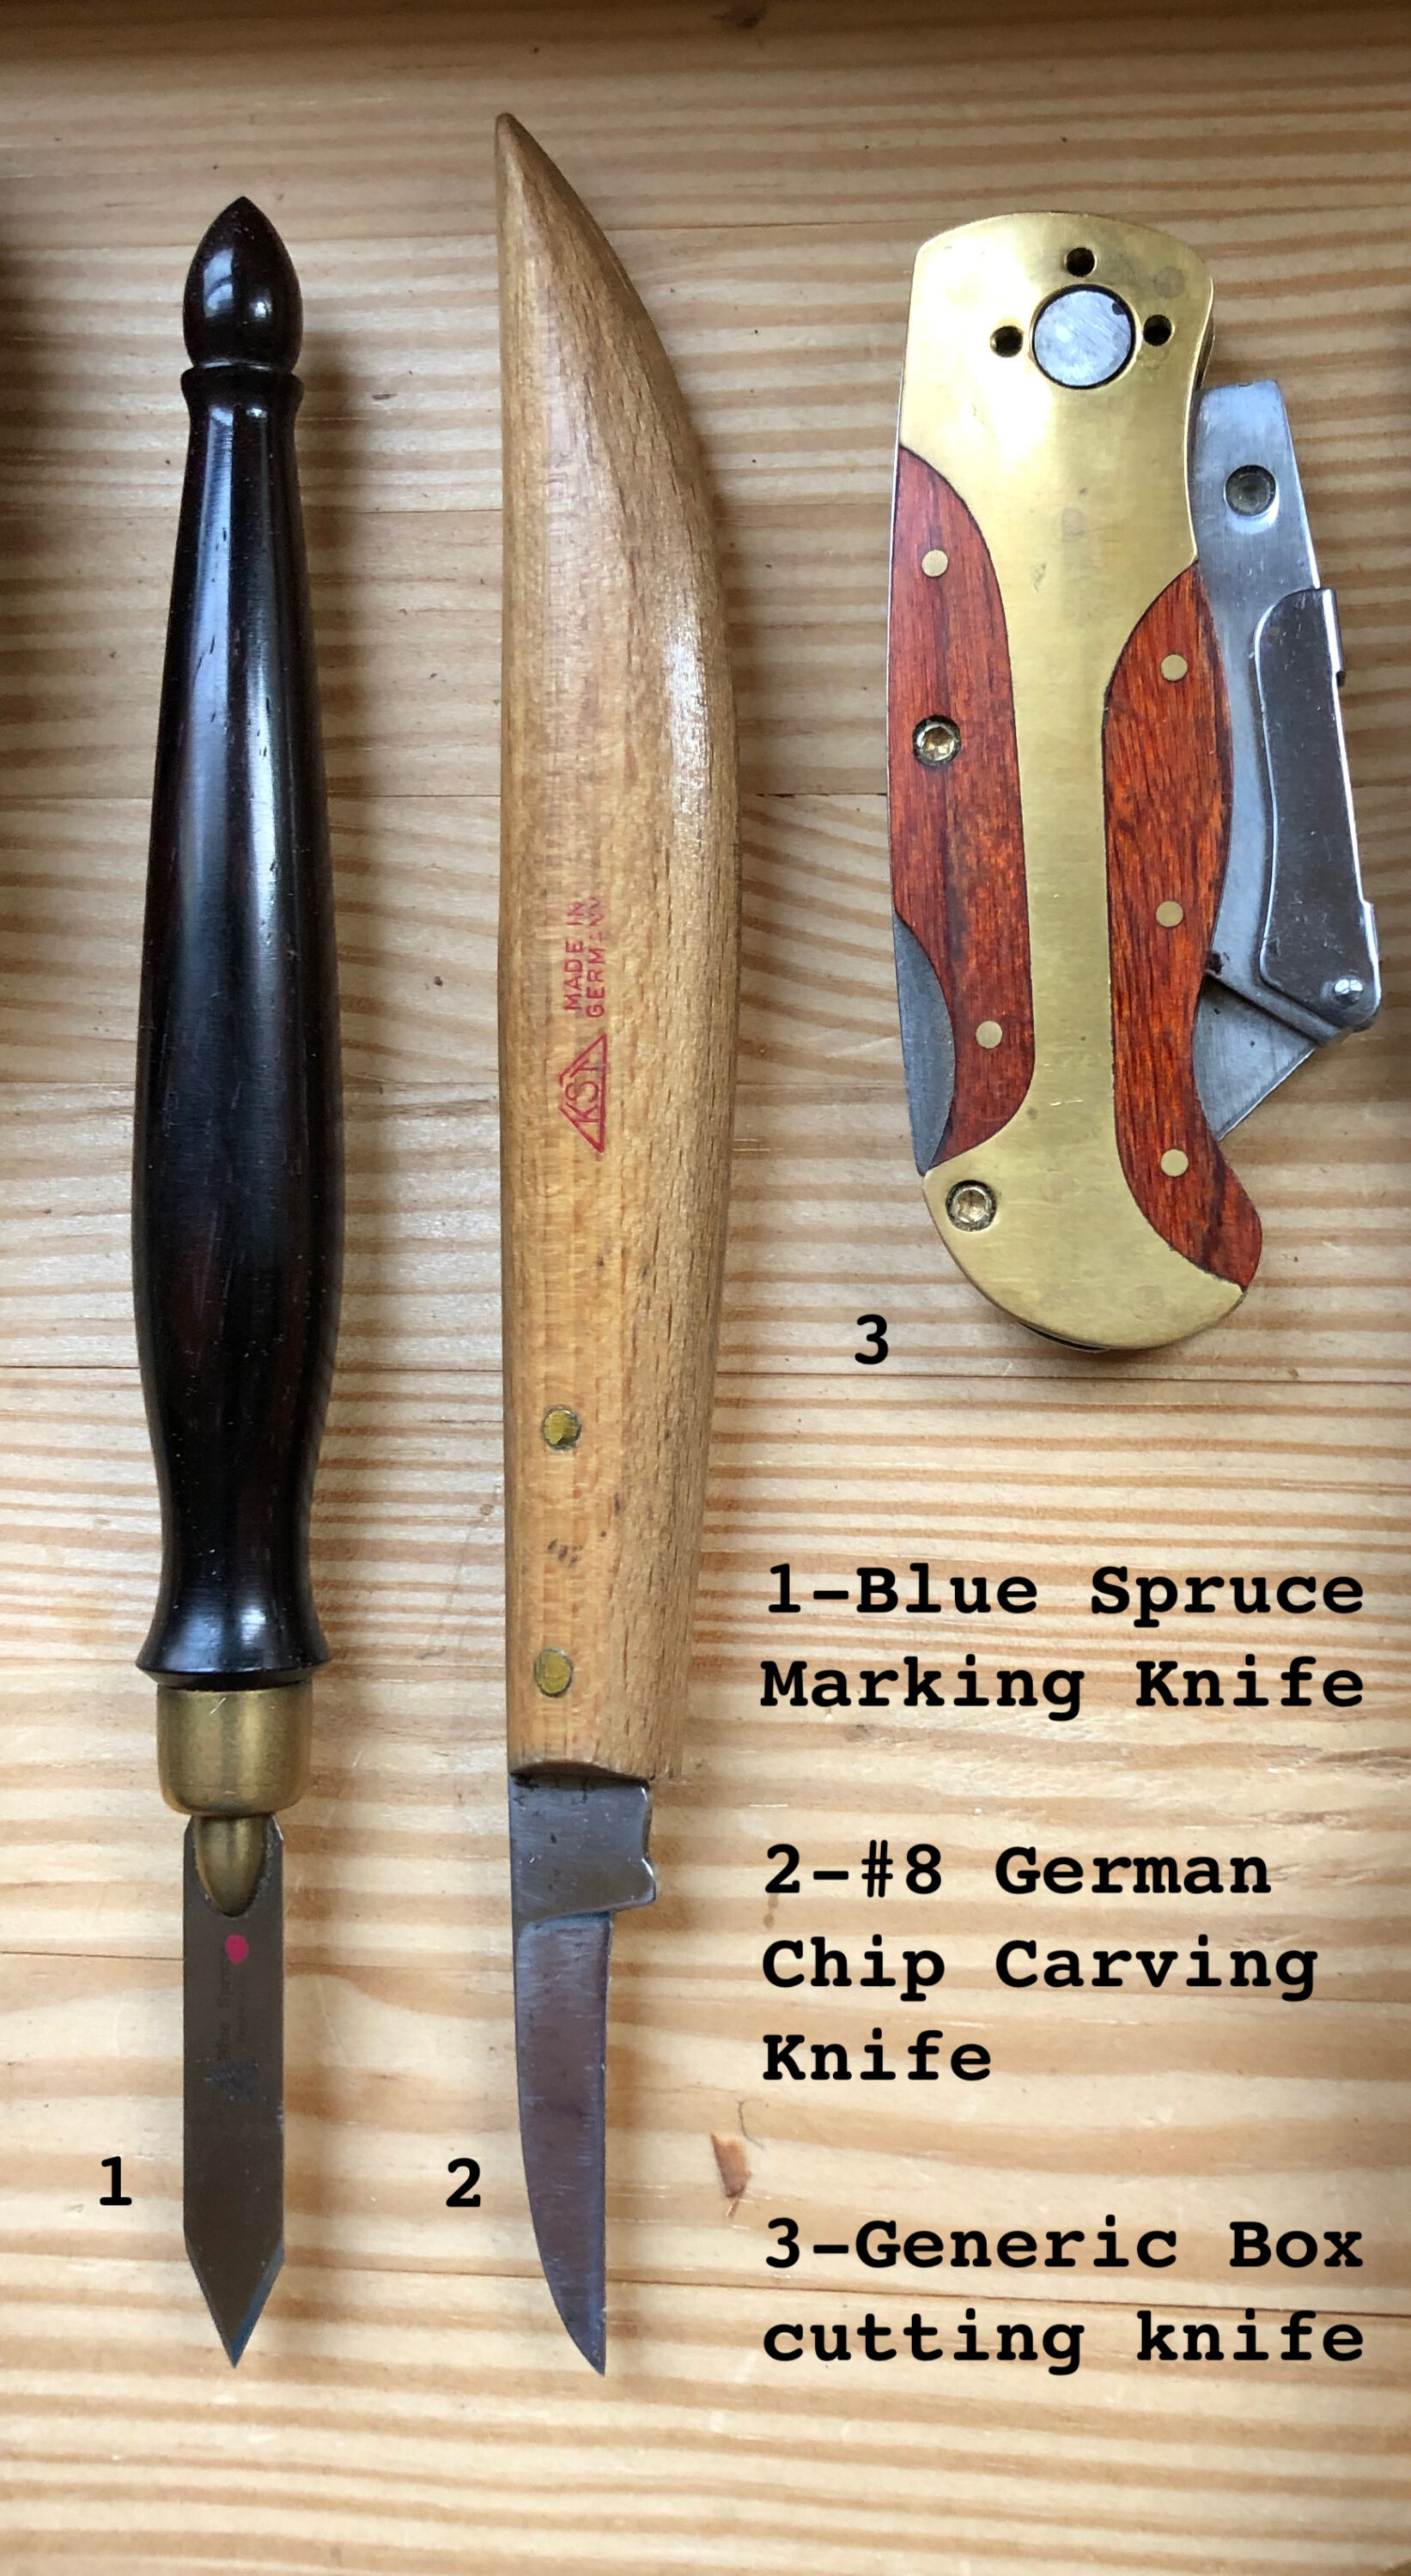
I love dovetail saws. There is something about the way they cut so precisely and quickly. I have two (three if you count the Veritas Crosscut Saw) dovetail saws. The top saw is one is a saw I made at Roy Underhill’s Woodwright School with Tom Callisto. It has 14tpi and has such a thin blade, I can’t even get my thin Blue Spruce marking knife in it’s kerf (I have to use my box cutter knife to mark dovetails in it’s kerf). But it’s a pleasure to use and beautiful to boot. The second saw is a Veritas Dovetail Saw 20tpi, that I bought in 2011 and I absolutely love this saw. It makes great dovetail cuts and is comfortable in the hand. The third saw is also a Veritas saw but it is filed Crosscut with 16tpi. It’s very nice to use for smaller precision crosscut pieces and makes a very clean cut. I got this from a friend and will treasure it always.


Tenon Saws

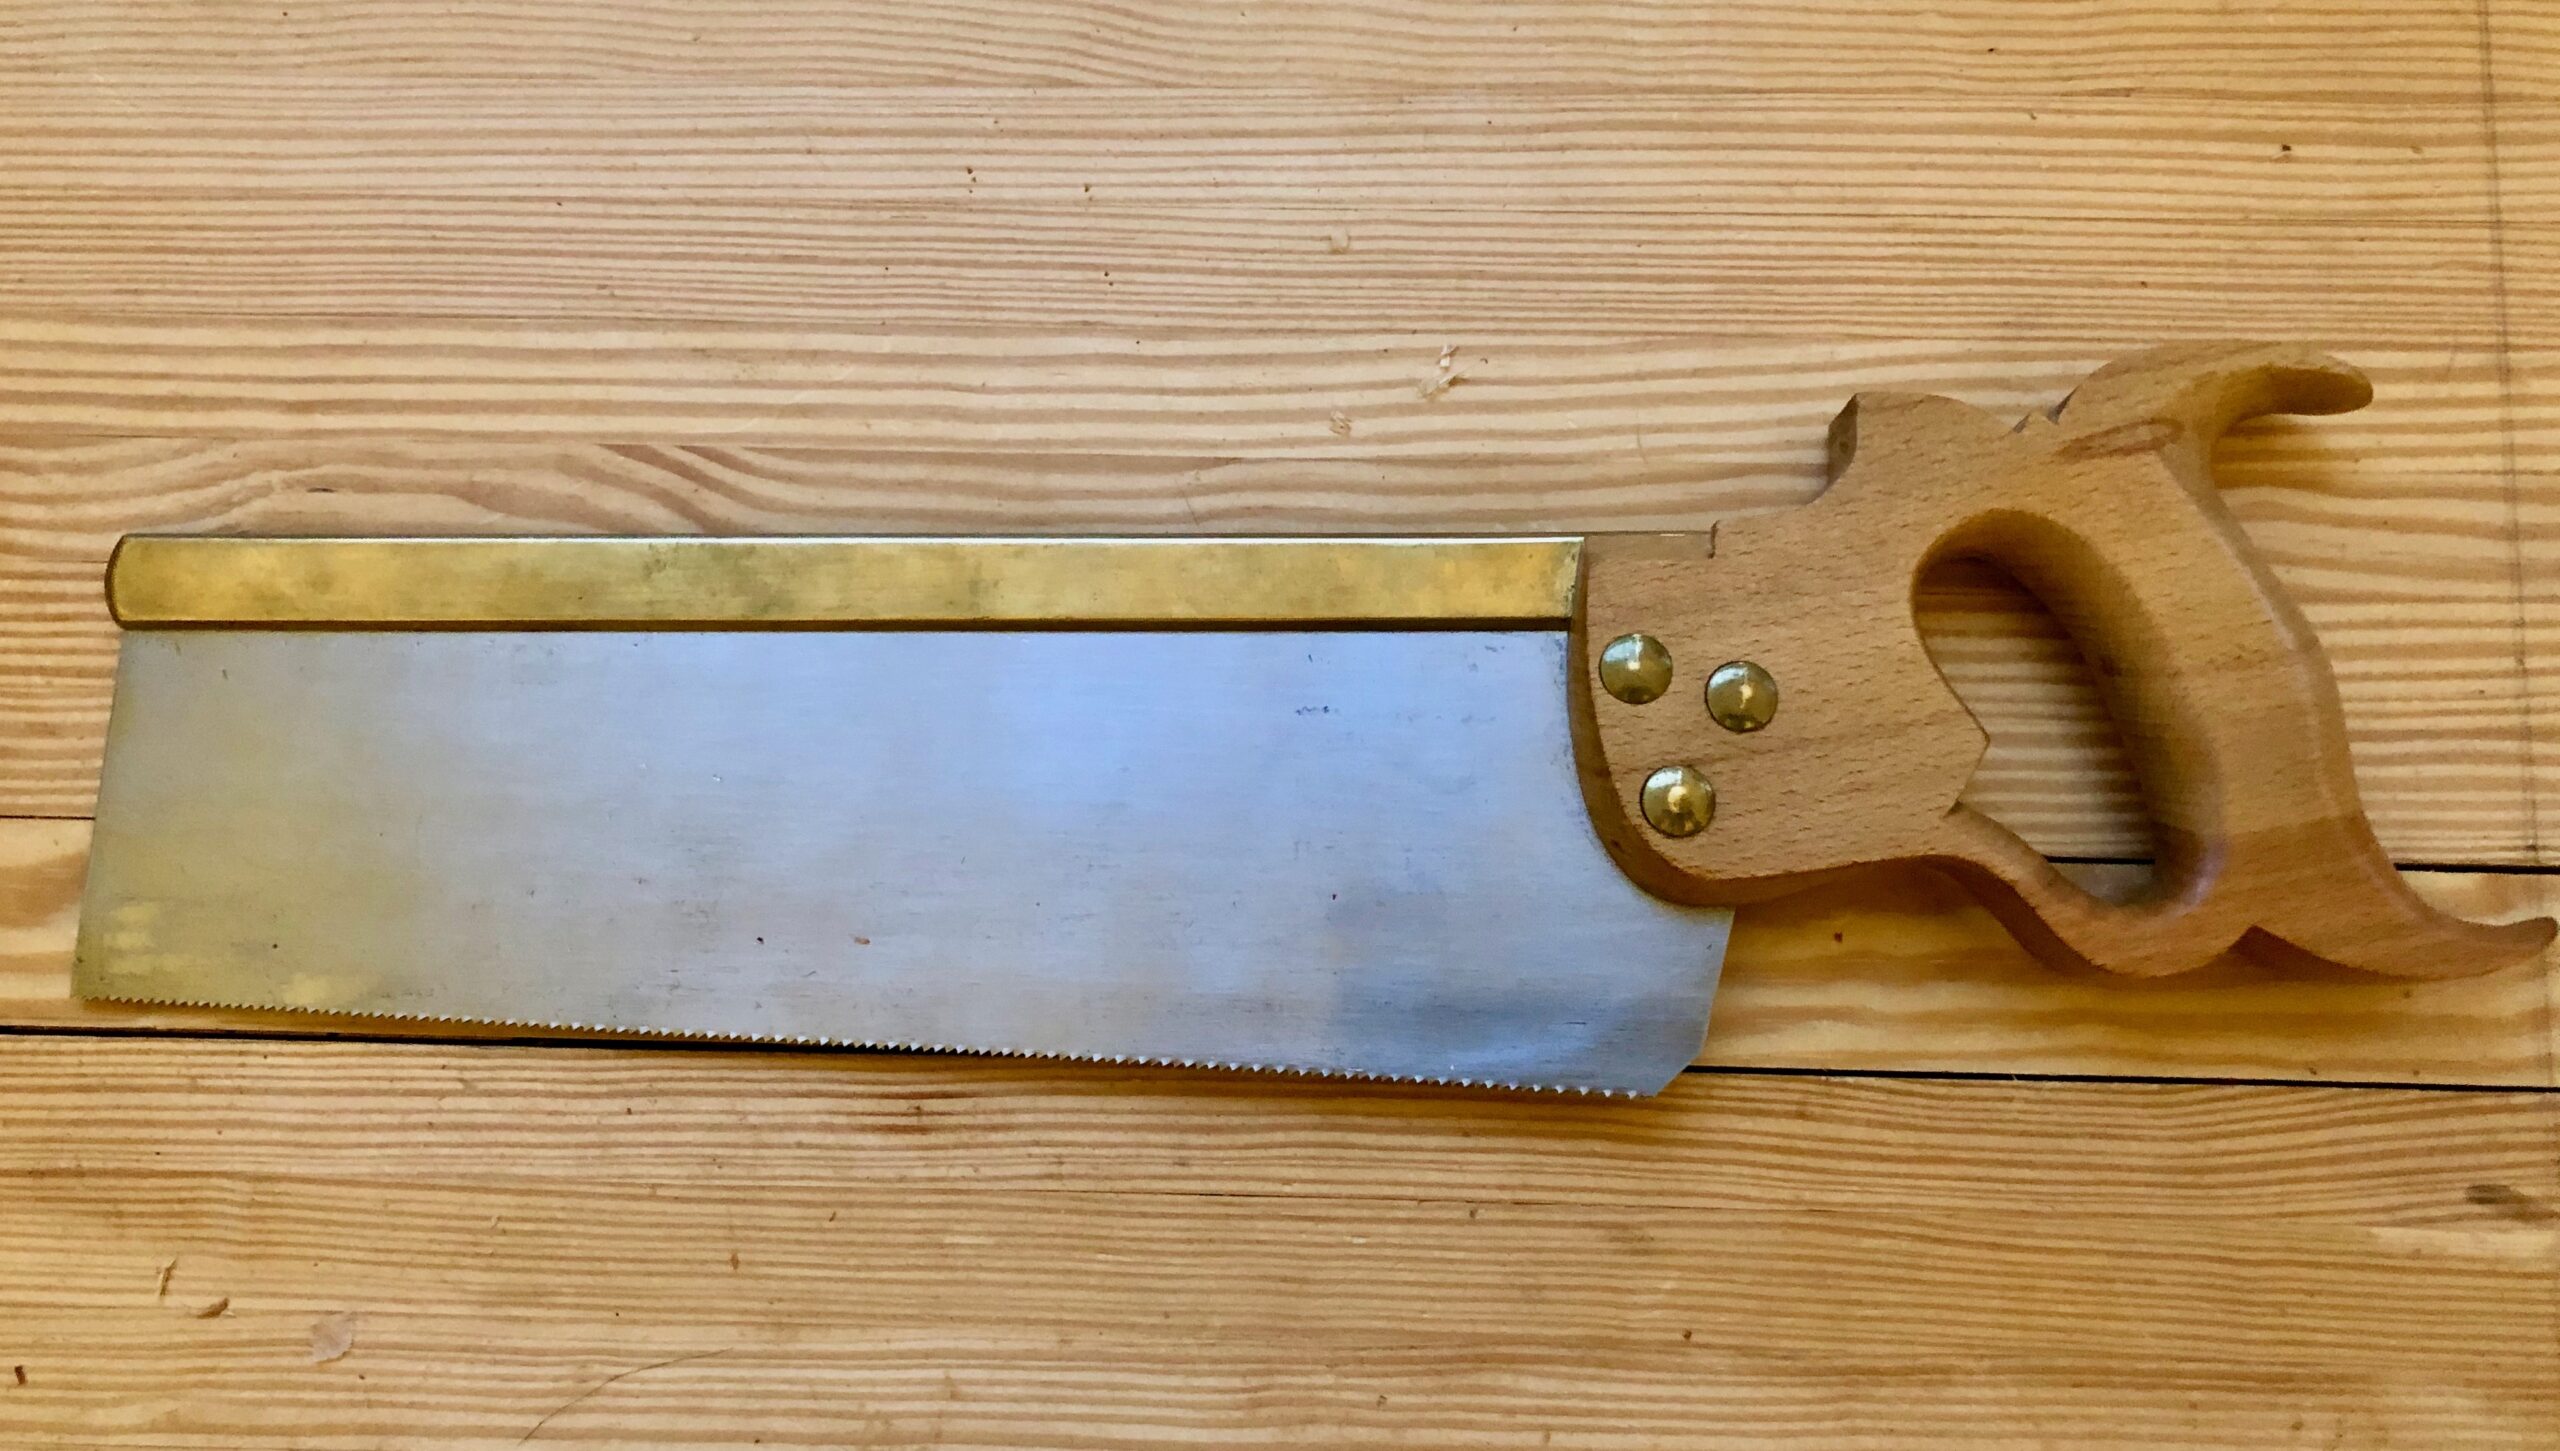
This saw is easy to sharpen and great to use. It does not see a lot of use in my shop, but it does get used. This saw is one I made on my own. I purchased the saw plate, nuts, handle blank and saw back from Tom Callisto. I shaped the handle and punched the holes in the blade and fitted the back. This saw has a beech handle and filed rip at 12tpi. It cuts great, but not so much in crosscut, but it’s not really designed for that.


Carcase Saws

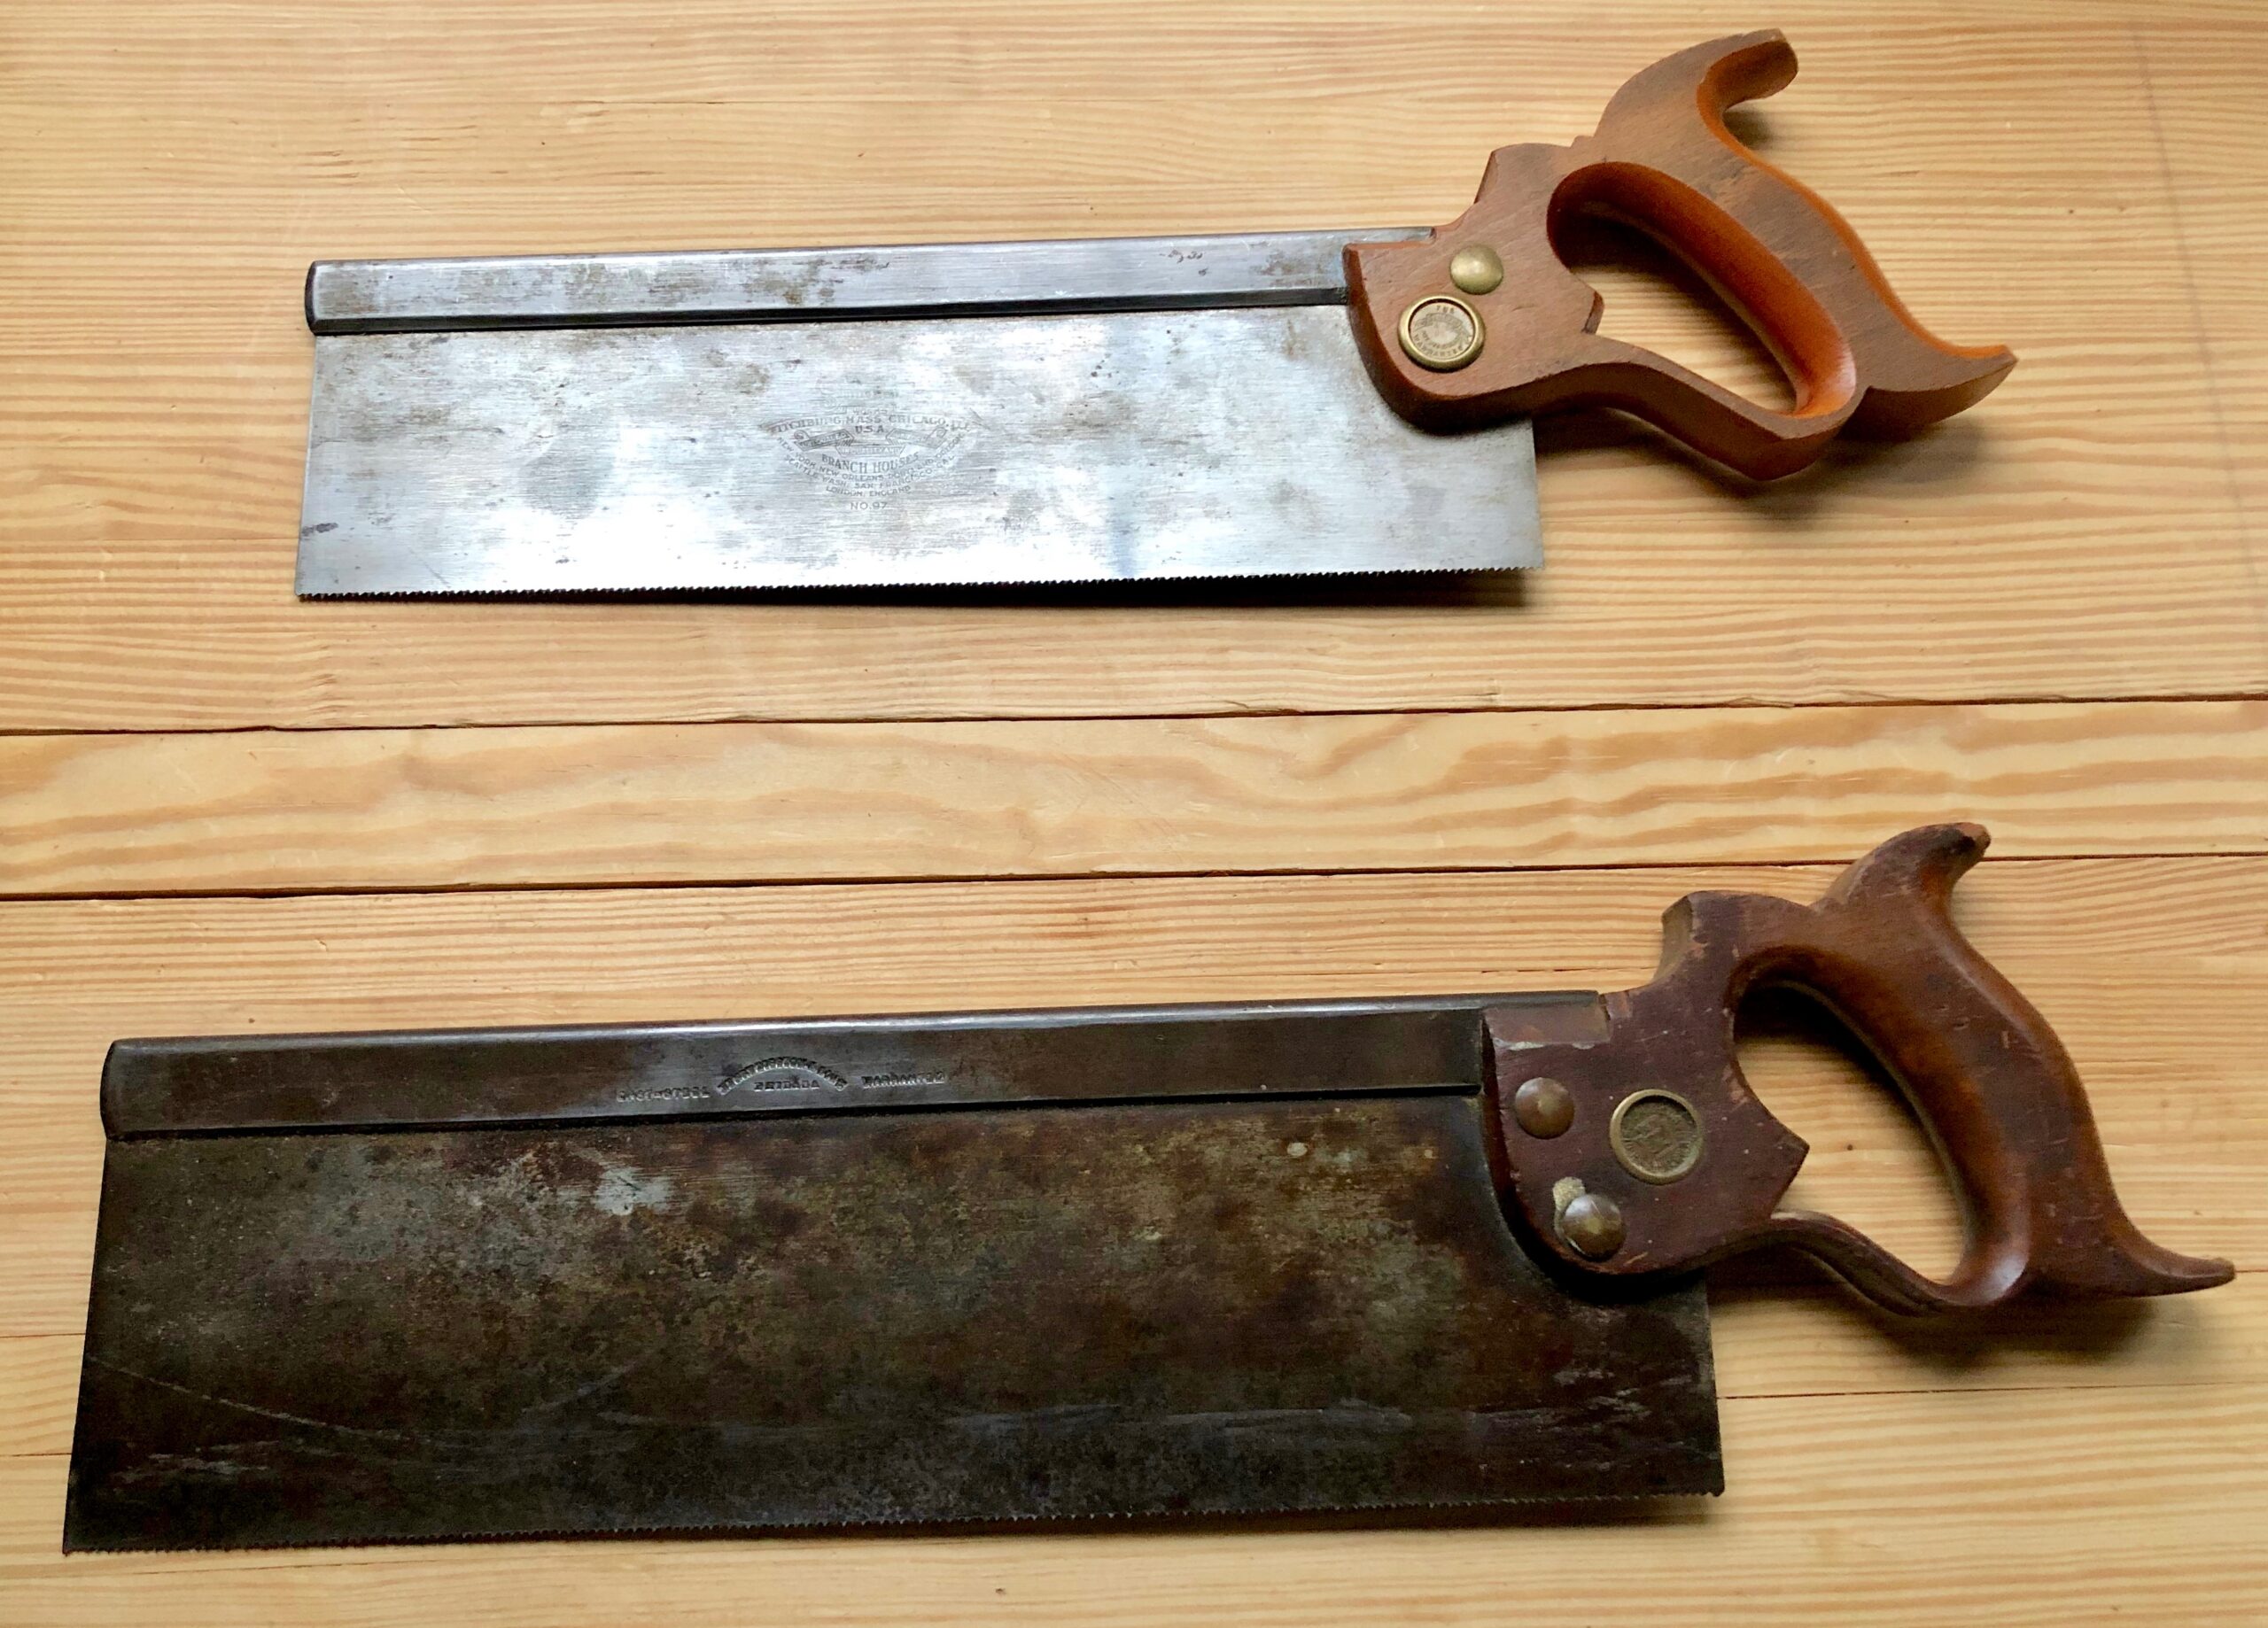
The two of these are nice vintage crosscut Carcase Saws. The first one was made by Simons and has 12tpi 12″ blade and cuts quickly and easily. The second saw is a nice Disston filed 16tpi with a 14″ blade. Both of these saw are fine examples of excellent vintage saw quality and craftsmanship. The steel is perfect and the handles fit human hands. I use both of these saws almost daily and I would not part with them for even really good money. I bought both of these saws at a Mid-West Tools Collectors Association or MWTCA Tool Meet in 2013. I do not remember exactly how much I paid for them, but it was about $80 and $60 respectively.


Flush Trim Saws

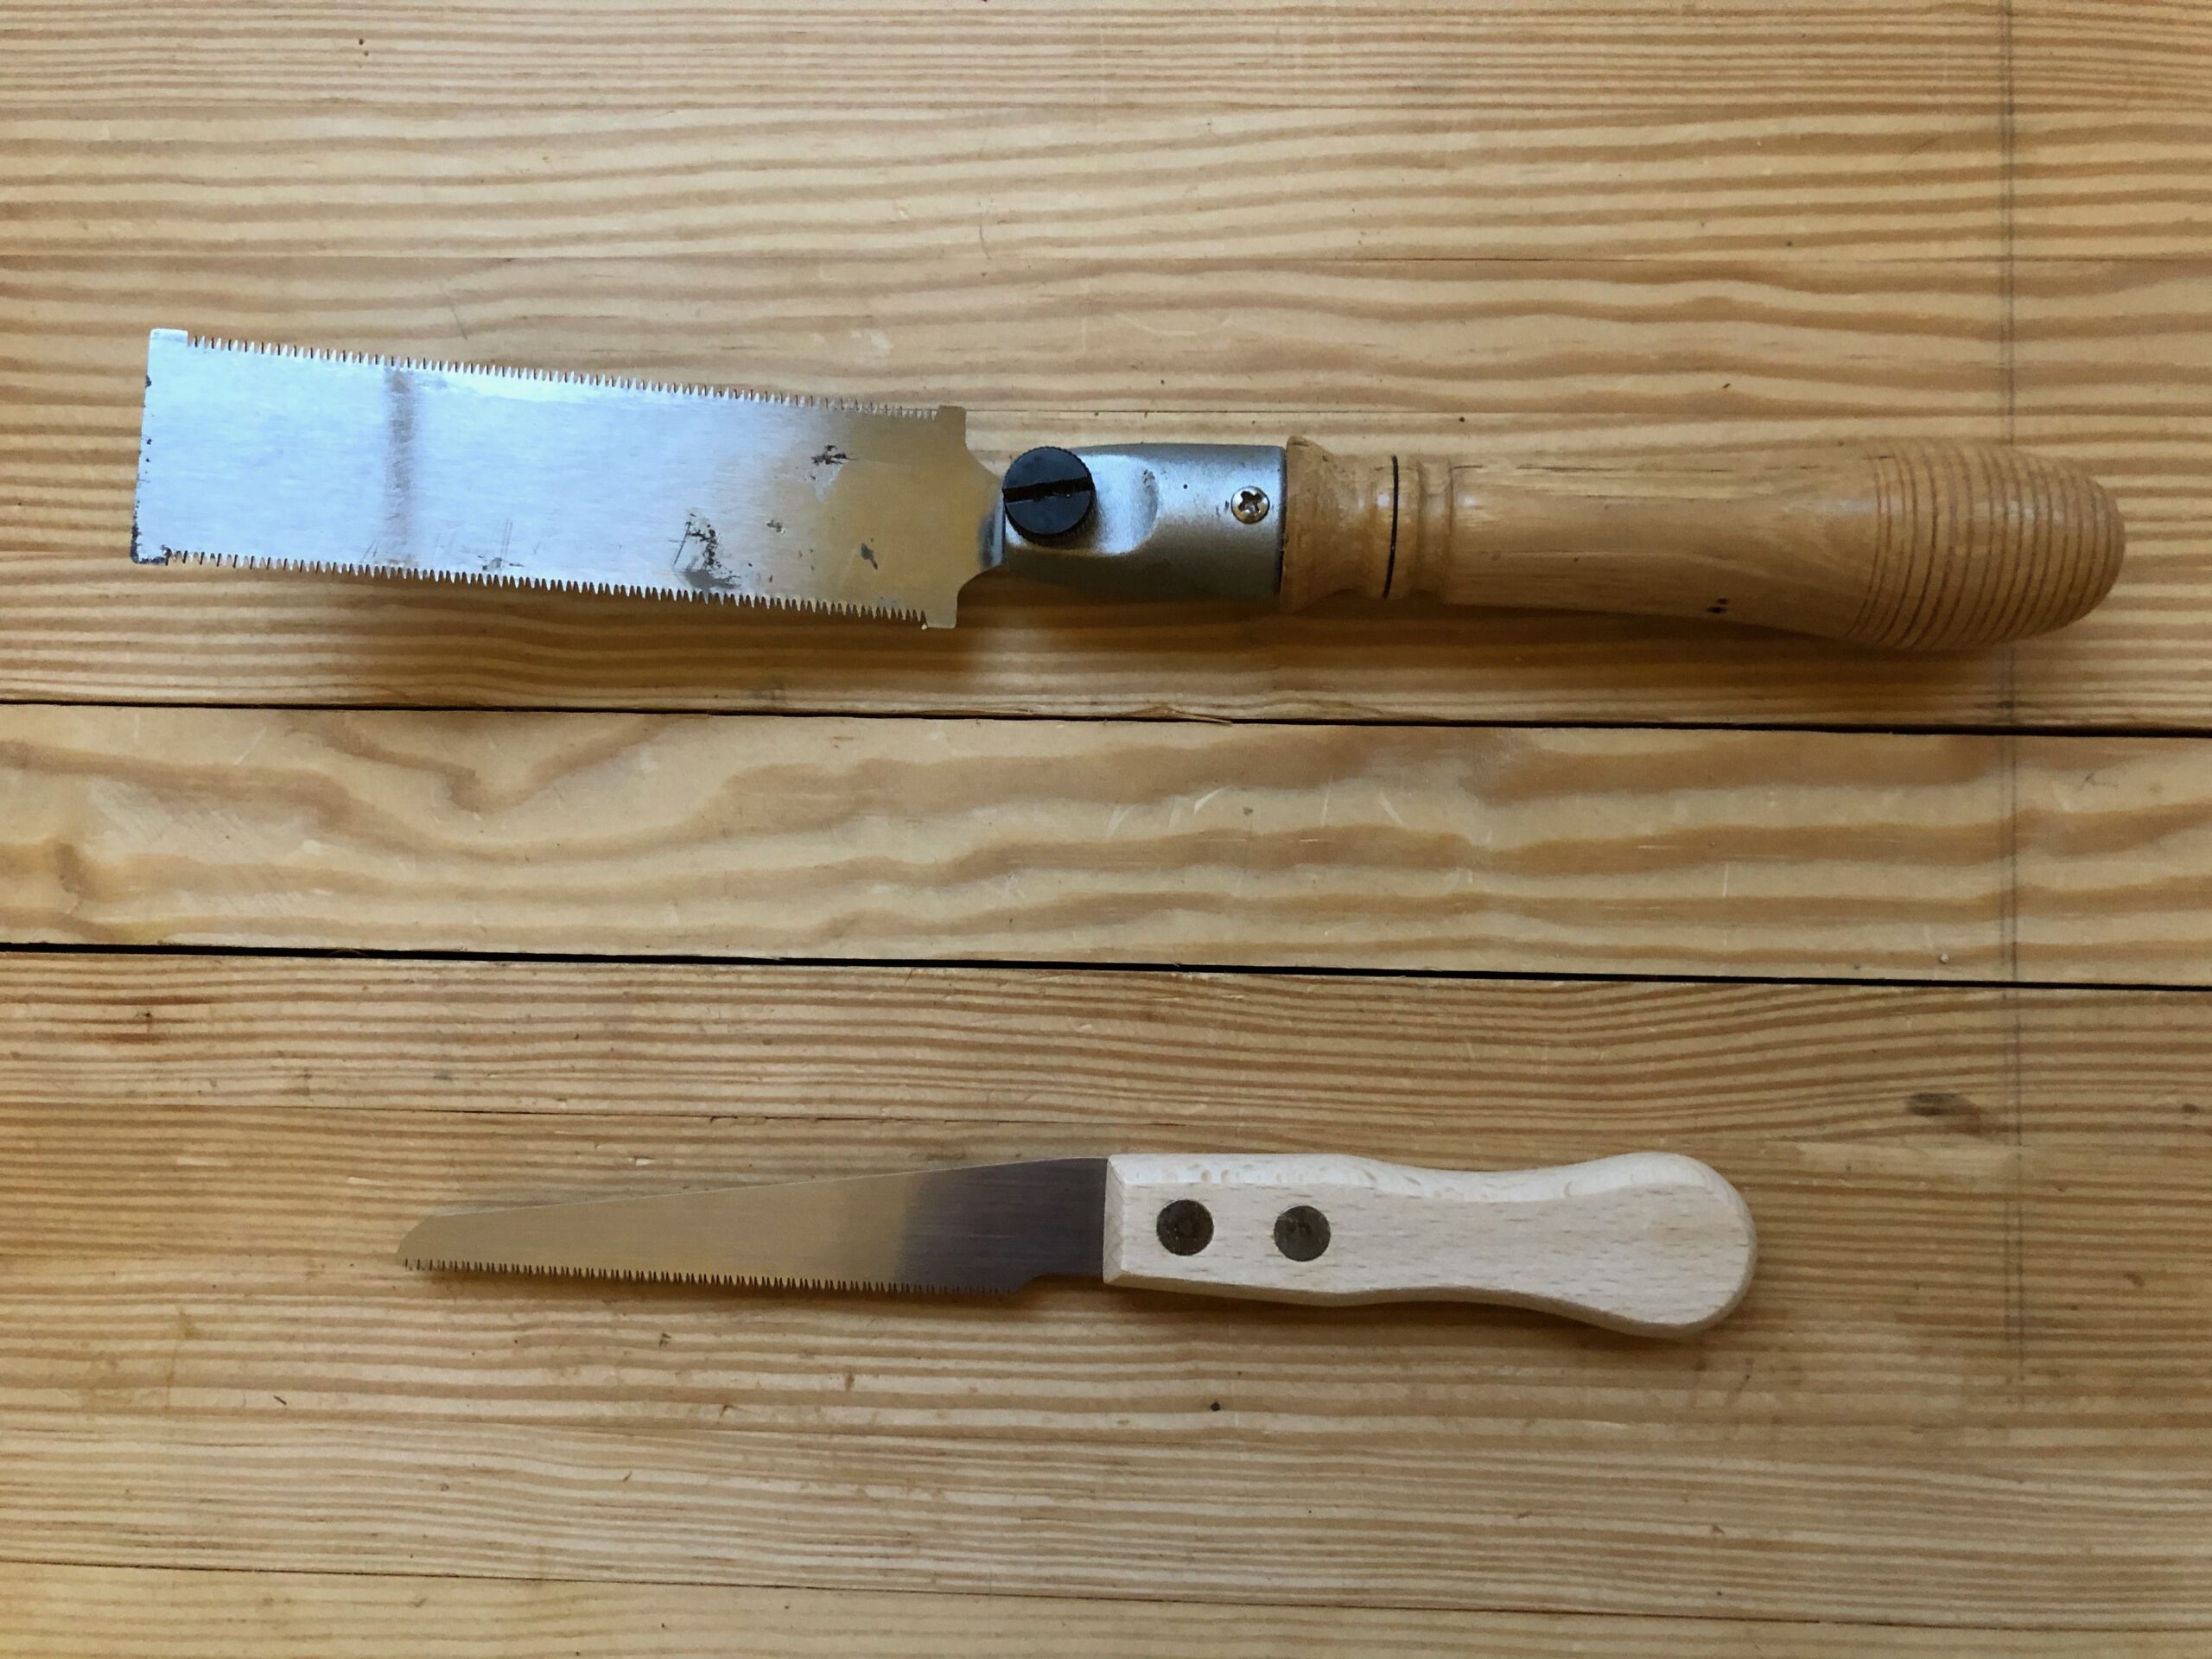
Used to trim flush. The first one is a cheap box store saw with a handle I turned (this was one of my first turning projects and I’ll probably turn a new one (with the three lines 🙂 ) to get rid of the plastic junk that came with it. The second saw is a Japanese Single Edge Flush-Cut Saw I recently purchased from Lee Valley to put in my tool chest.


Keyhole Saw

I don’t use it much, but when I need it, it’s very nice to have. This is a vintage saw that I got from a CraigsList purchase in 2013. The finish on the saw handle was in terrible condition and I just scraped of the old finish and put several coats of good ol’ Boiled Linseed Oil or BLO on it.
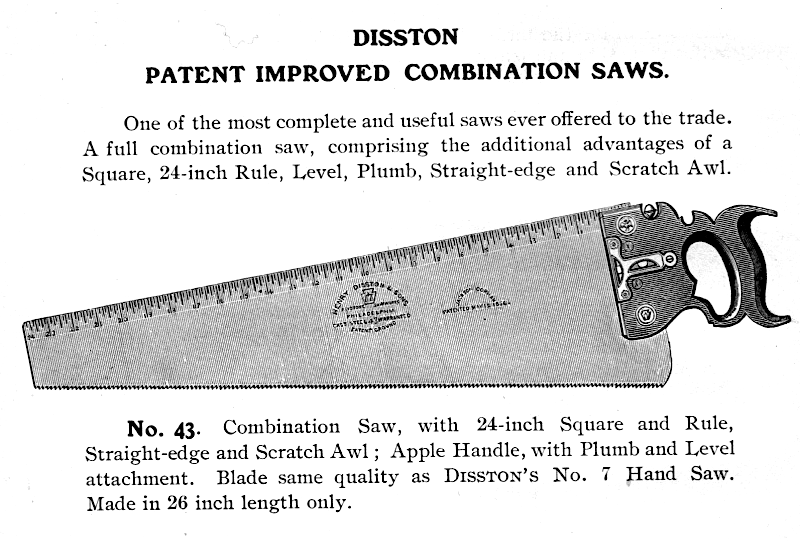

Saw Restoration

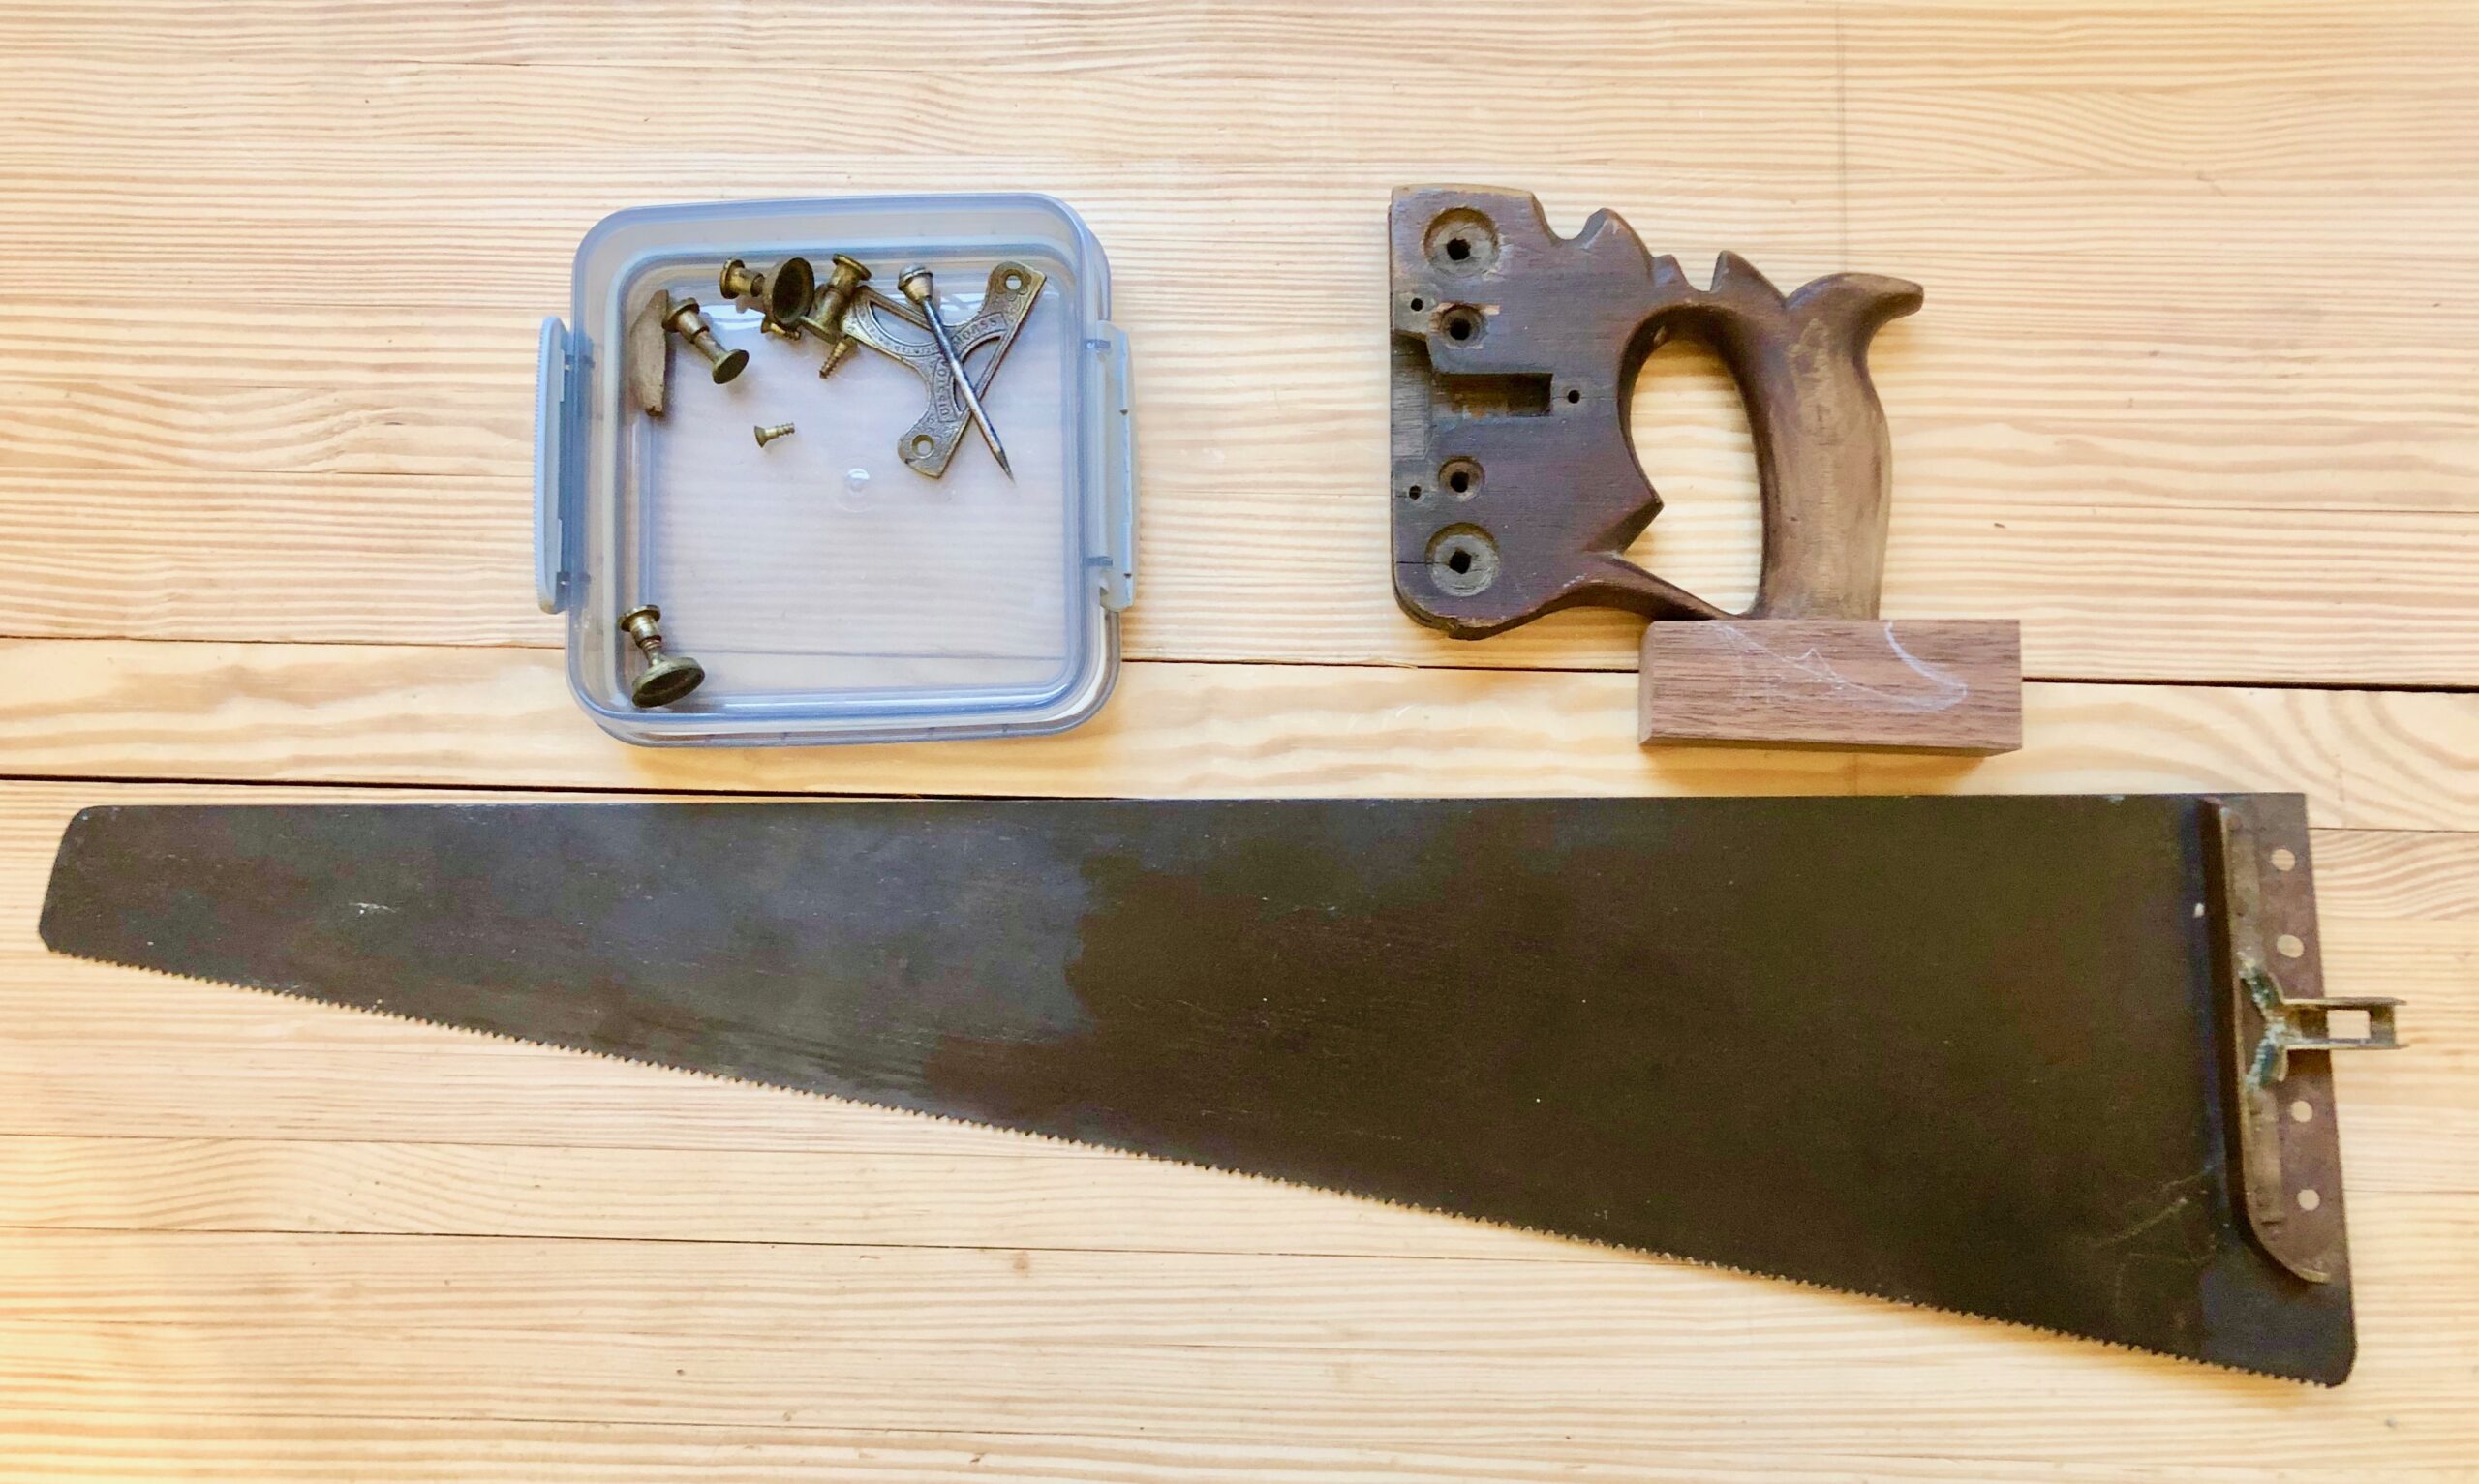
I’d like to take a minute to talk about saw restoration. I have purchased and acquired some vintage saws that were in a pretty sorry state, but had great potential. I don’t even consider restoration if the plate is deeply pitted or bent badly. I have an old and rare Disston and Morss #43 combination saw that I inherited from my father (if you haven’t guessed already, this is the saw in the first picture of the blog). It has A Straight Edge, Plum and Level Attachment, a Square, a Scratch Awe and Rule etched in the blade. I am in the process of restoring it to it’s former glory and I will reveal it in a future BLOG entry when done. It has a broken handle, a broken level vial and quite a bit a rust, but not too much, and is removable. I was able to salvage a replacement level vial glass the same size and the original from an old busted level. This should be a beautiful saw when I am through and I look forward to showing it in an upcoming blog.


Modern Saws

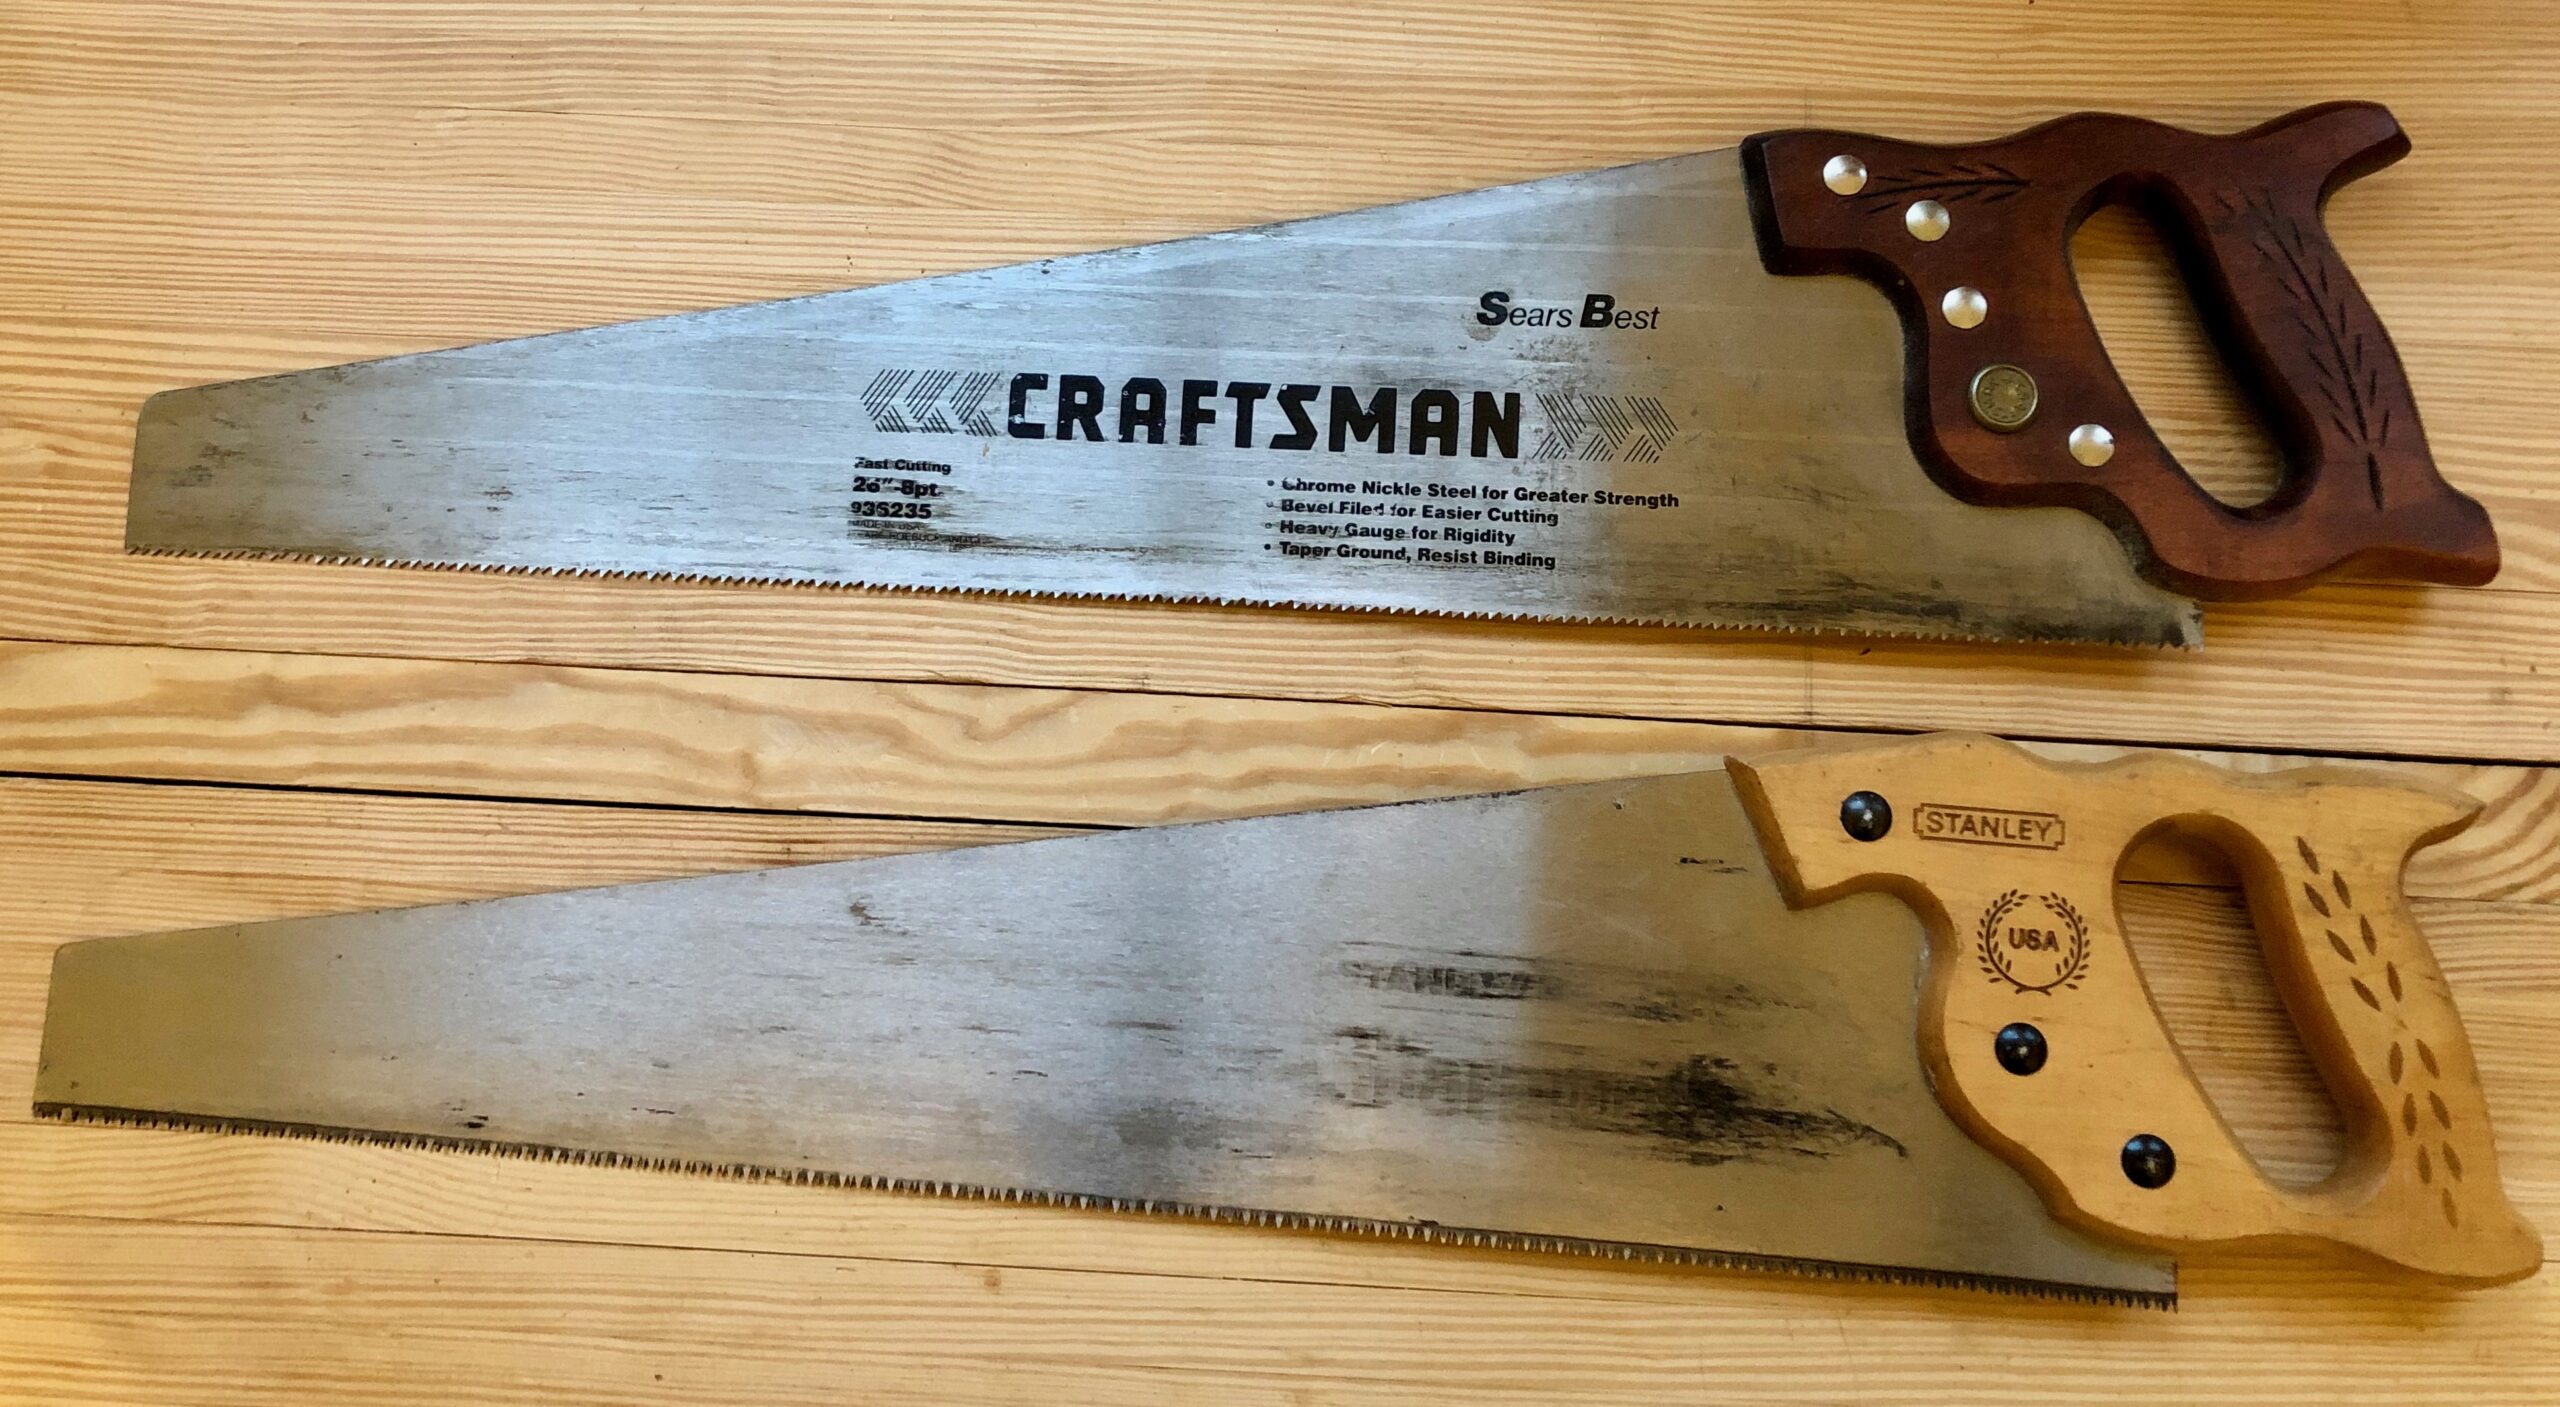
They have their place but I dislike the handles. I’d hate to see what the creature looks like, that had a hand that would fit these monstrosities. I mainly use these saws to cut stuff I’d never have my “good” saws cut. Like laminates and plywoods, etc. They do all my “dirty” work and I generally use gloves when using them…have I mentioned I don’t like the handles? The Craftsman pictured on top is about 35 years old and can be filed sharp again, so I’m contemplating making a decent handle for it. The Stanley is about 20 years old and has hardened teeth. When it gets dull, I’ll have a chunk of wood with a crappy design and soft tool steel only good for scrap use (not tool or scraper applications like the older saws). Nice features, right?


Vintage Panel Saws

I have been collecting panel saws for over a decade. I started looking in yard sales, estate sales, FreeCycle and Craigslist. I look for old saws with straight blades and brass saw nuts and handles shaped for the human hand, not like the modern saws with handles shaped by accountants (not to diss accountants, I know and love several, they’re just not really good at advising on manufacturing designs for tools used by humans).

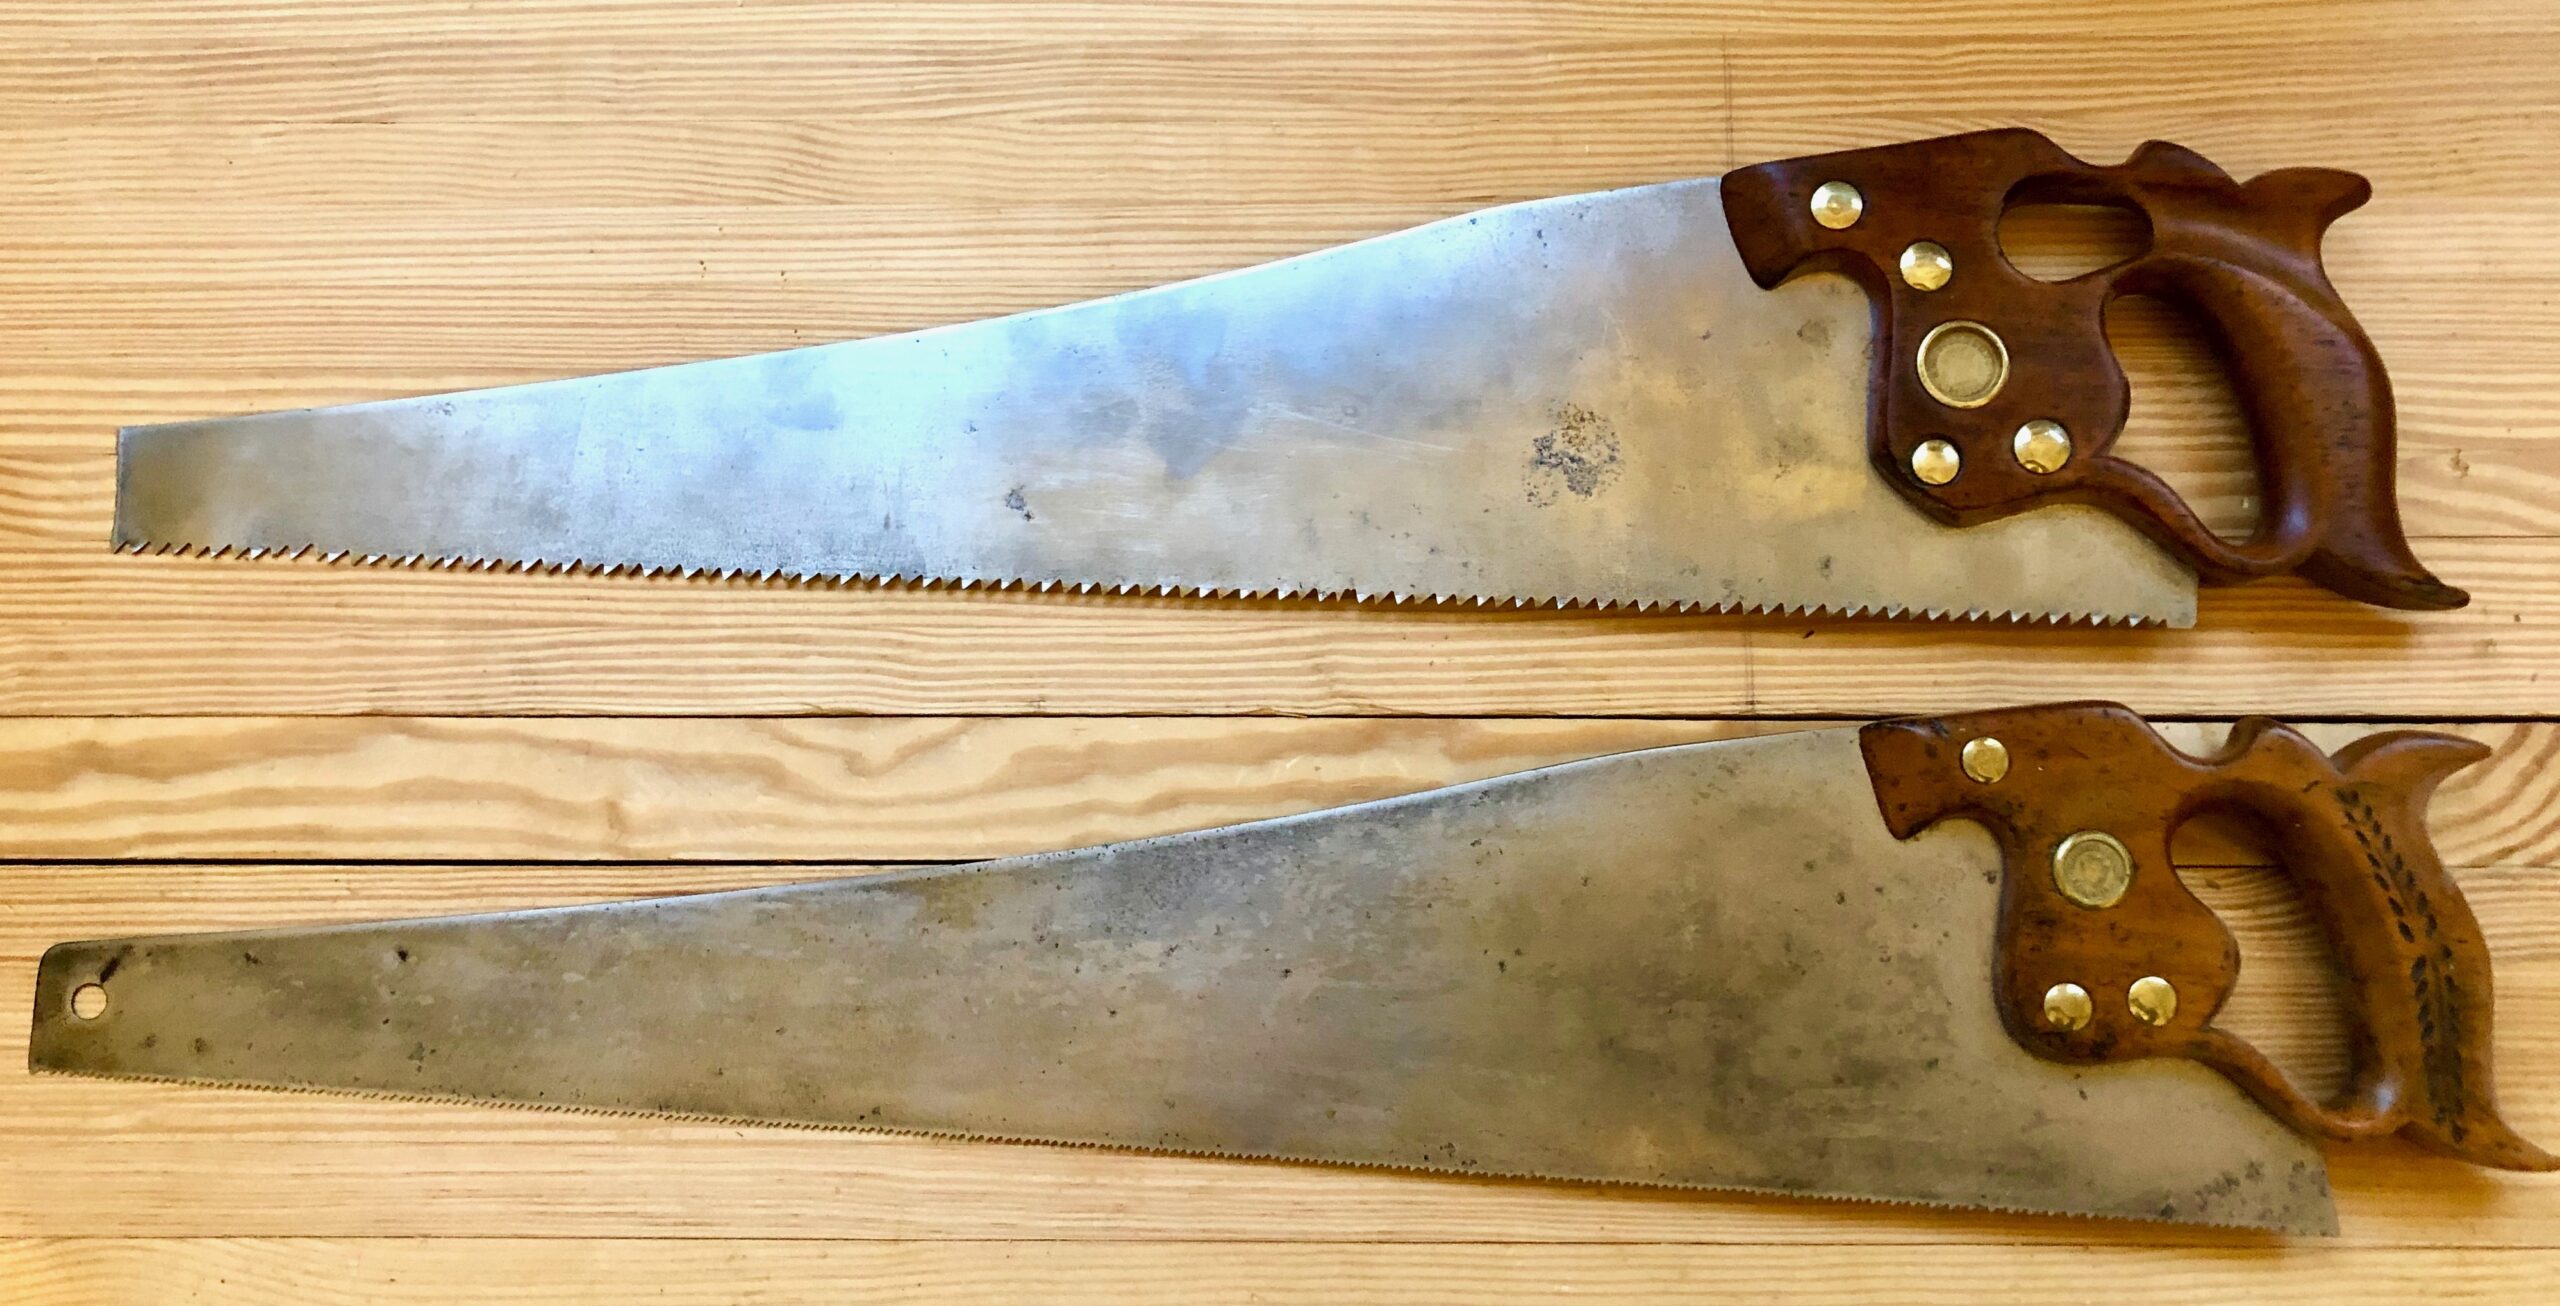
Above are two saws I restored a few years ago. They are both Disstons; the top one is a course rip saw and the bottom one is a very fine crosscut saw. They work great and they’re very comfortable in the hand. I mainly use the my Lie-Nielsen Panel Saws, as I do not want to keep sharpening and therefore shortening the life of the vintage saws.


Saw Sharpening

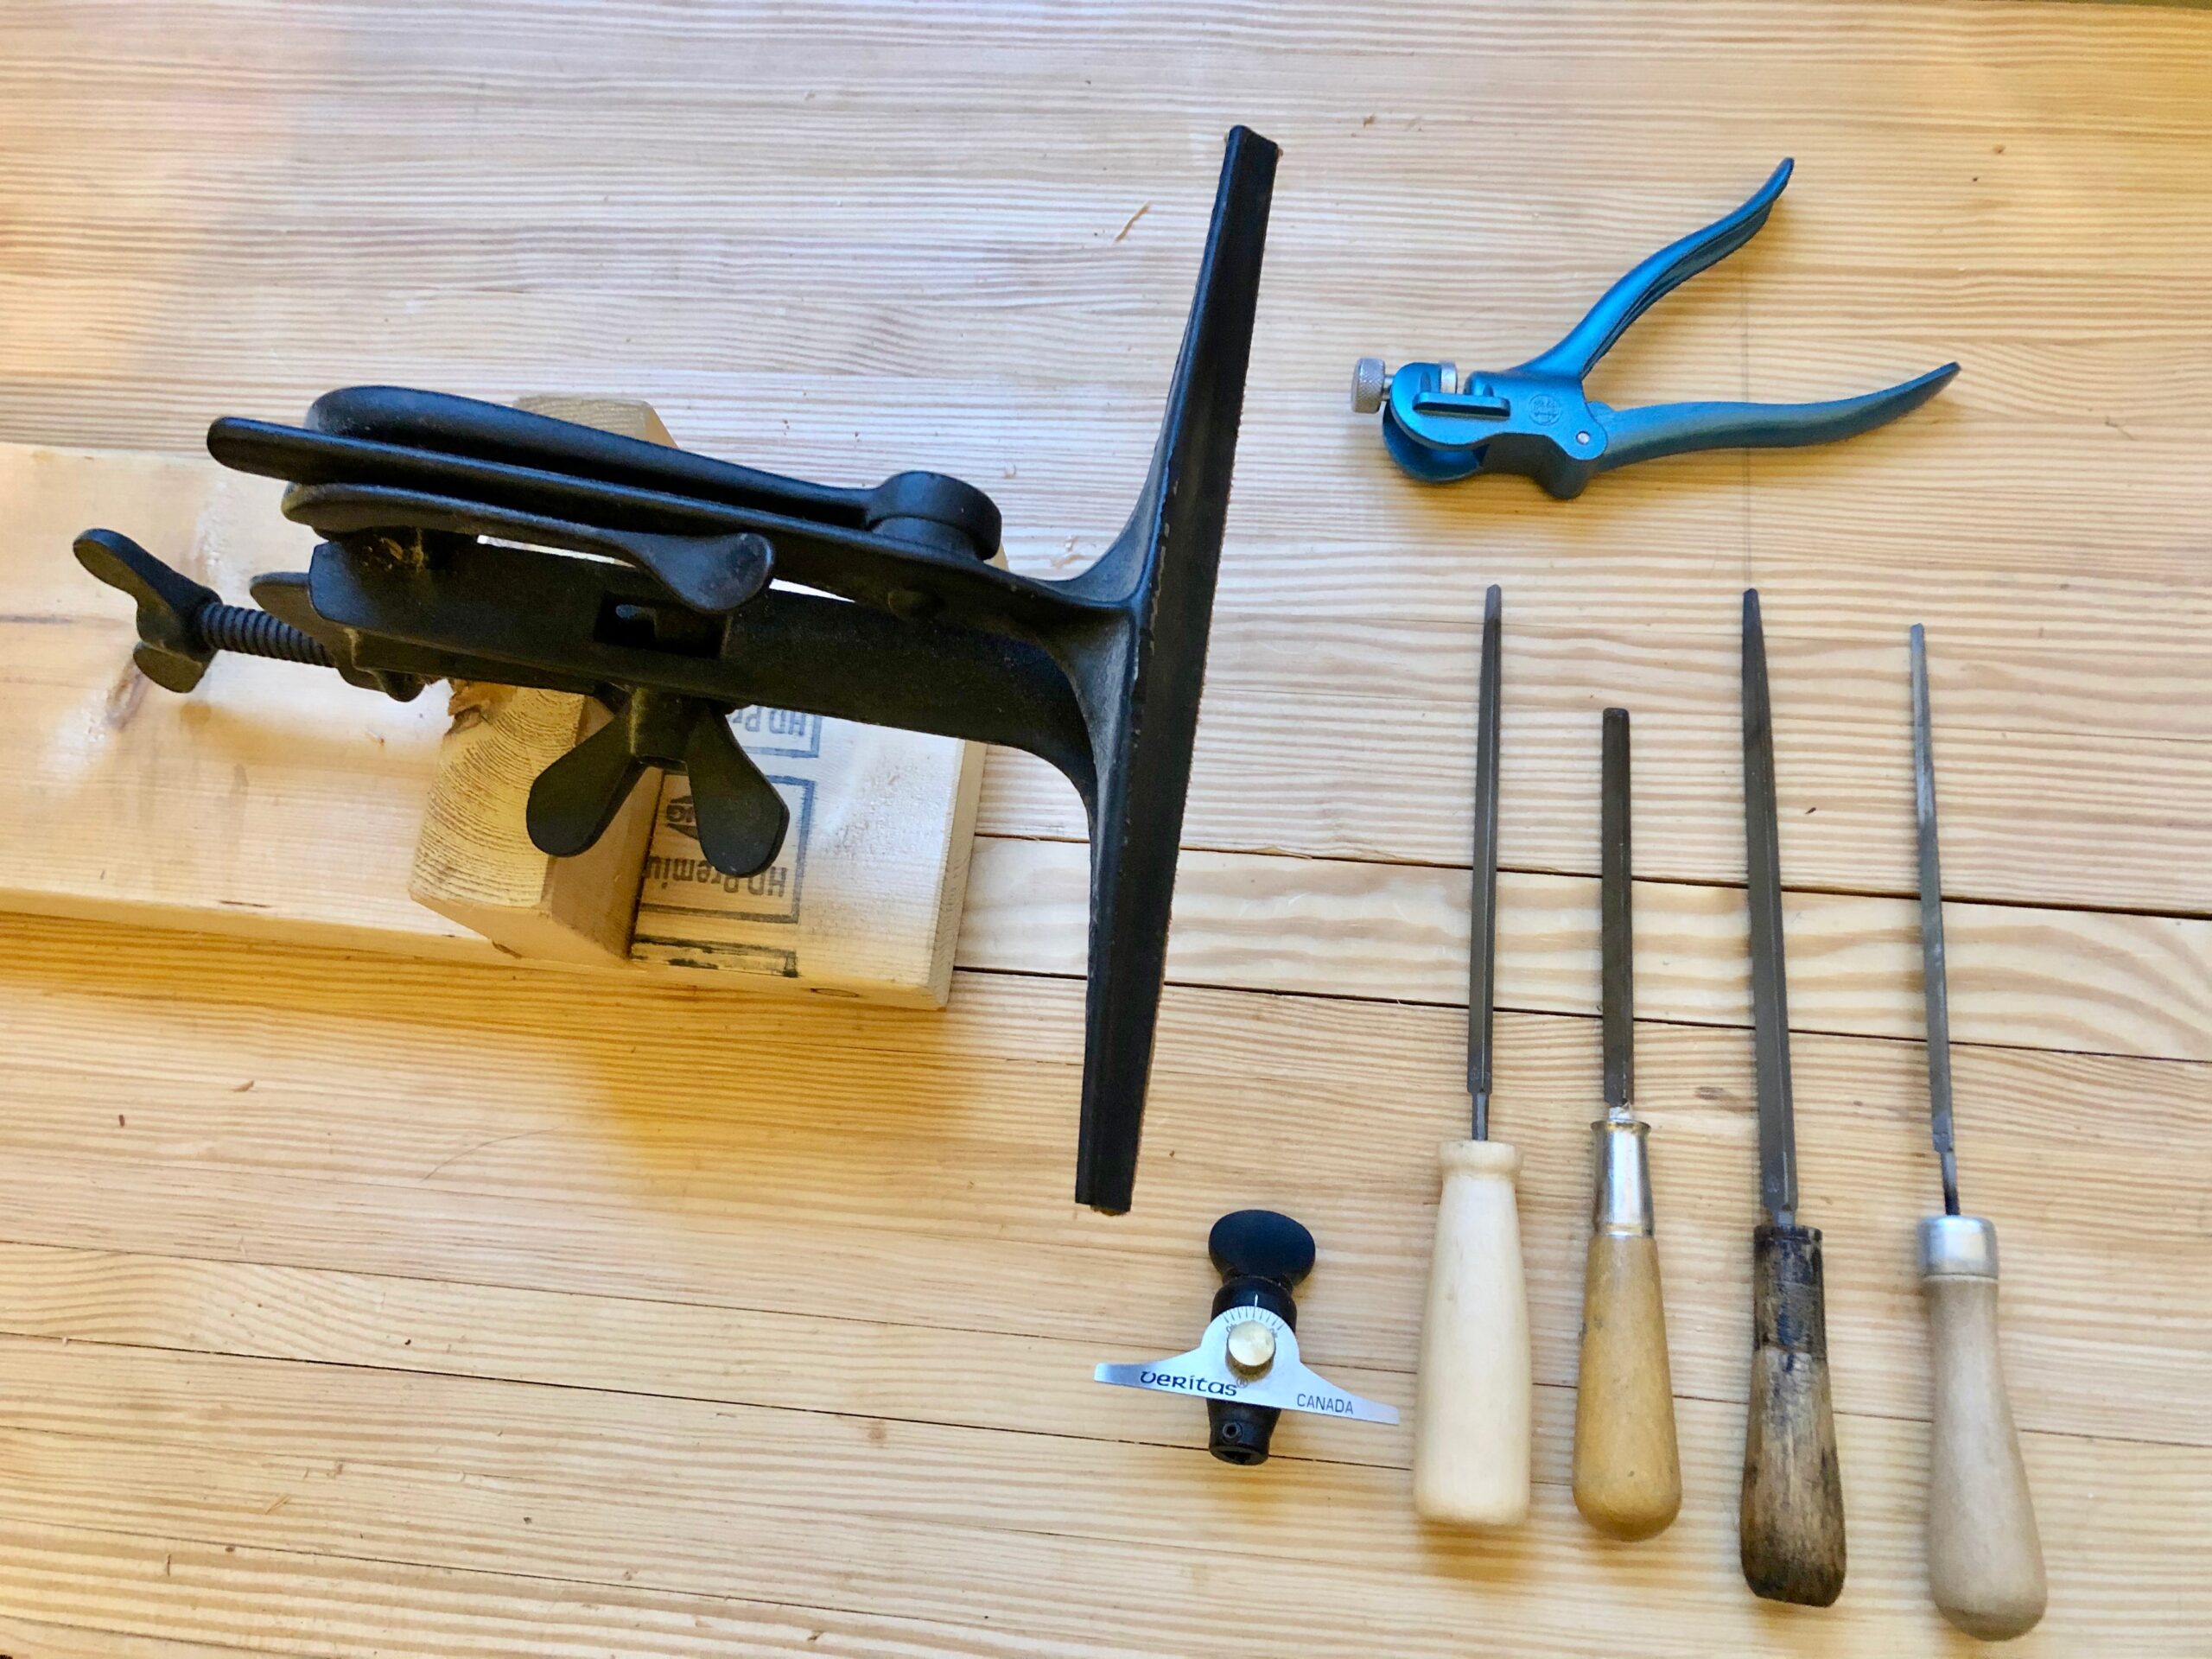
Above is the kit for sharpening saws. It includes a Saw Vise, Saw Set (top), Veritas Saw File Holder, and various size triangular files. I bought the Saw Vise around 2012 at a MWTCA meet. I bought the Saw Set and Veritas File Holder from Lee Valley the same year. As you can see saw file handles art not a priority for me, l’ll probably turn a few in the future, who knows.

Well that’s all my saws. I hope you enjoyed seeing them and learning a little about them. Sawing is definitely a skill you can learn in a few minutes and spend a lifetime perfecting. There are a few tricks to sawing that makes it easer. I can cover these in a future blog entry if I get some requests for them. Until next time, keep making shavings and sawdust.

Peace,

Aaron

Tools Series – Part 1 – Marking and Measuring

I’m staring a new blog series about my tools, their use and origins. I’m kinda obsessed with my tools. They fascinate me and I just sometimes go into my shop to clean them and marvel at their beauty and design. I would like to say upfront, this is my choice of tools. You may agree or disagree with my choices, but ultimately the tools I choose are my decision and not really subject to anyone else’s opinion. I do listen to others about what tools they like and some people with lots of experience I listen very carefully, but I’m not bound to any one philosophy or system or cult of personality. I have made many tool choice mistakes and will make more in the future. But I try to stick to one maxim: “Buy the best and most appropriate tool you can.” If you can’t afford to purchase a particular tool, make something and sell it to get the money to buy the tool. Sometimes I get lucky and find just the right vintage tool at an estate sale or garage sale, but lately I have been buying new very high-quality tools as I am not necessarily a vintage tool collector.

The tools in this series are just a snapshot in time of the tools I have now and not a definitive list of “must-have tools”. I have arrived at this current set of tools over about 10-years time and have chosen these based on experience, mainly, and also how much I like/love using these particular tools. I also love making tools. It seems every tool I make fills me with so much satisfaction that I wonder how I got this far in my life without doing this all along; better late than never.

This first entry is about my marking and measuring tools. Like all tools presented in this series, I use some tools more than others, and I will try to point out my favorites.


Left to right – Homemade Scratch Awe. Czech Edge Bird Cage Awe, Czech Edge Scratch Awe. All three have Cocobolo handles

Awes

Awes are a group of tools that have a pretty wide variety of shapes, sizes and uses. I also dabble in leather work so I have a few more not pictured here. Here, I have a homemade scratch awe that I made from 1/4″ O1 tool steel, a brass pressure fitting and some cocobolo wood that I had on hand. This homemade awe (my new favorite) was inspired by one featured by Bob Emser from the “The Art of Boatbuilding“, but I made my own design and parts. It has the steel as a “full tang” construction, so it may be struck by a hammer; something I wouldn’t do for the other two Czech Edge awes. The middle awe is a “Bird Cage Awe” and is useful for “drilling” out a small starting hole for starting screws and also for my centers for my lathe. The awes on the right and left are considered “Scratch Awes”. They are for marking lines and puncturing holes. They are NOT for clearing out chips jammed on your plane mouth. Just one additional note about awes: Keep their points sharp.


Left to right, top to bottom: Vintage 6″ Compass (has insert that can double as a set of dividers) Modern 6″ Starrett, Vintage 6″ Unknown, and Vintage 4″ B&S Mfg. Co. (I’m looking for a knob for the top).

Dividers

Speaking of pointy tools, above is my collection of old and new dividers. I have been acquiring these for quite some time and the Starretts are my latest addition to the group. Dividers are awesome and have a variety of uses from drawing (scratching) arcs in wood to dividing up equal sections for dovetails to setting up drawer divisions. They can be used with a sector to scale measurement up or down. The new Starretts are my preferred dividers; very sharp and very smooth.


Left to right – 1-Tite Mark cutting gauge, 2-Veritas cutting gauge, 3 and 4-Vintage mortice gauges .

Marking Gauges

Marking Gauges are very handy for layout work. Having more than one is quite handy as you can leave them set during a project and keep your measurements accurate. If you only had only one, you would be changing it to different settings and you’d lose the exact setting of the previous measurement. The Tite Mark gauge is my favorite. This thing is silky smooth and dead accurate. It has a good weight in the hand and oozes quality; it’s a pleasure to use.


Left Veritas Angle Finder, 1, 2, 5, 6 Vintage Bevel Gauges, 3-Woodpeckers 7″ Bevel Gauge, 4-Stanley N0. 18 Bevel Gauge

Bevel Gauges

Bevel gauges help you reproduce an angle or cut a specific angle. I may have a bevel gauge problem as indicated by the the image above. My two favorite are the antique Stanley (4) and the new Woodpeckers (3). They both have the locking mechanism on the bottom that wedges the blade and hold them immovable until loosened. The other vintage ones are usable, but you need to take care not to bump them or your setting will move. I really wanted an angle finder for some time and just this year bought the very nice Veritas one in the image above. I have used it a lot and I consider this essential kit.


Top to Bottom – Homemade 9″ Try Square, Starrett 12″ 11H-12-4R Combination Square, Starrett 6″ 11H-6-4R Combination Square

Squares

What can I say about squares? They are great, especially the Starrett combination squares. They are so versatile and nice to use. I also love using the try square I made from beech and walnut. It is light weight, very accurate and easy to true. I made two of these squares about a year ago. I use them both. All three are my favorites. Don’t make me choose.


Veritas Sliding Square, 1-35 year old Klein Tools 12″ tape measure, 2-General Rule 12″ center finding ruler, 3- 1 Meter plastic folding ruler, 4-Vintage Stanley folding ruler, 5-Generic 6″ ruler

Rules

Rules rule! I mean that. Some people do not see the the need to measure stuff and that’s ok. I may be doing it all wrong, but it’s my way and I love to measure. Mind you, I mostly take measurement right off the piece, but measuring is still necessary for rough stock breakdown and sometimes to make sure you have enough stock to finish a project. The Veritas Sliding Square is not, in my opinion, essential to the work that I do, but I sure do use it a lot. It has many uses and I would not want to do woodwork without it. I have had this square for over 20 years and it’s still going strong. I also want to mention number (3) above, it is plastic and cheap and not my first choice. I like that it is metric and is a folding meter ruler, but besides that fact, I can use this a my sector. With its 25cm ( 9.84″) length of it’s legs, it makes a halfway decent sector. It works and I have used it as such. At some point I’m either going to have to make a really nice sector or buy one (good luck doing that I say to myself). I wish someone (I’m looking at you Tools For Working Wood) would make a nice sector kit so you could make your own out of your own wood.


1-Blue Spruce Small Marking Knife, Ultra Thin Blade, 2-#8 Chip carving Knife, 3-Generic Box Cutter

Marking Knives

Marking knives are very personal and everyone I talk to has an opinion. I look for three qualities in my marking knives. 1) They must make accurate cuts in wood; 2) They must be easy to sharpen; and, 3) They must be comfortable to use. I love the Blue Spruce marking knife for marking out dovetails, I love the last two for general marking. I regularly use all three


1-Ticonderoga #2, 2-White Colored Pencil, 3-Pentel .5mm lead pencil 4-Fisher Space Pen, 5-Double-ended Black Sharpie, 6- Not Pictured – Mechanical Drafting Lead Holder

Writing Implements

I just like using a plain old #2 pencil; it’s what I mostly use. I use the white colored pencil for marking dark woods and the double-ended sharpie for thin and thick markings on my irons and metal bits and pieces. I love the Fisher Space pen for it’s resilience and that it just works. I do not user the pen on wood just notes and drawing on paper.


Top to bottom – English Layout Square made from Chris Schwarz’s plans, Straight Edge, Panel Gauge copied from the old Lie-Nielsen model

More Homemade Tools

I’ll say this again, I love making tools and I have used the three above extensively. Wood makes such a great Square and Straight Edge that I don’t like using the metal equivalents. I covered making the English Layout Square in a blog post “English Layout Square” in December 2012. The Panel Gauge is soooo nice! This design was inspired by the Lie Nielsen version and it is not wobbly and is very accurate; I would not change a thing about it.


Vintage Trammel Points and a Modern Dovetail Marker

Misc Tools

These trammel points are beautiful. I purchased these at an MWTCA tool event for $20 and they are awesome! I have created a split pointed beam for them so they can be used as pinch rods as well. Double duty! The Dovetail Marker is not necessary kit, but a quick fix for marking out this joint.

Conclusion

I love my tools, not as much or in the same way as I love my wife or kids. But they do allow me to manipulate wood to make useful and beautiful projects. They give me a sense of wonder at what humans can accomplish and give insight into our ingenuity. When I use them, I feel a close connection to my ancestors and feel how they felt when using them. I hope my kids or future grandkids find these posts useful if they choose to become woodworkers. I hope they can feel a connection to me when using my tools like I do when using my grandfather’s old tools. Tools, like music can connect people across the centuries and from different parts of the world.

Peace,

Aaron

Post Holiday Update 30-Dec-2020

My wonderful wife bought me this beautiful Acer-Ferrous Toolworks Sector from Red Rose Reproductions. This is a excellent addition to my measuring and marking kit. I have used it several times since receiving it and it works with precession and ease.

Roubo Workbench – Update 5 – The Home Stretch

Split-Top Roubo in all it's glory
Cat on Roubo Workbench

This project has taken way too long to finish (my first post was on Sep. 15, 2015). This bench deserved better from me. I am on the home stretch now and only have a few tasks left. I have made a commitment to myself to finish this project before the New Year (to be exact, New Year’s Day 2021, there are some members on my family that need that specific of a date declaration.) Here is a casual non-exhaustive, non-binding list of things to finish:

o Make and install deadman
o Level the tops, make sure they are shimmed and ready for mounting to base
o Install barrel nuts on the top slabs
o This is embarrassing, but put front dovetailed veneer piece to cover trim sawing disaster (more on this later)
o Install a Roubo-style bench stop made by Peter Ross. This was a late addition after careful consideration and desire to have more work holding options
o Pre-finish cleanup of all surfaces
o Make a new center board as the old one was just temporary  
o Finish the bench
o Enjoy!

All in all, not that much work remaining considering all I have put into this project. I have used and continue to use this bench. I LOVE IT!  Best thing I have ever built by a long shot. My second workbench (if I build another) will not take nearly as long.

This is one of the truly good things to come out of the Covid-19 lockdown. 

I will write a lessons learned post after I have finished the workbench. I wish I had gotten a copy of the “Anarchists Workbench” (The PDF is free to download “And it’s covered by a creative commons license that allows you to use the material however you like for non-commercial purposes.”) before building this bench, but I am very happy with the workbench I have built and it will serve me well for the rest of my life. One thing I do regret is buying a commercial workbench for $500. I bought that bench before I “knew better” but that is a cop out. I should have done more research, even back then before laying out that much money. Also, I had seen Roy Underhill build his workbench on the “Woodwright’s Shop” years before, but did not think I had the skills to build one myself. 

Never underestimate your abilities! You can do it. Yes, you will make mistakes, I made LOTS of them.

Build
Fail
Try Again
Fail
Build Some More
SUCCEED!

This the way.

You will figure out how to fix mistakes and you can complete the project if you stick to it. I love to work on problems, and this build gave me no shortage of them. I love to innovate and my solution for the right front bench dog ejector “Teaching a New Dog Old Tricks” was  particularly satisfying. 

Here are some adjectives to describe this project in no particular order – Fun, Strenuous, Challenging, Frustrating, Satisfying, Educational, Joy, Sorrow, Ingenious.

Peace,

Aaron 

Teaching a New Dog Old Tricks

First dog closest to vise

During this stay at home time, I decided to finish my loooong term project, my Split Top Roubo Workbench (more on the actual workbench in a later entry). I was working on the legs and benchtop. With this design the dog hole closest to the end or wagon vise (BenchCrafted) is directly over my right leg. The plans call for a hole drilled vertically down the leg to allow for the dog to seat flush with the top. That’s all well and good but how do you get it out?

Bench dog down, how do you get it out when it’s down?

The BenchCrafted plans call for a largish hole to be drilled on the face of the leg to poke your finger into to prop it up.

Umm, yeah, this solution it’s not for me

This did not sit well with me for some reason. It’s not particularly that I have an issue with holes in my bench leg, per se (I don’t mind the dog holes for my holdfasts). it’s just this is a fairly large hole and I thought there should be a better way.

First Dog Hole Lever
I tried using Sketchup, but I’m busy working in my shop, drawing is much faster also the graph paper is scaled to 1/4″ imperial (6.35mm for metric) squares.

Enter the “1st Dog Hole Lever”, this handy contraption will sit on the left inside of the right leg and will extricate your flush bench dog with abandon. This takes some extra work to install, but not that much and I do not believe it will interfere with any clamping operations. As this is my idea and I have not seen anyone do this (every Split Top Roubo Workbench i’ve seen just drills the big hole) time will tell. If it does get in the way, you can simply remove the pivot nail and proceed with your clamping or other operations and replace it when you’re done.

If any of you are building or planning on building this bench, you may want to add this little detail. I know I really like using it (and my cat does too).

Peace,
Aaron