Olde Tool Workshop

No Tool Like an Olde Tool

Finished Finishing

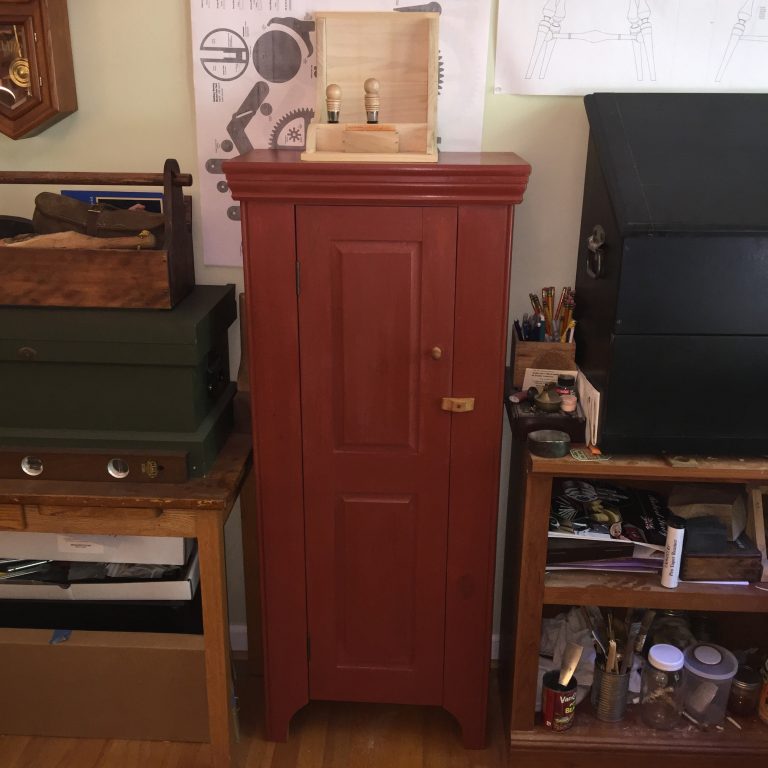
As promised, here is the finished cabinet. This was a fun and quick project to do and it was so needed in my shop. It was quick because milk paint dries crazy fast and the top coat is only paste wax.

“Happy Shavings”
-Aaron

Click HERE for my YouTube video of this project.

This entry was posted on May 9, 2018


Roubo To The Rescue

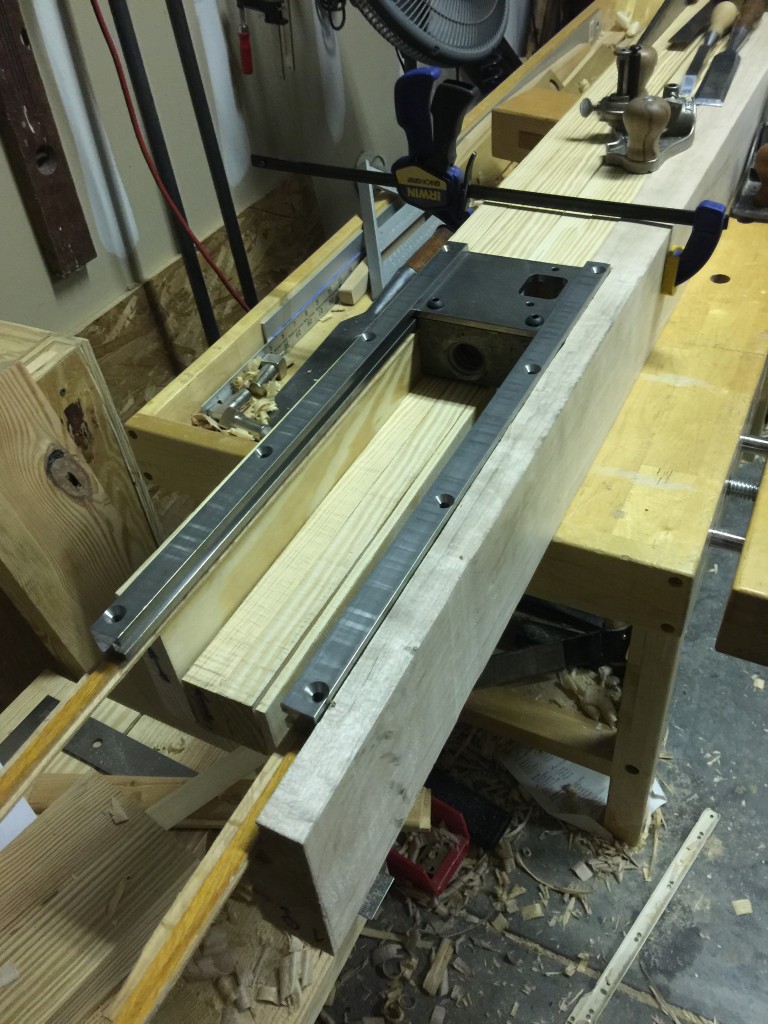
You know the the saying, “Everything old is new again?” As you may or may not know, I have been in the process of building my workbench for over a year now and I have been struggling with the benchtop glue-up as I have fewer clamps than I would like and my boards for the top were slightly bowed. Well, after getting my copy of “Roubo on Furniture” from Lost Art Press a few months ago, something I saw in the plates, specifically plate 18 had my subconscious mind working. Specifically the “straightener” that Roubo talks about for edge gluing boards in figure 19 of that plate.


Roubo Workbench Update 3 Tail Vise Puzzle

2015-11-21 10.27.00

Tail Vise Rails resting on the bottom of the bench top for a test fitting

At long last, I am back working on my workbench. There was a brief delay because life happens. For reasons I won’t bore you with (cat fostering), I was unable to work in my garage for the past 2 weeks and I was not able to make any workbench progress. Fortunately, I am back in business and I made a major step forward yesterday. I finished the cavity for the tail vise to be installed in. I have the pictures showing the “finished” cavity below. Suffice it to say, I am glad to get that part completed so I can get on with the rest of the workbench. As you can see in the photos, I have not glued the boards together for the front part of my bench. I will probably do this tomorrow. Then I can start gluing the remainder of the boards together to finish assembling the top. Right now the exact dimensions of the cavity is not important. I will need to finish the top surface of the workbench before making any precision cuts to mount the tail vise. In the following pictures you will see the boards clamped together and then expanded to show how each one is individually cut to form the whole. I did purchase some soft maple to attach to the front of the bench because it will get the most abuse from clamping and other activities, so I decided to make it out of maple. Also, it will be dovetailed into the side maple piece which the tail vise will be attached.


Workbench Update 2 - New Leg Vise

IMG_2826
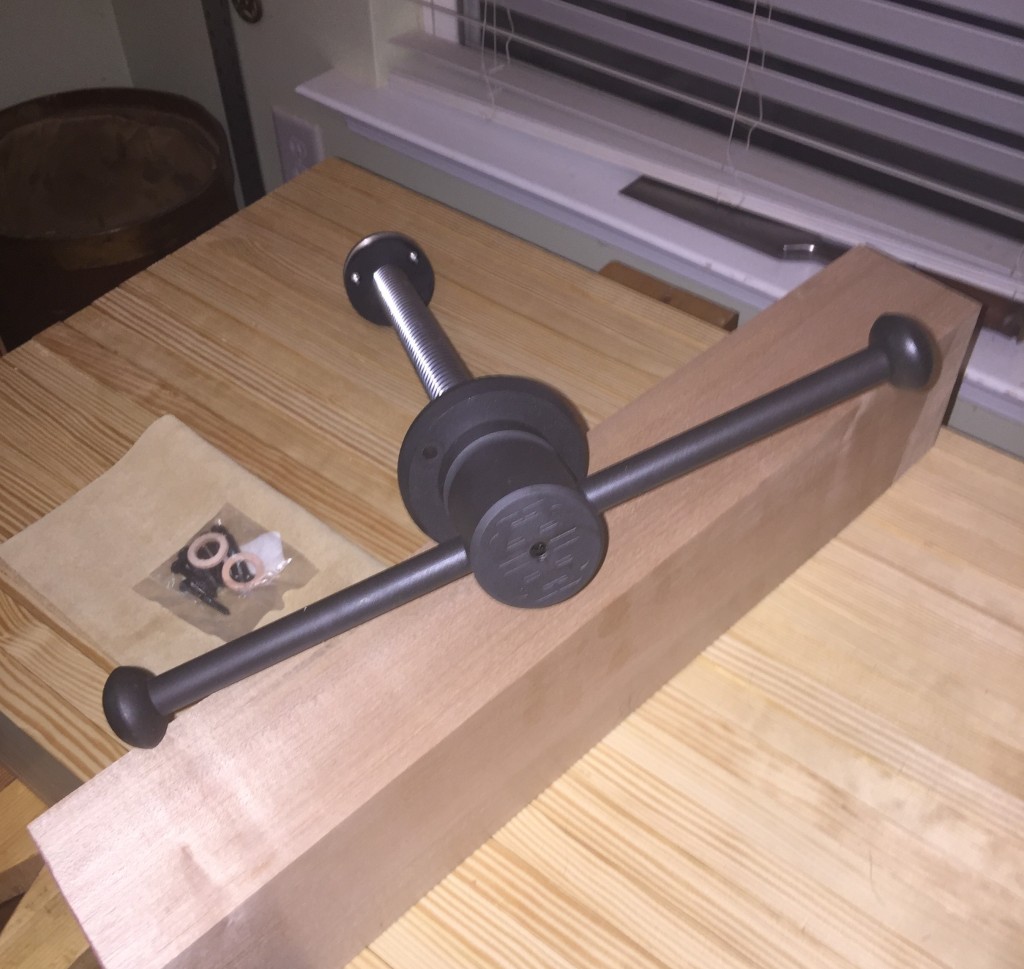
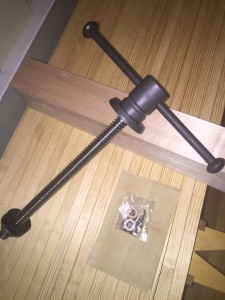
Yea!, My new
Benchcrafted Classic Leg Vise is in. Unfortunately they must have run out of the unfinished vises, I am still very happy with this vise. The machining on their vise hardware is amazing. They are the best you can get…period!

IMG_2829

Now to build a leg to put it in. Should be able to build a couple on Friday.

-Aaron

This entry was posted on October 21, 2015


Workbench Update 1 - Stock Prep

bc_classic_leg_vise_pic

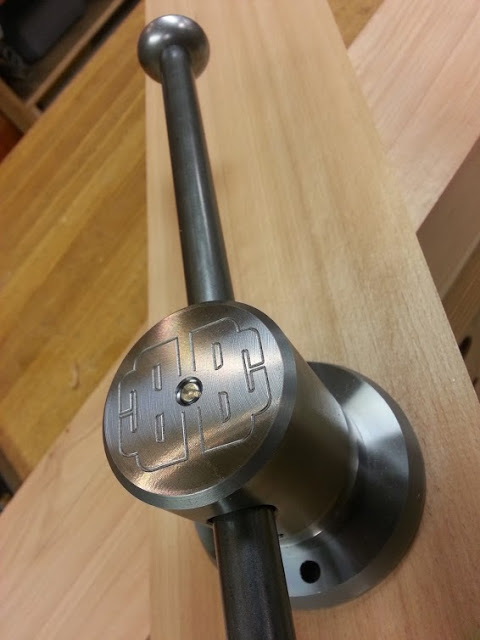
BenchCrafted Classic Leg Vise - Unfinished

IMG_2818

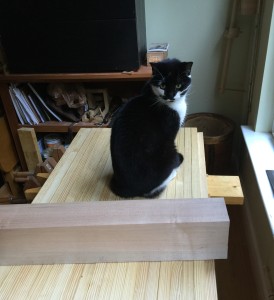
3x5x22 Maple End Cap - Cat Inspected (Cookie)

I have almost all the materials on hand for my workbench. I am still waiting for my new Benchcrafted Traditional Classic Vise to get here, but I finished surfacing my hard maple end cap that secures the tail vise to the end of the bench. As you can see my shop cat is inspecting my work with aloof approval. It started out as a rough log and now it is surfaced on 4 sides, square and flat 3″x5″x22″ board. As you can also see, the benchtop boards are now acclimating in my shop. I will start laminating them soon.